
Table Of Content
- Install OpenClaw with OpenAI GPT on AWS EC2 Free Tier?
- Create the EC2 VM
- Install OpenClaw
- Configure OpenAI
- Configure Telegram channel
- Skills and gateway service
- Verify the setup
- Pair OpenClaw with your Telegram bot
- Test and common error
- Prompts I tested
- Final thoughts on Install OpenClaw with OpenAI GPT on AWS EC2 Free Tier?

How to Install OpenClaw with OpenAI GPT on AWS EC2 Free Tier?
OpenClaw Error Fixer
Paste any OpenClaw error and get the exact fix instantly — cause, steps, copy-ready commands, and related guides.
Table Of Content
- Install OpenClaw with OpenAI GPT on AWS EC2 Free Tier?
- Create the EC2 VM
- Install OpenClaw
- Configure OpenAI
- Configure Telegram channel
- Skills and gateway service
- Verify the setup
- Pair OpenClaw with your Telegram bot
- Test and common error
- Prompts I tested
- Final thoughts on Install OpenClaw with OpenAI GPT on AWS EC2 Free Tier?
I will show how to set up OpenClaw or Clawdbot/Moltbot using the OpenAI API and the GPT-4.1 mini model on an AWS Free Tier EC2 instance. I will create the VM, connect to the terminal, install OpenClaw, configure OpenAI and Telegram, and verify the setup. I will also share the prompts I tested that worked for me.
Install OpenClaw with OpenAI GPT on AWS EC2 Free Tier?
Create the EC2 VM
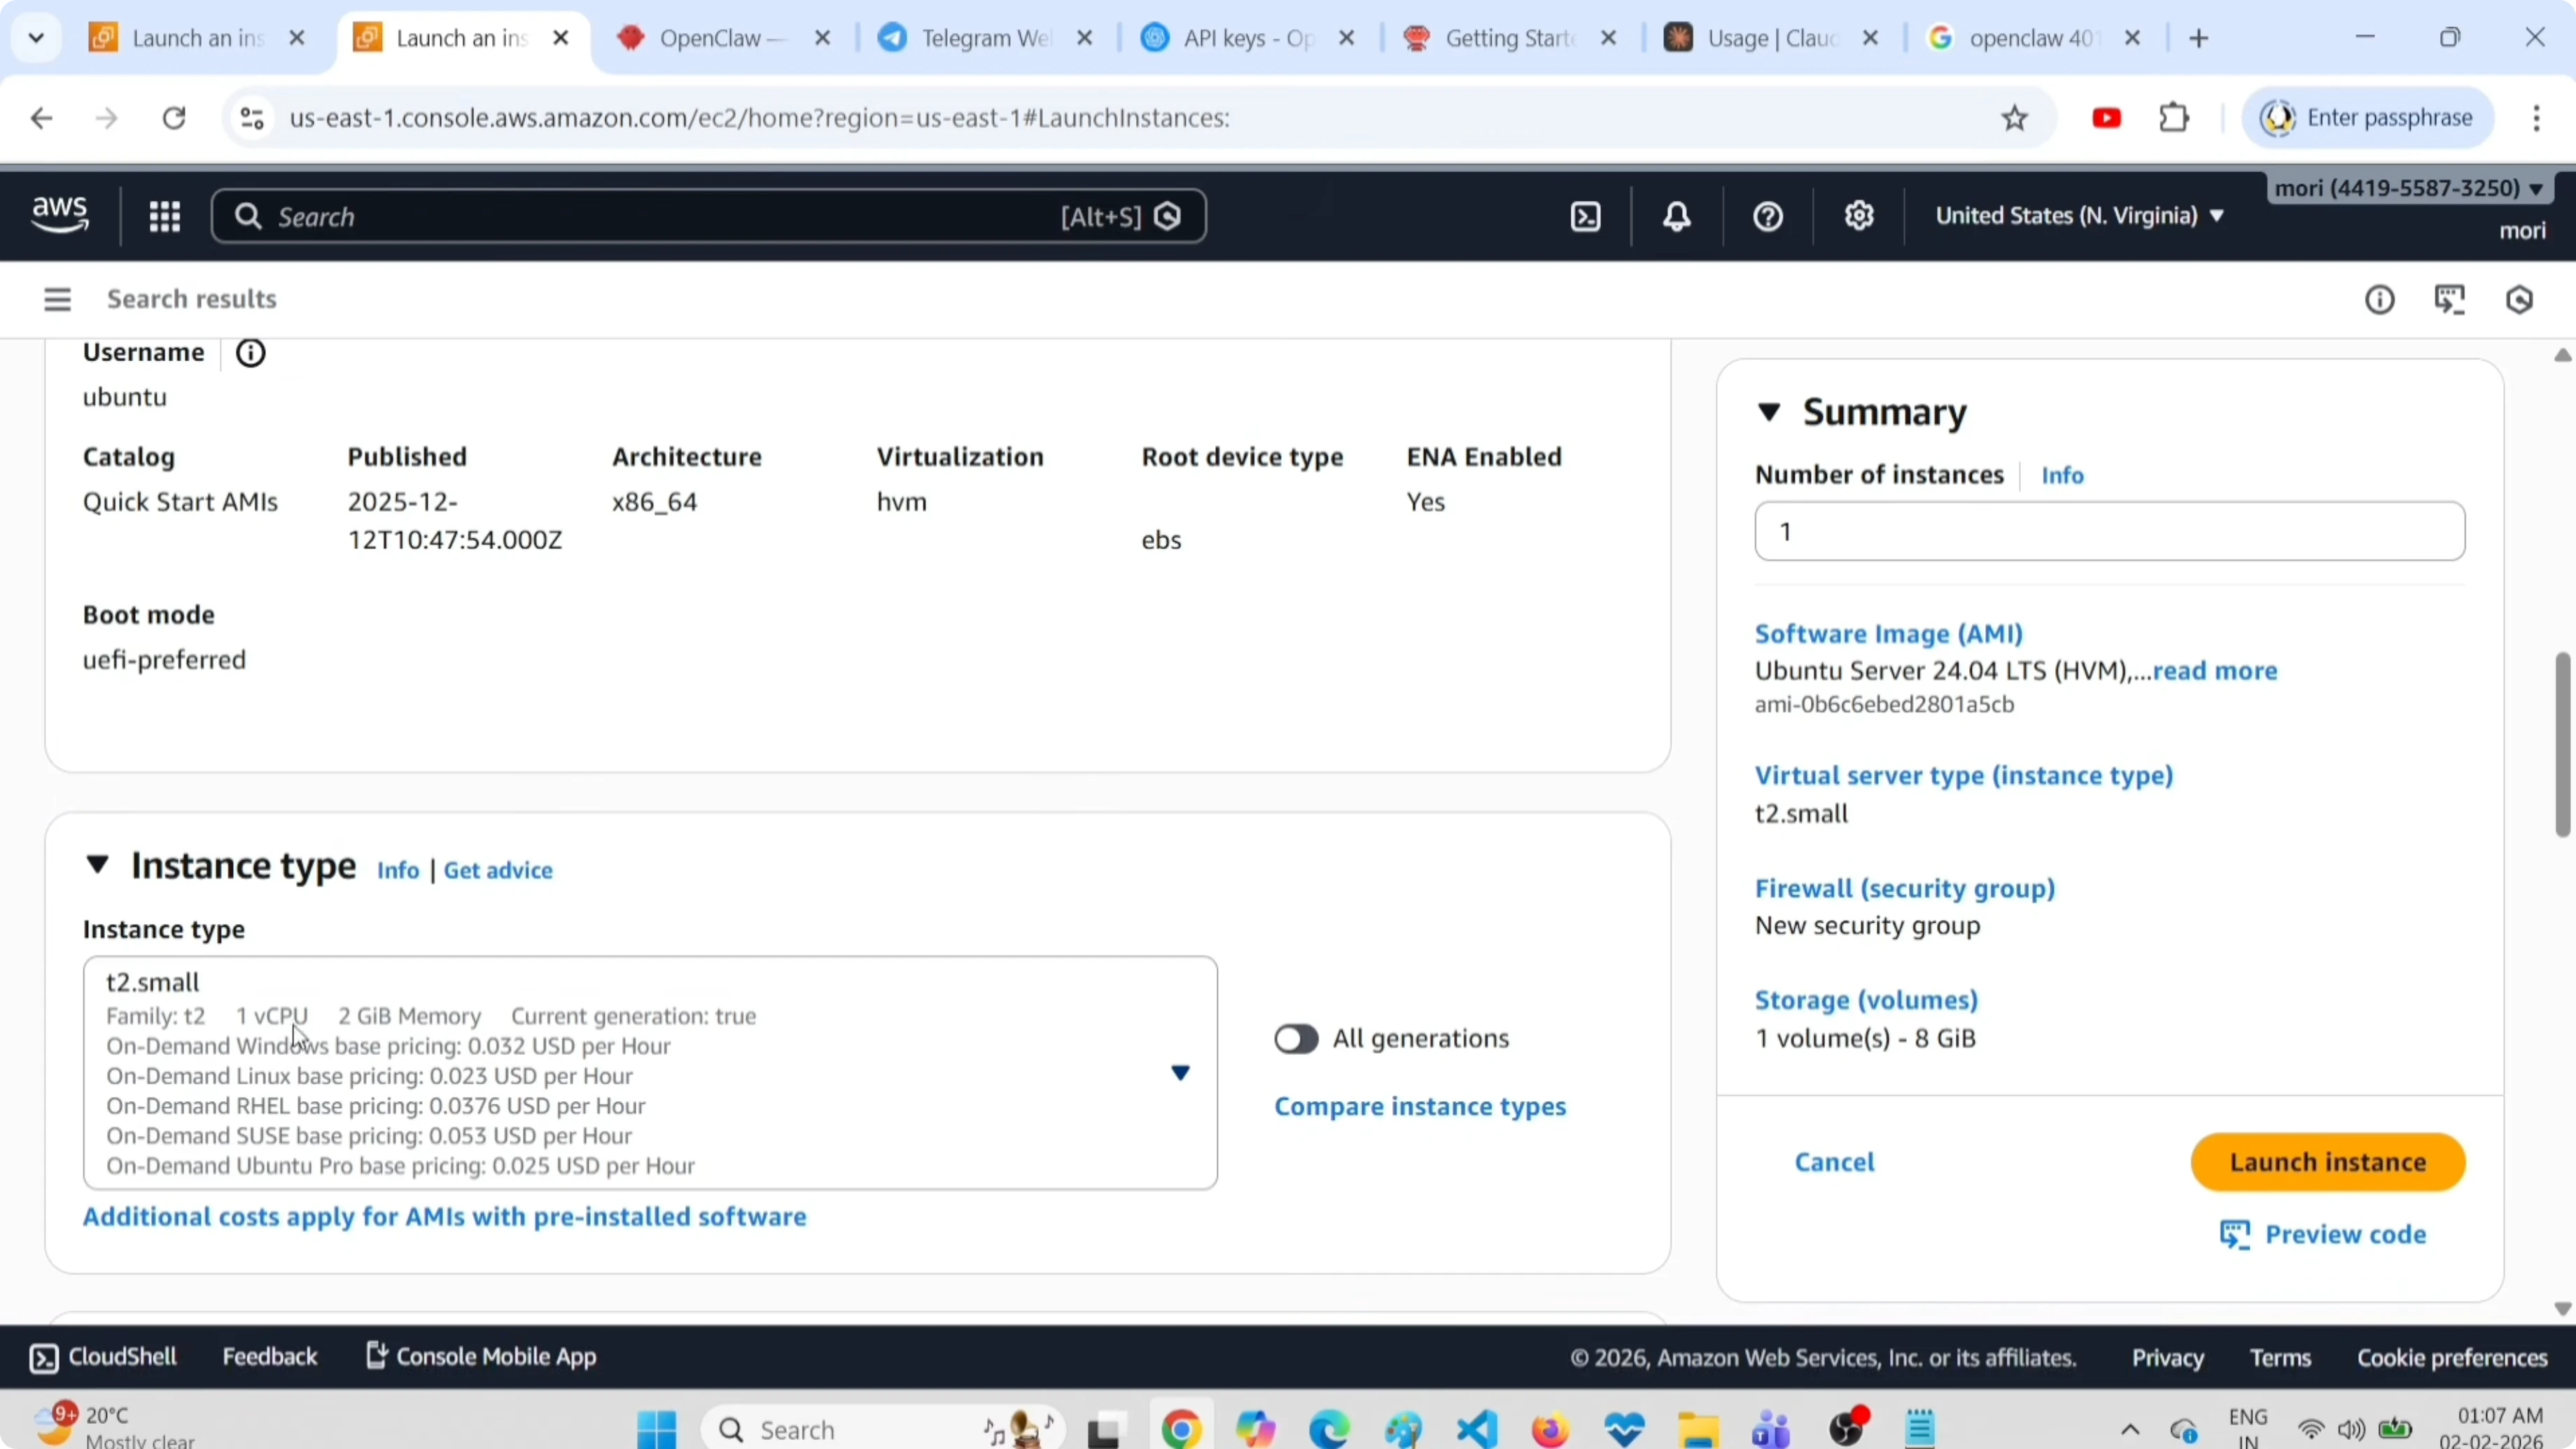
Click Launch instance in EC2 and name the VM OpenClaw. Select the Ubuntu Server 24 image. Choose the instance type t2.small with 1 vCPU and 2 GB RAM.

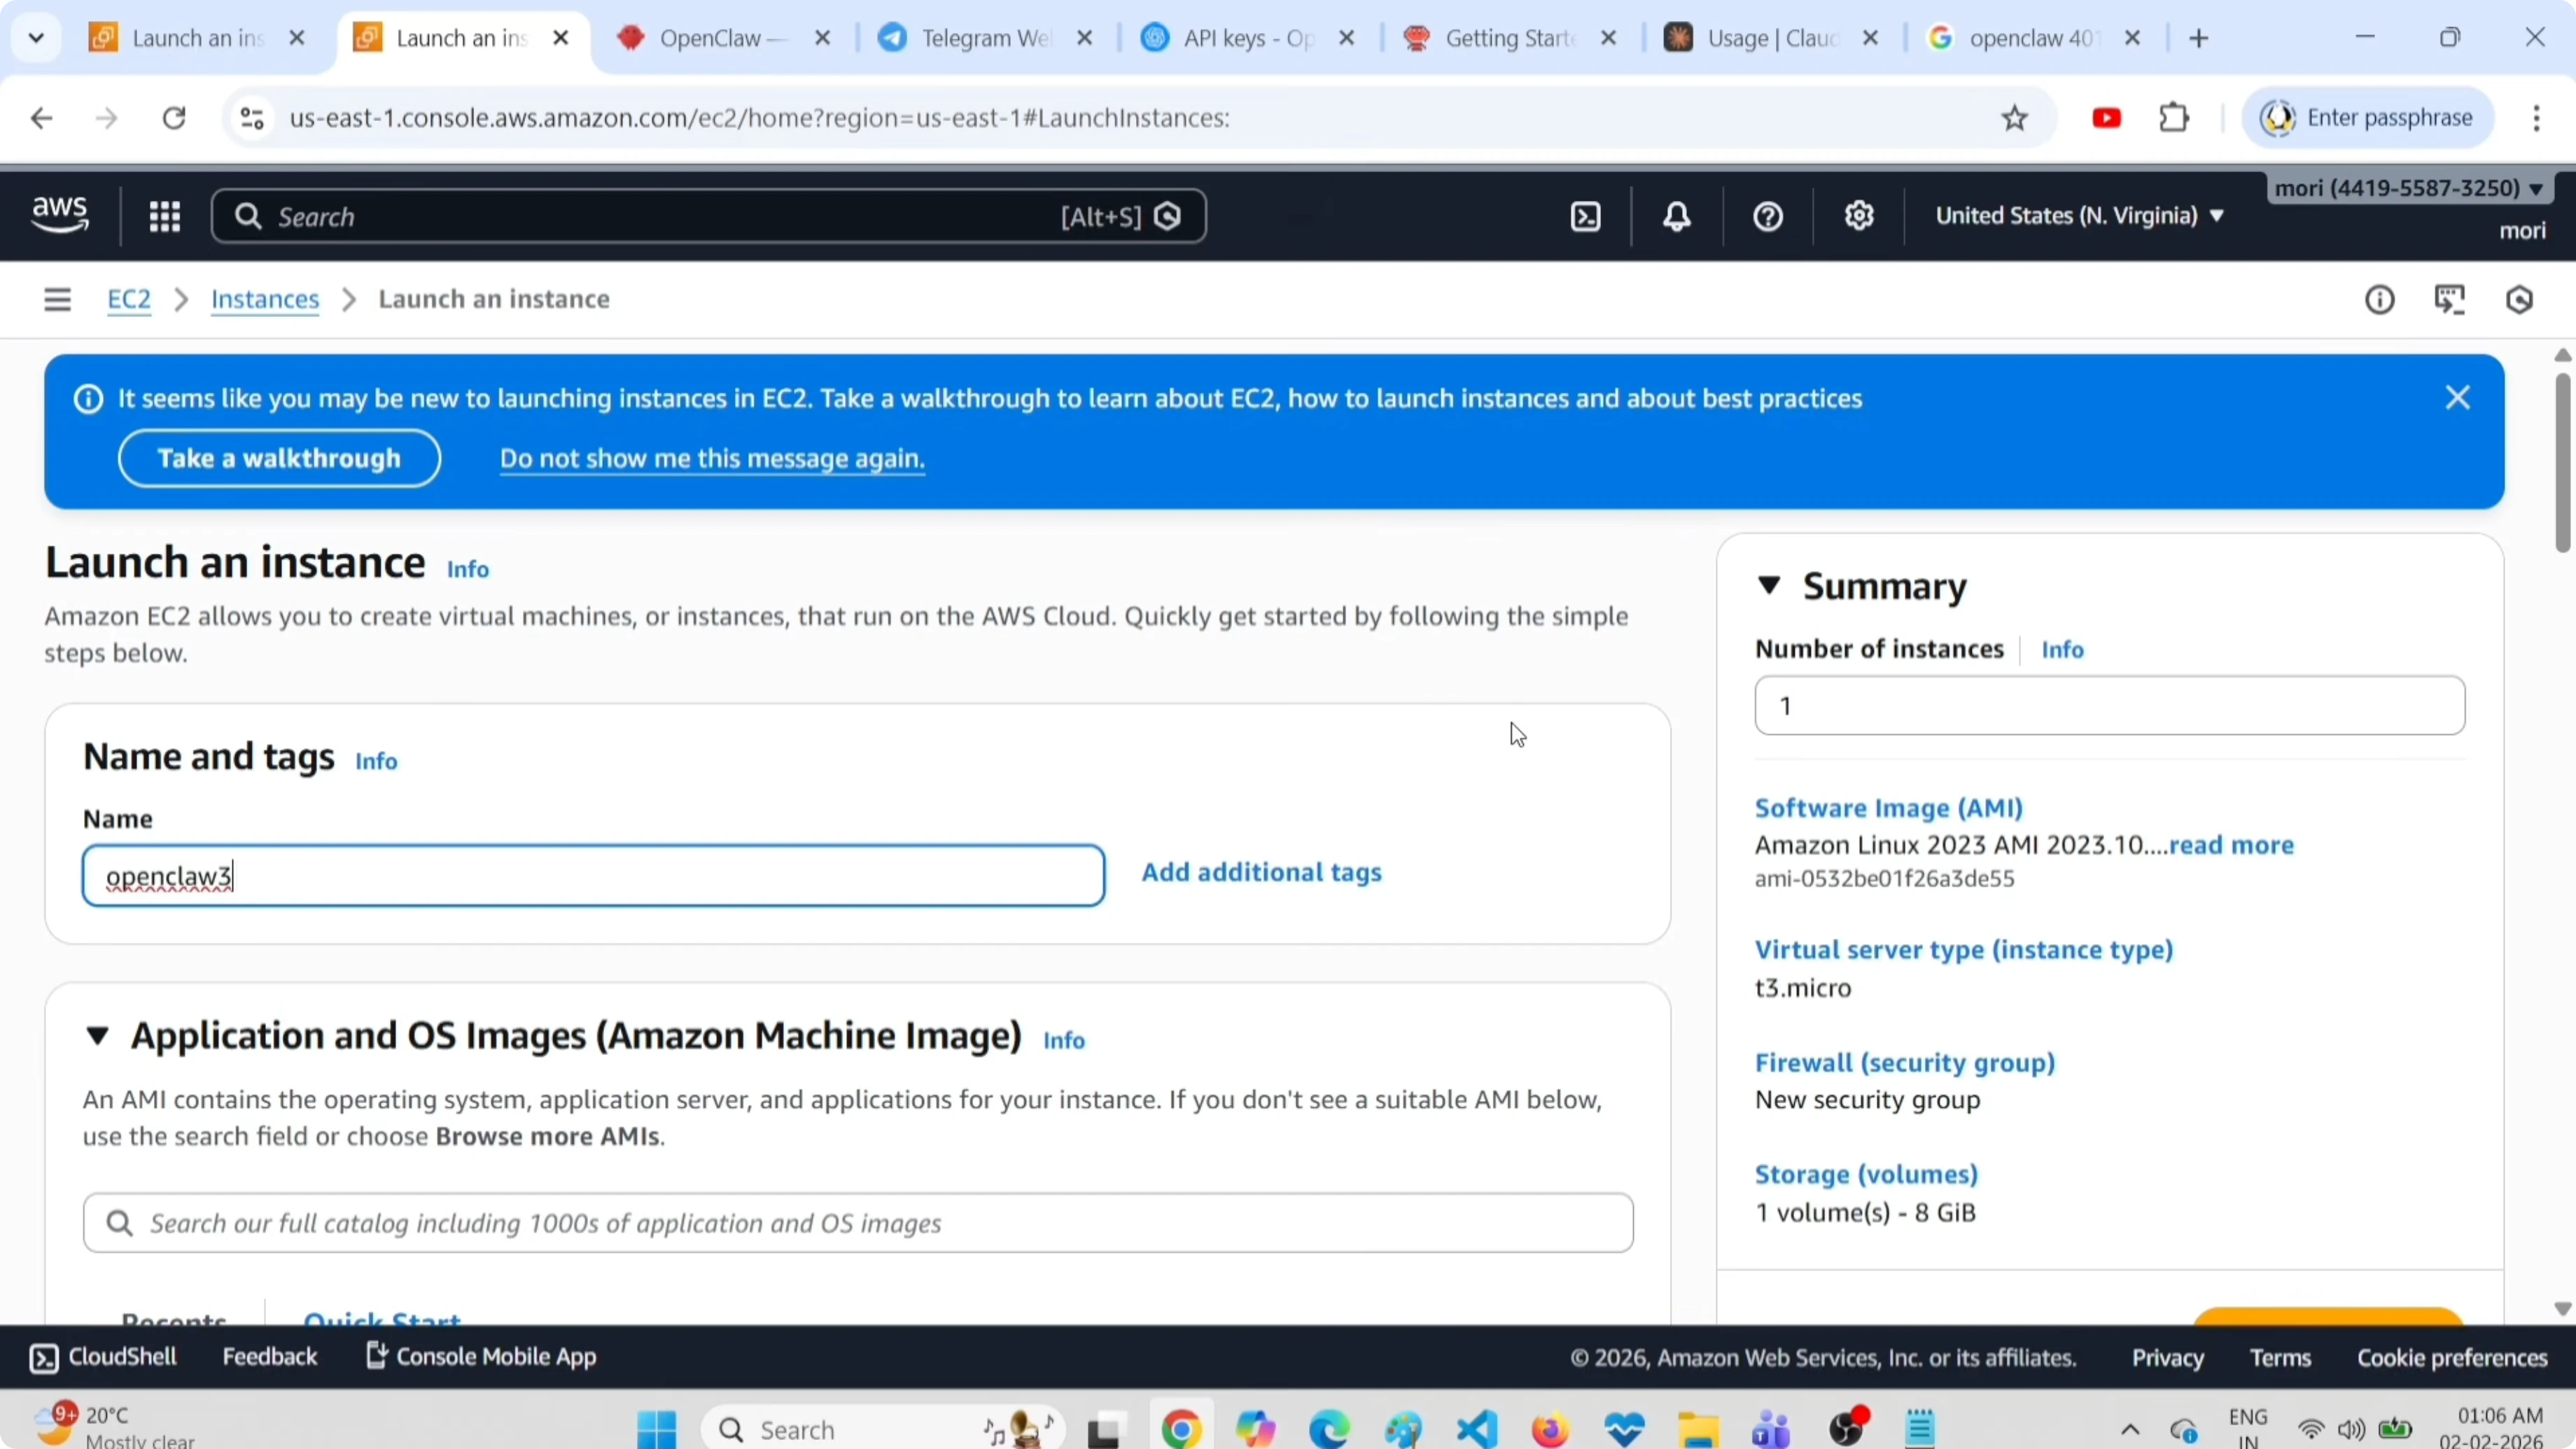
Create or select an existing key pair. Allow HTTP and HTTPS in the security group. Set storage to 8 GB and launch the instance.
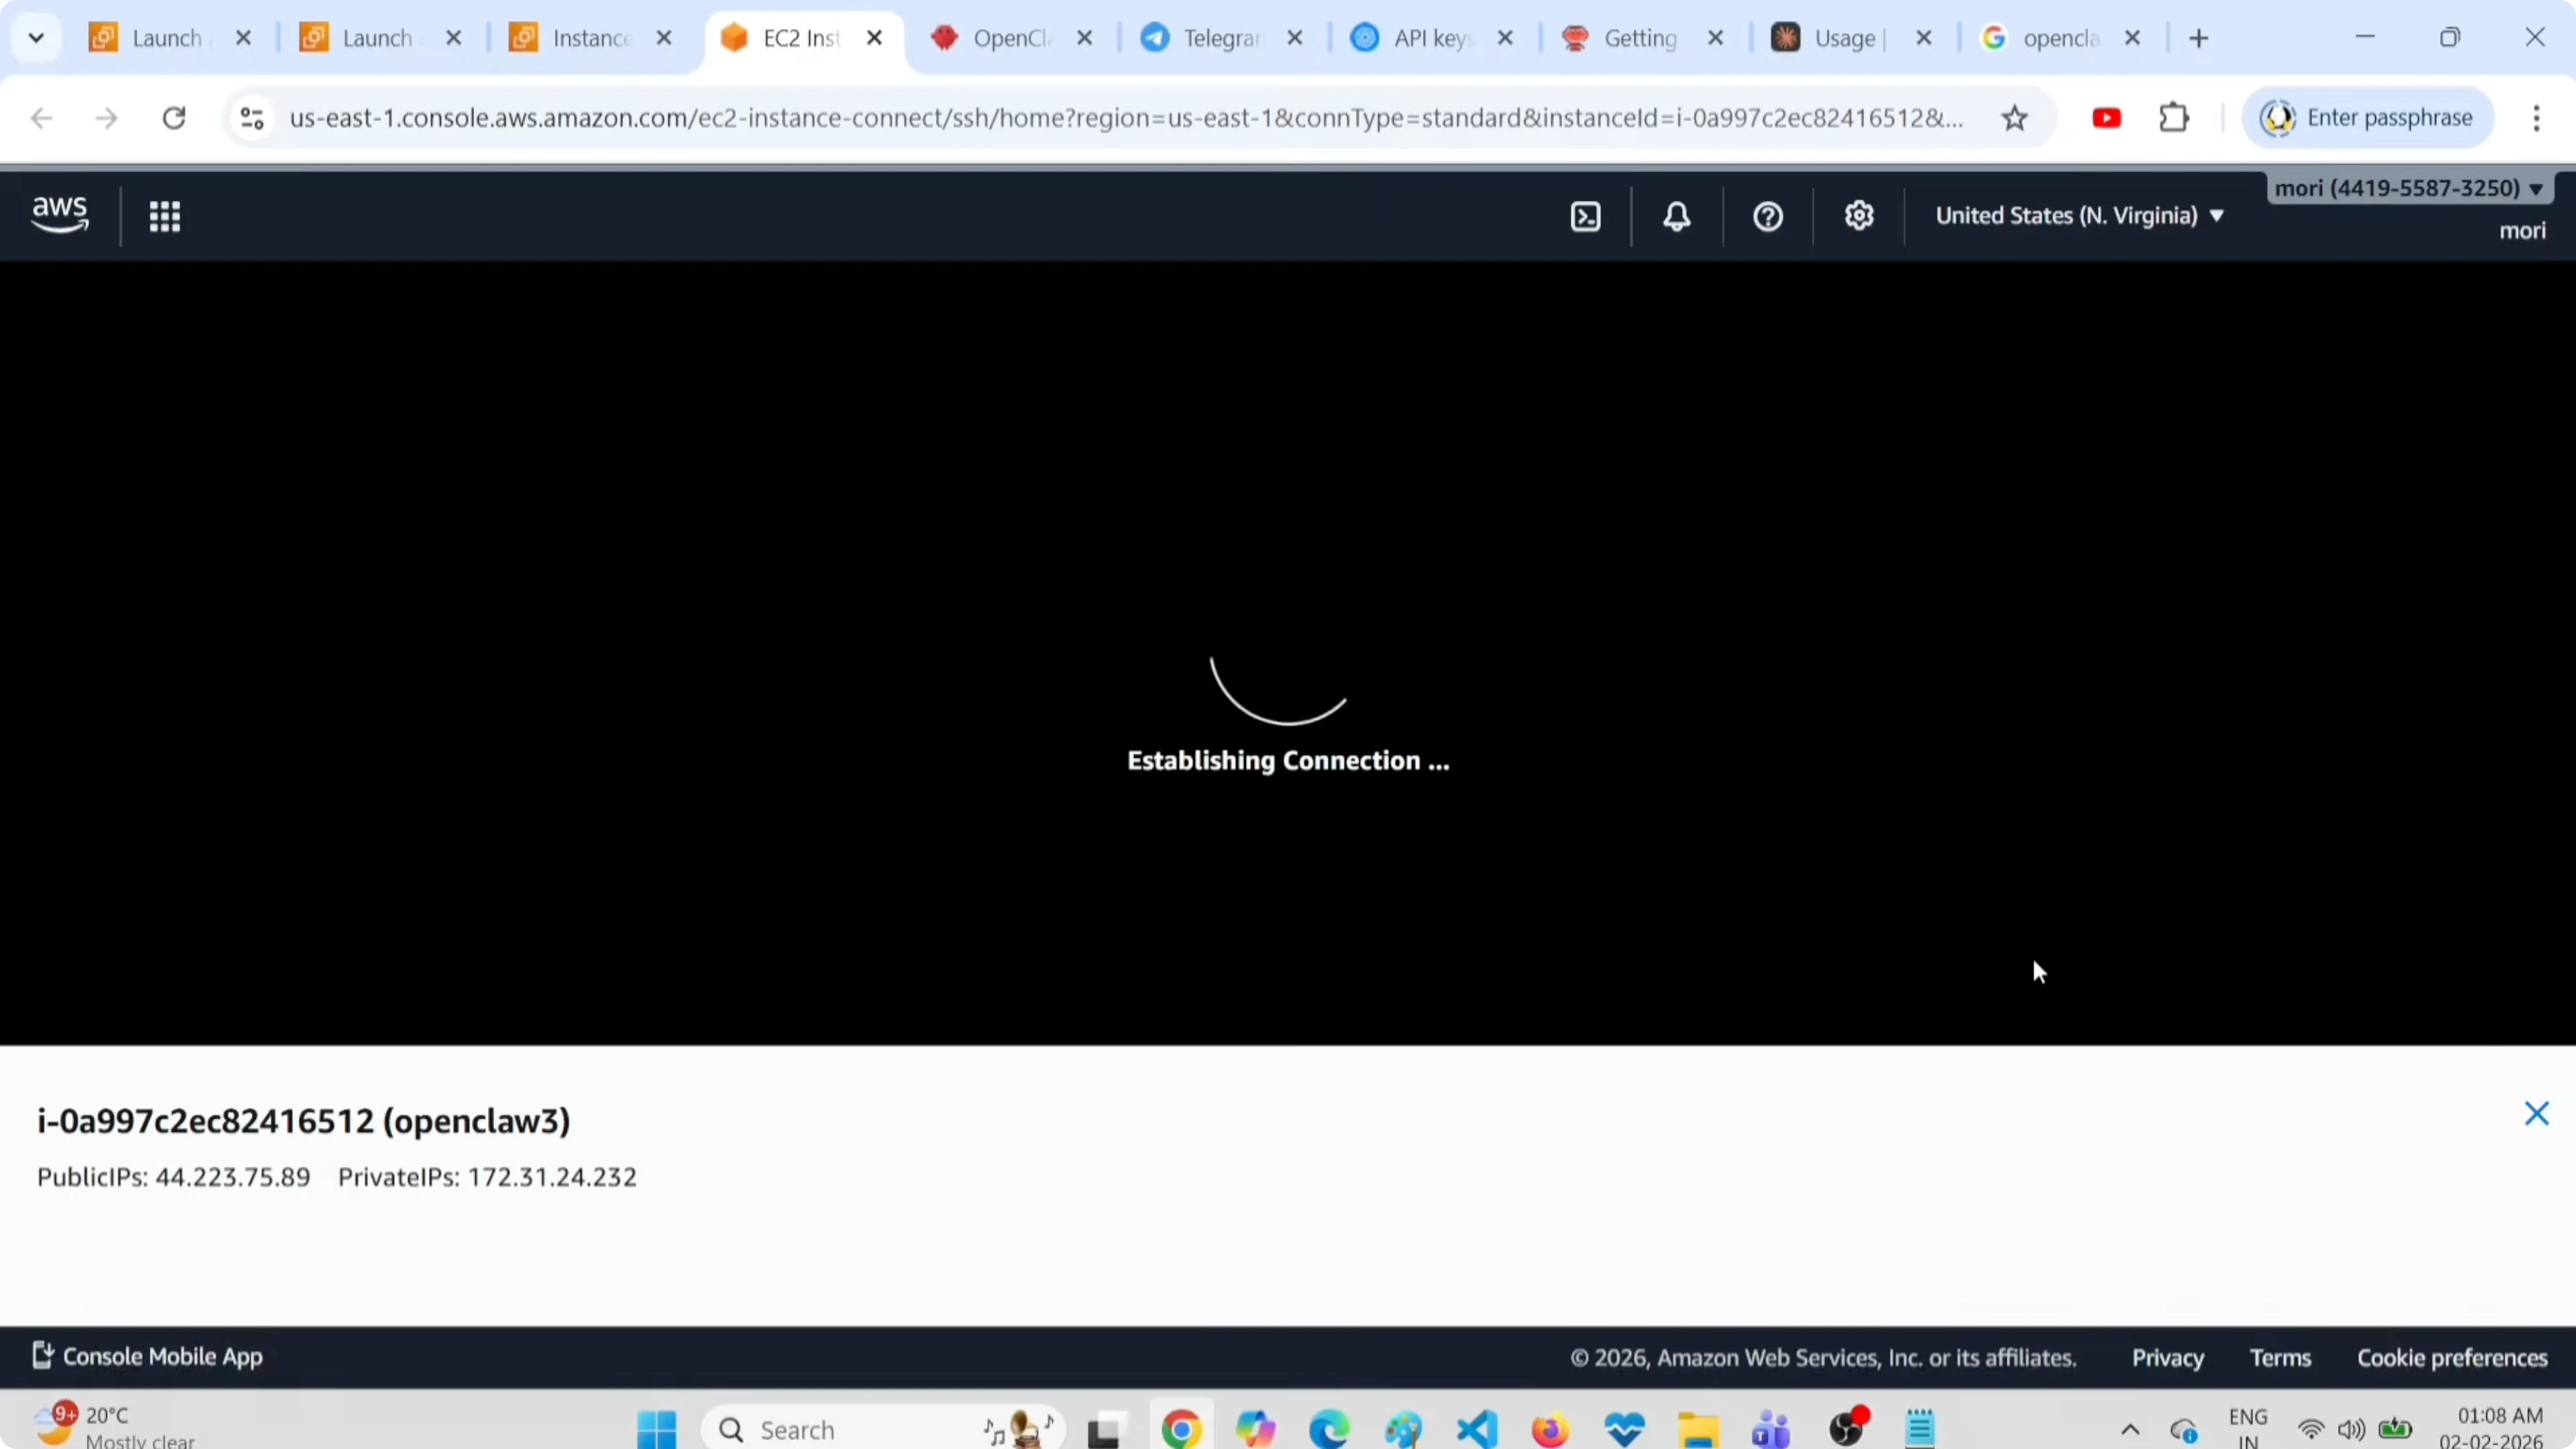
Open the instance details and click Connect. Use EC2 Instance Connect to open the terminal in the browser. Clear the terminal and get ready to run commands.
If you need help accessing the dashboard later, see these dashboard access steps.
Install OpenClaw
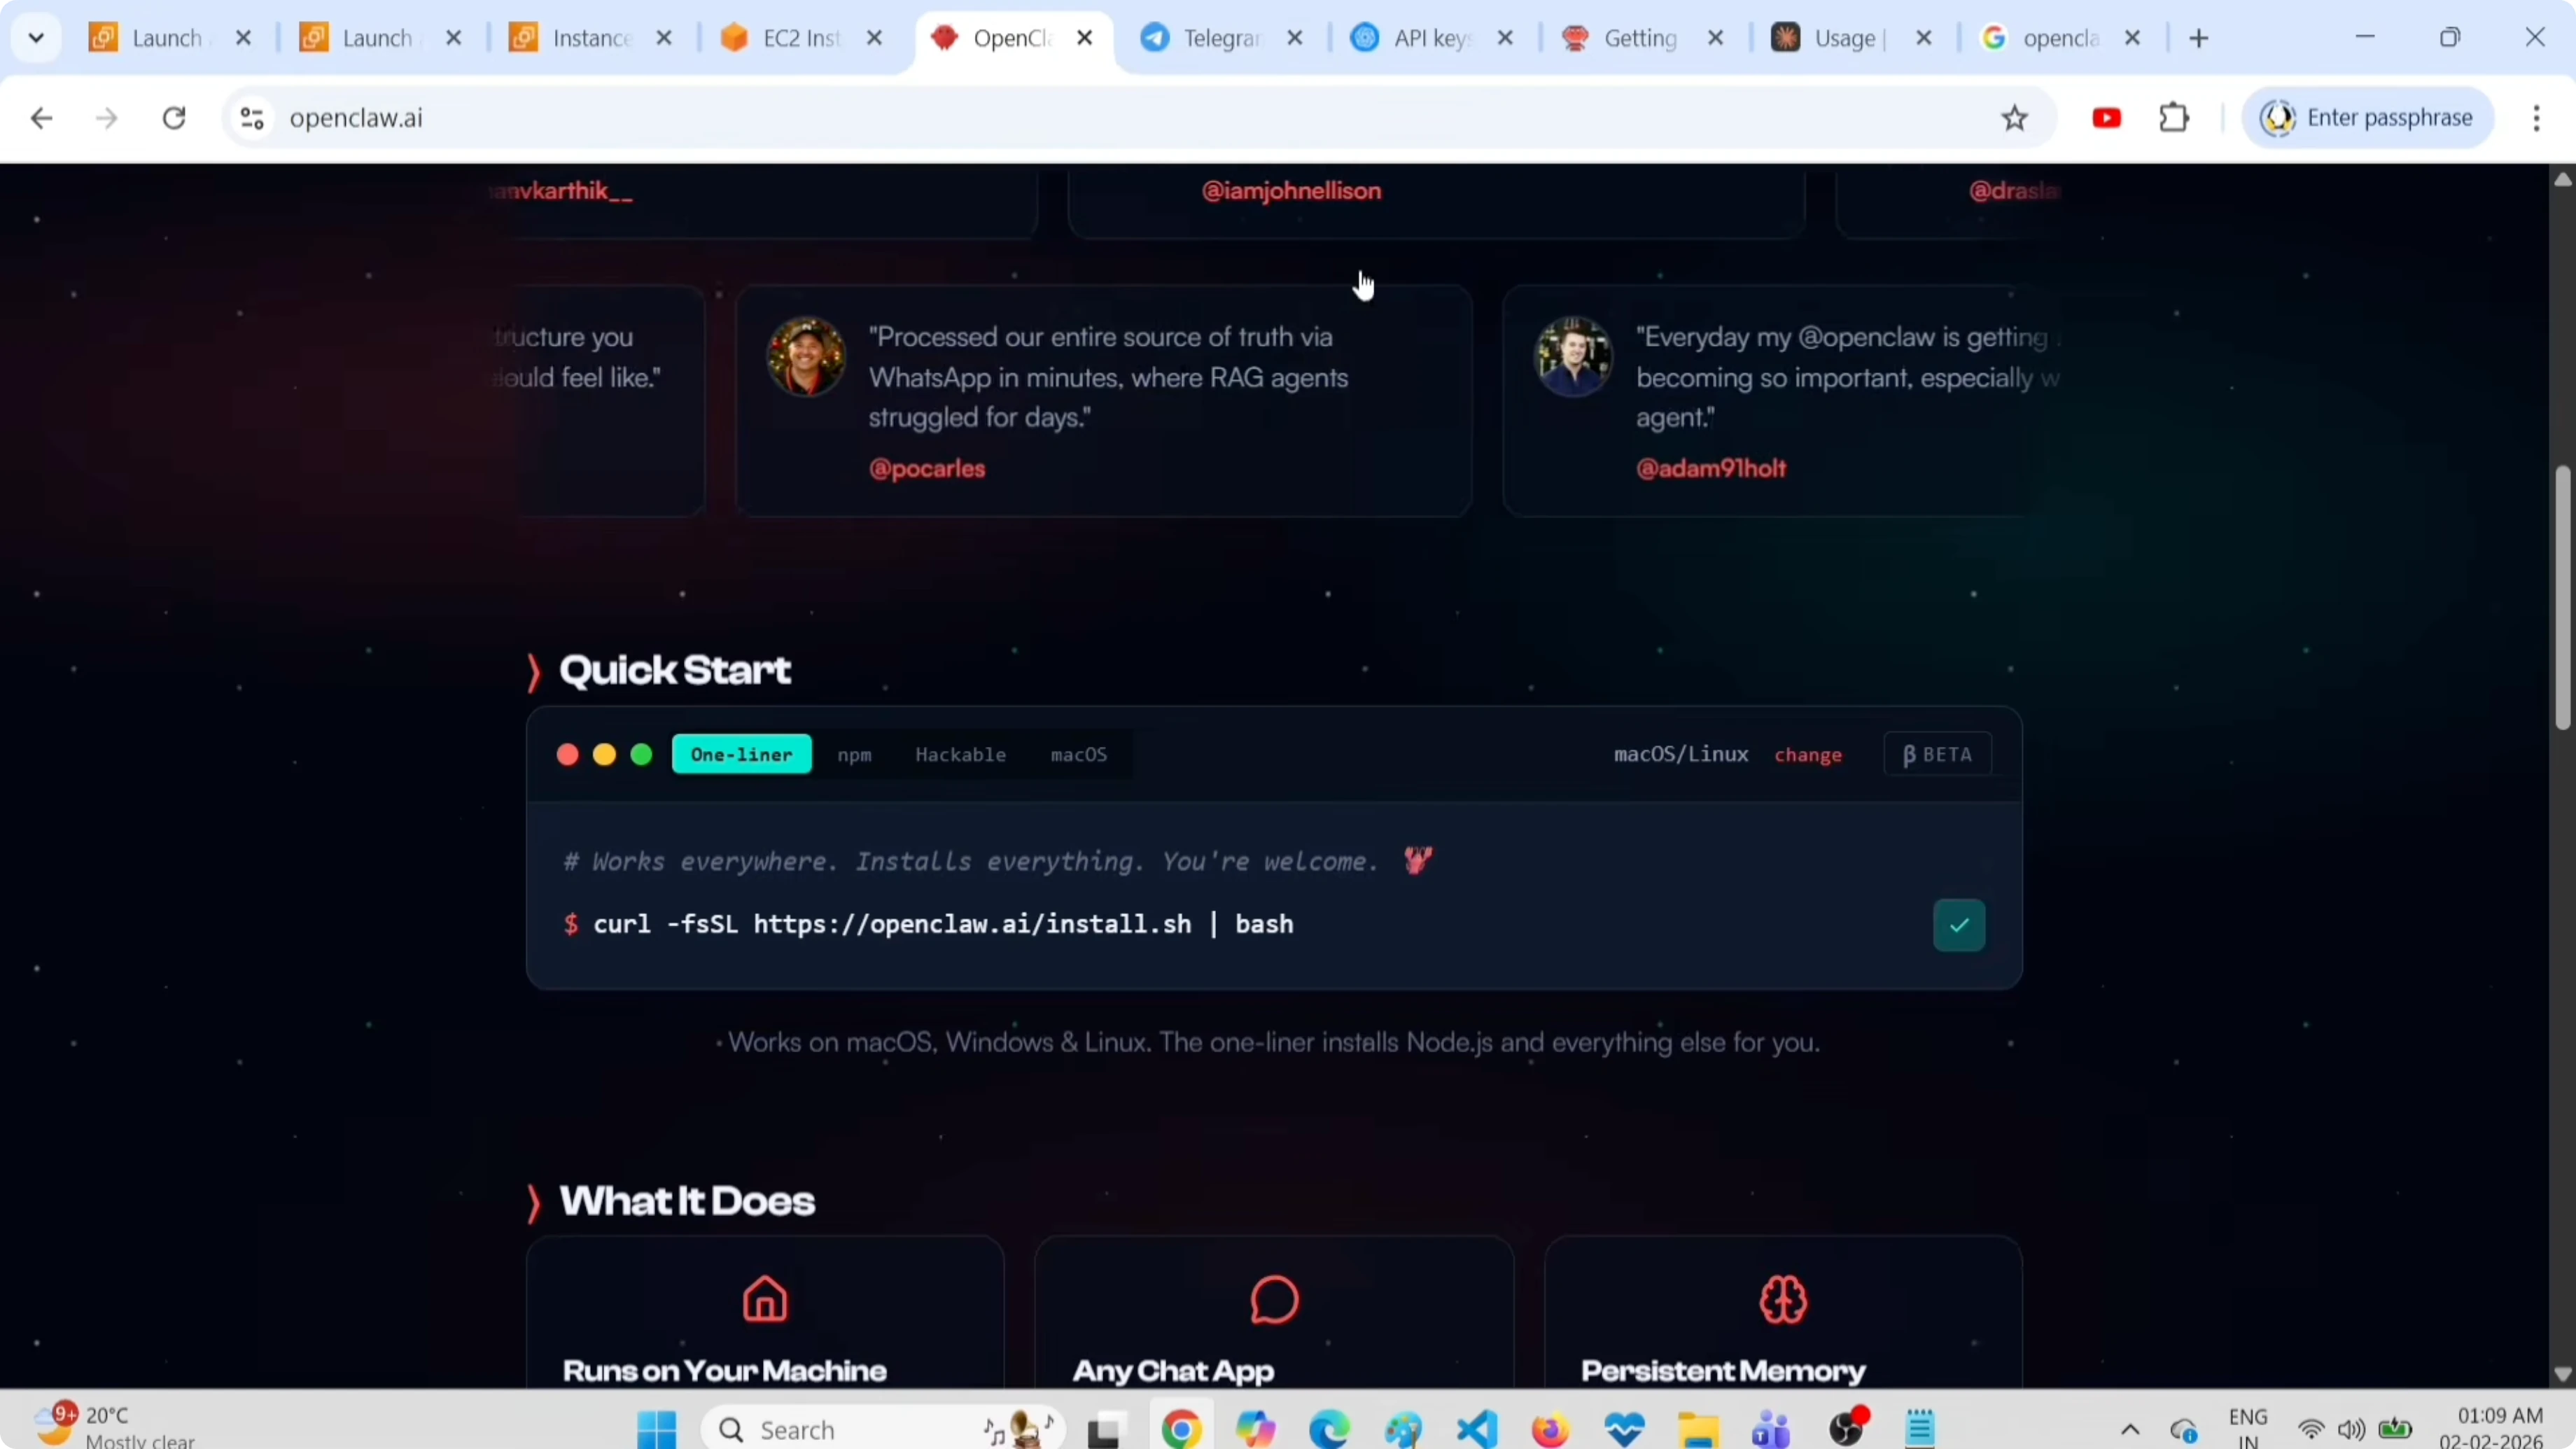
Go to the openclaw.ai website and copy the installer command. Paste it in the EC2 terminal and press Enter.
Wait for the installer to finish. When prompted, select Yes and then select Quick Start.
For those comparing free models for cost control, check this free models and APIs guide.
Configure OpenAI
Select the OpenAI interface in the setup list. When prompted for the OpenAI API key, generate it at https://platform.openai.com/api-keys and create a new secret key.
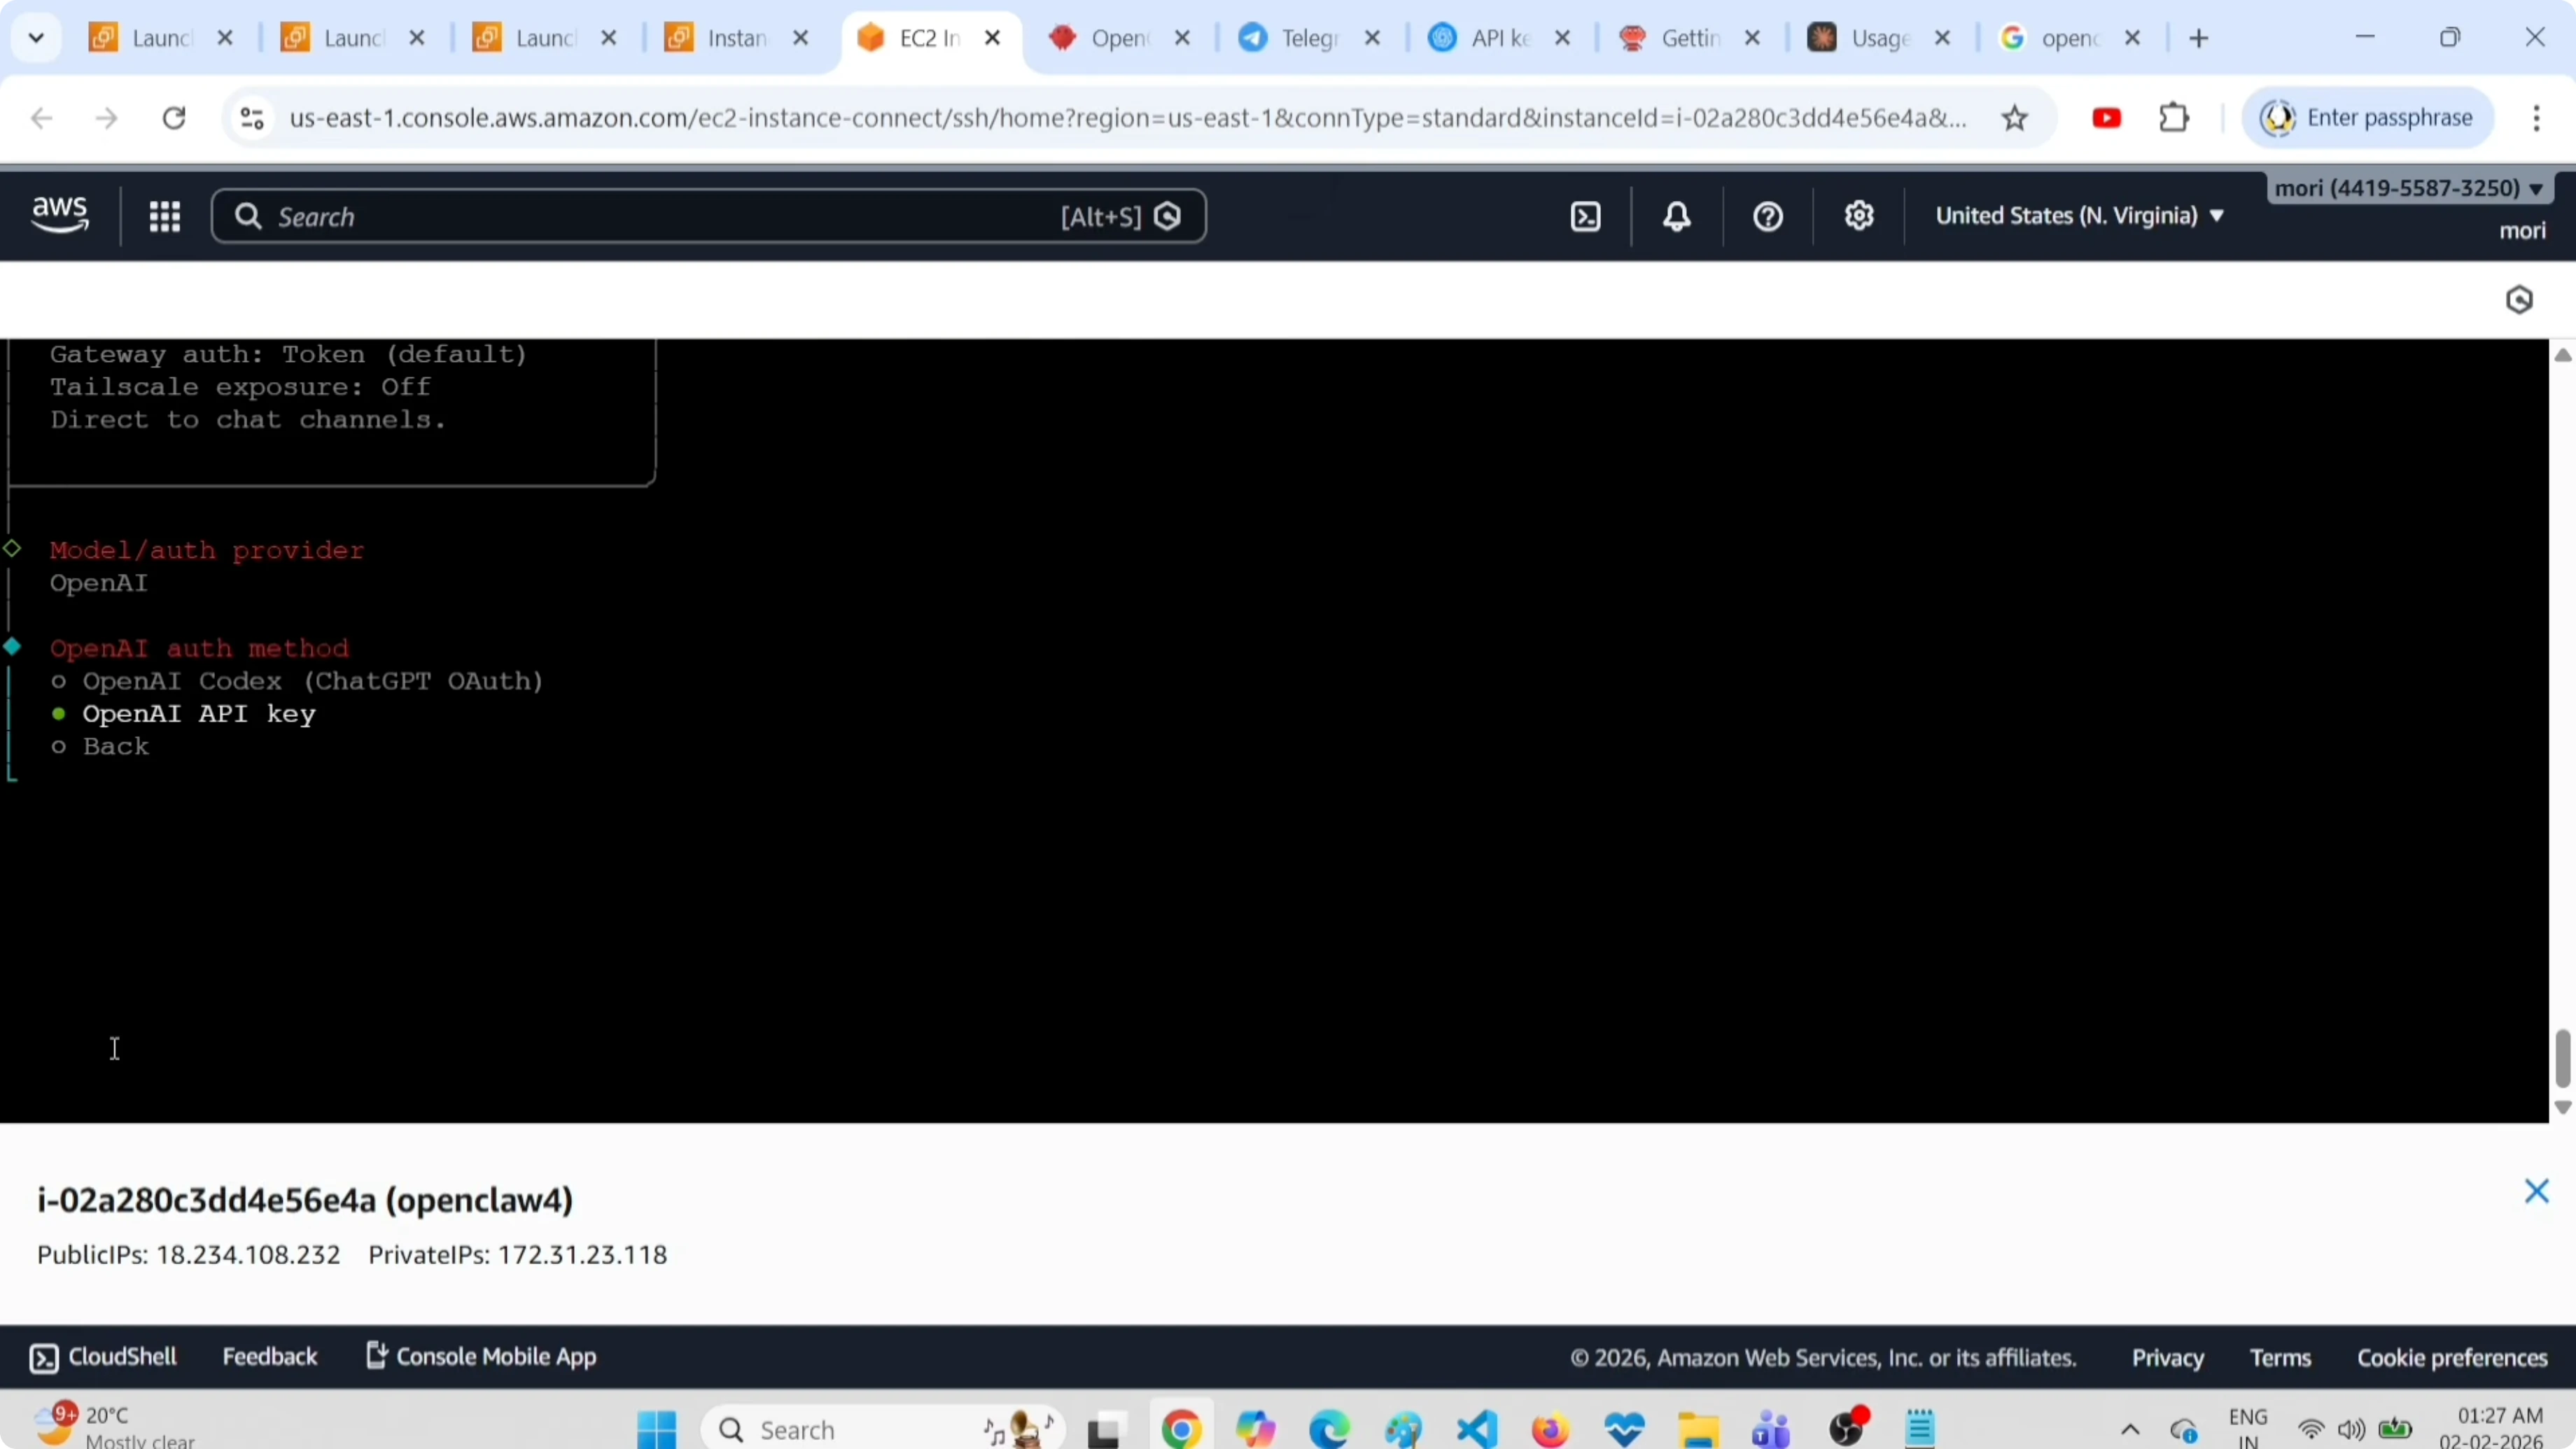
Copy the key and paste it into the terminal. Continue the setup.
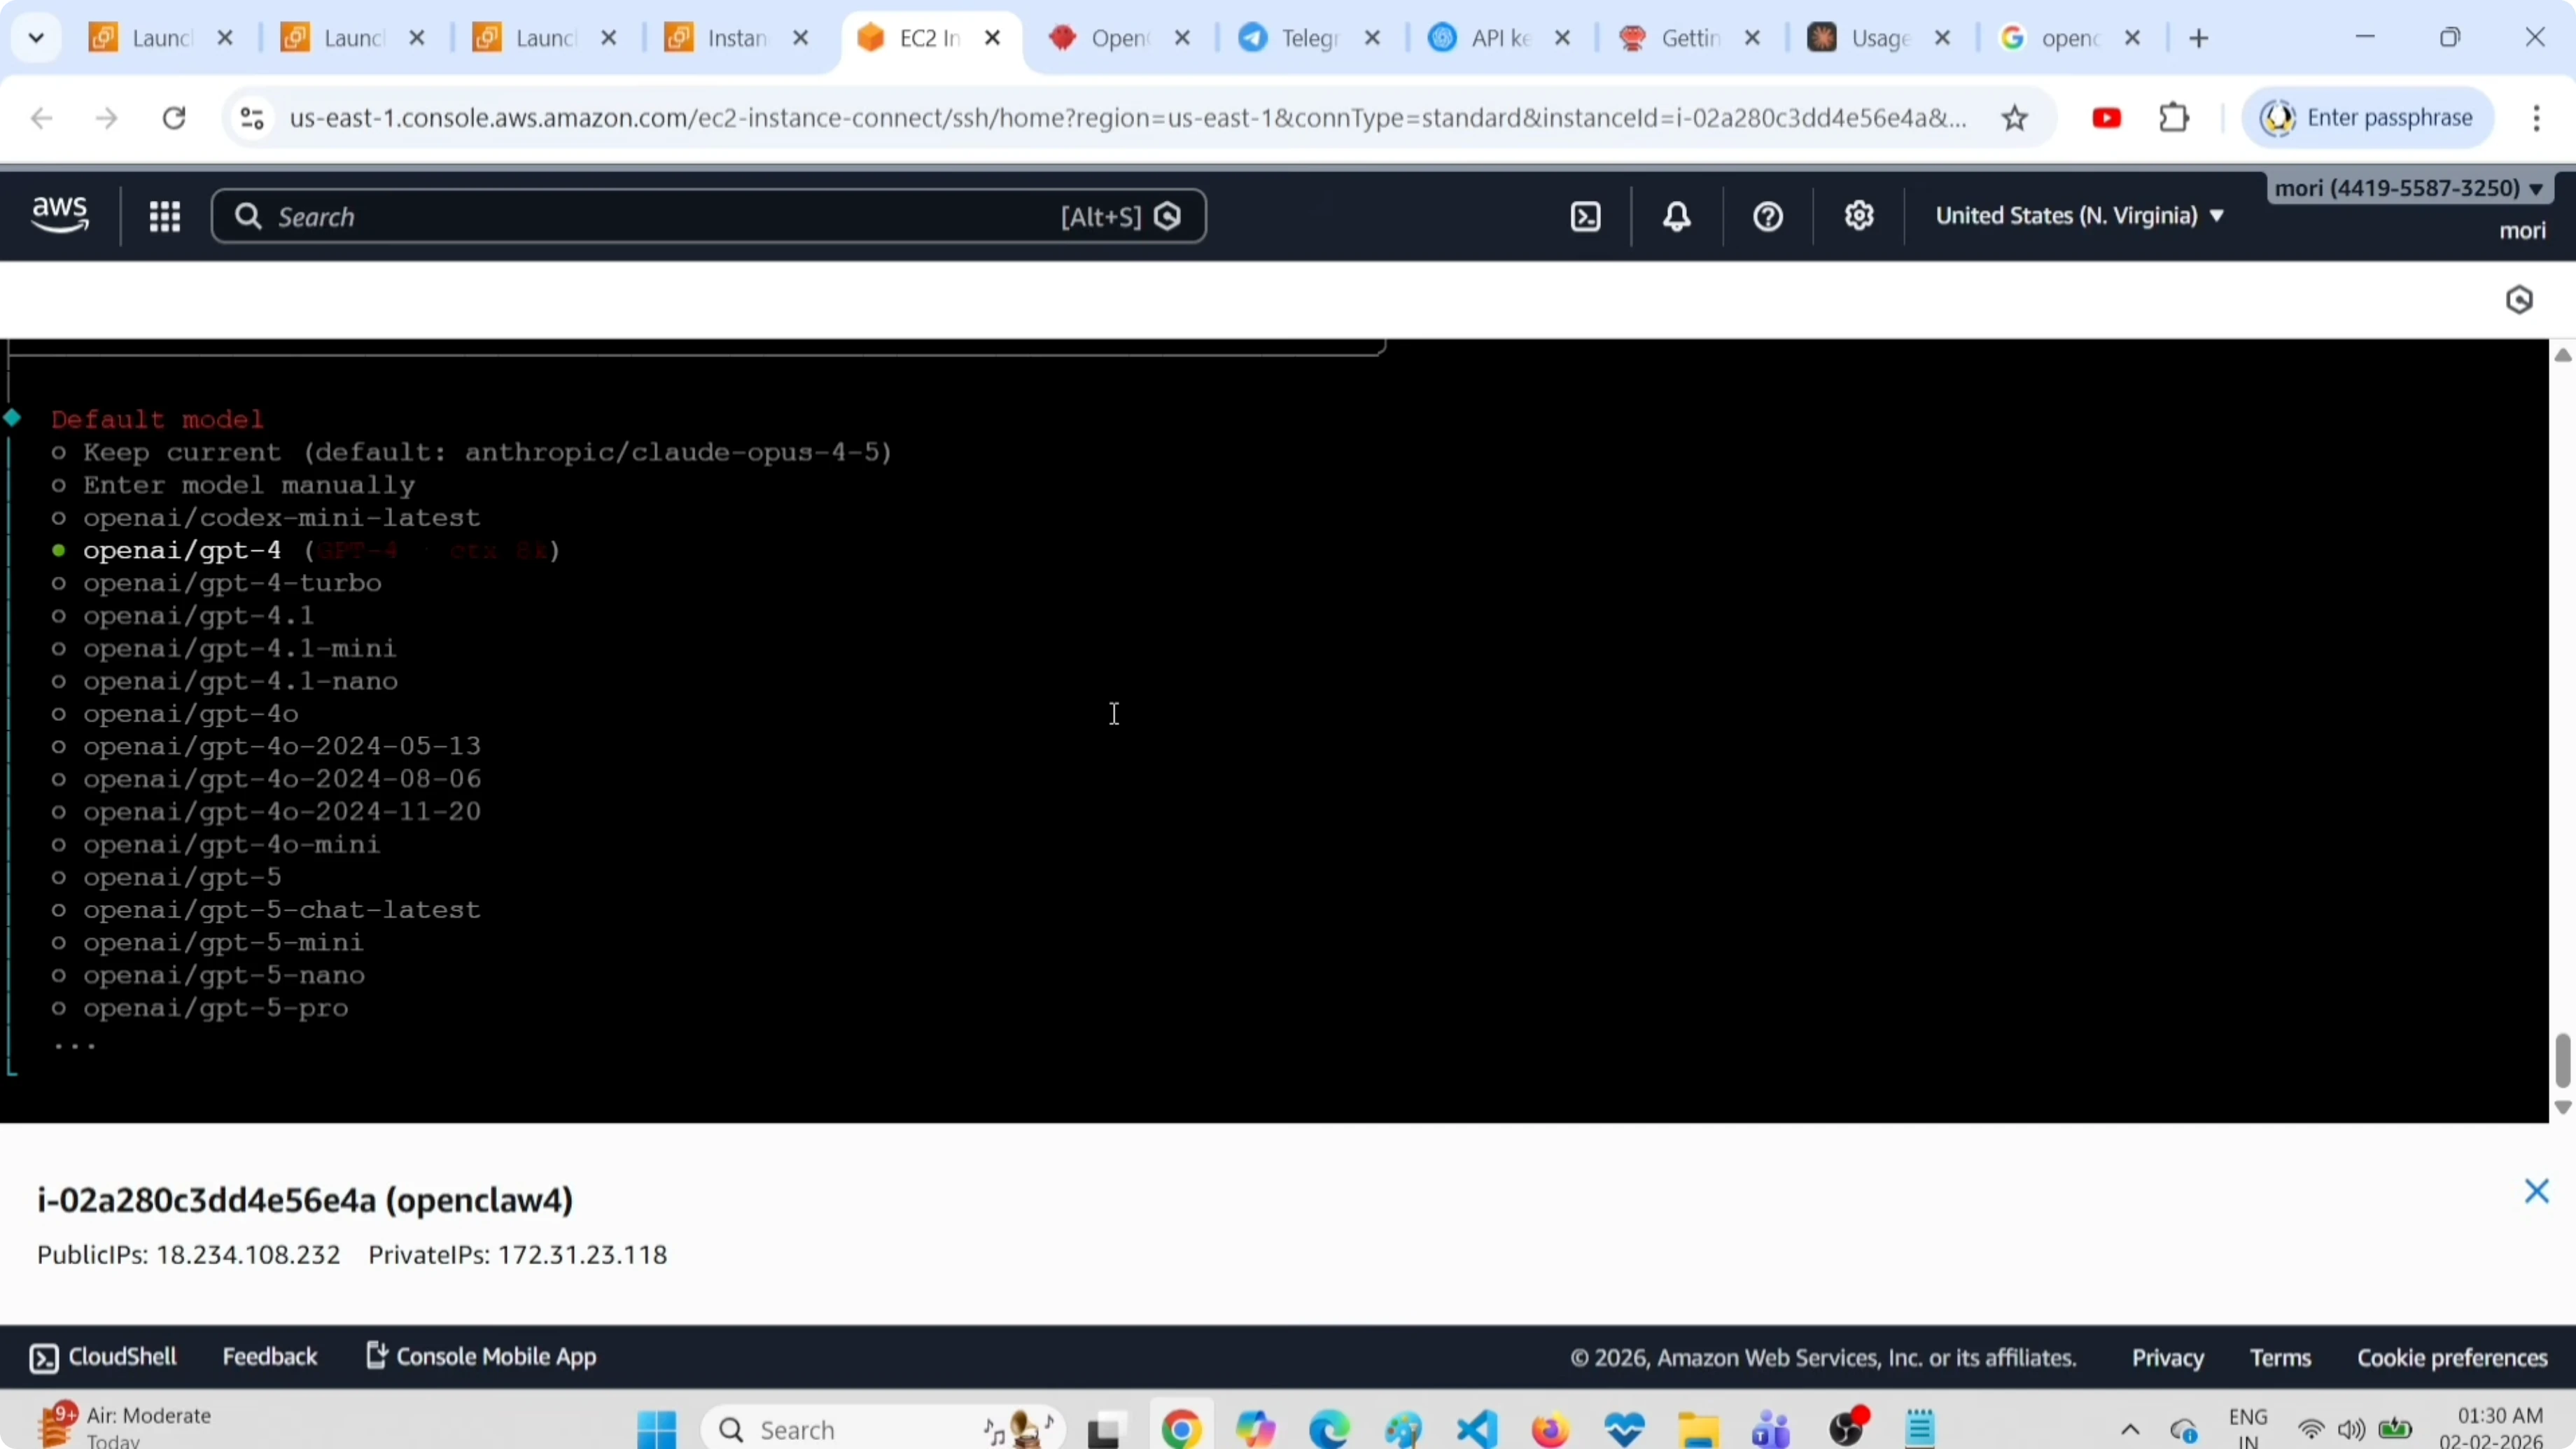
Choose a model from the list. I selected GPT-4.1 mini. Try to select mini or nano models because big models are very expensive and will eat all your credits.
If you need a curated list of free and low-cost options, see this list of free APIs and models for OpenClaw tools.
Configure Telegram channel
Select Telegram in the channels list. Create a bot and get the token using Telegram’s BotFather.
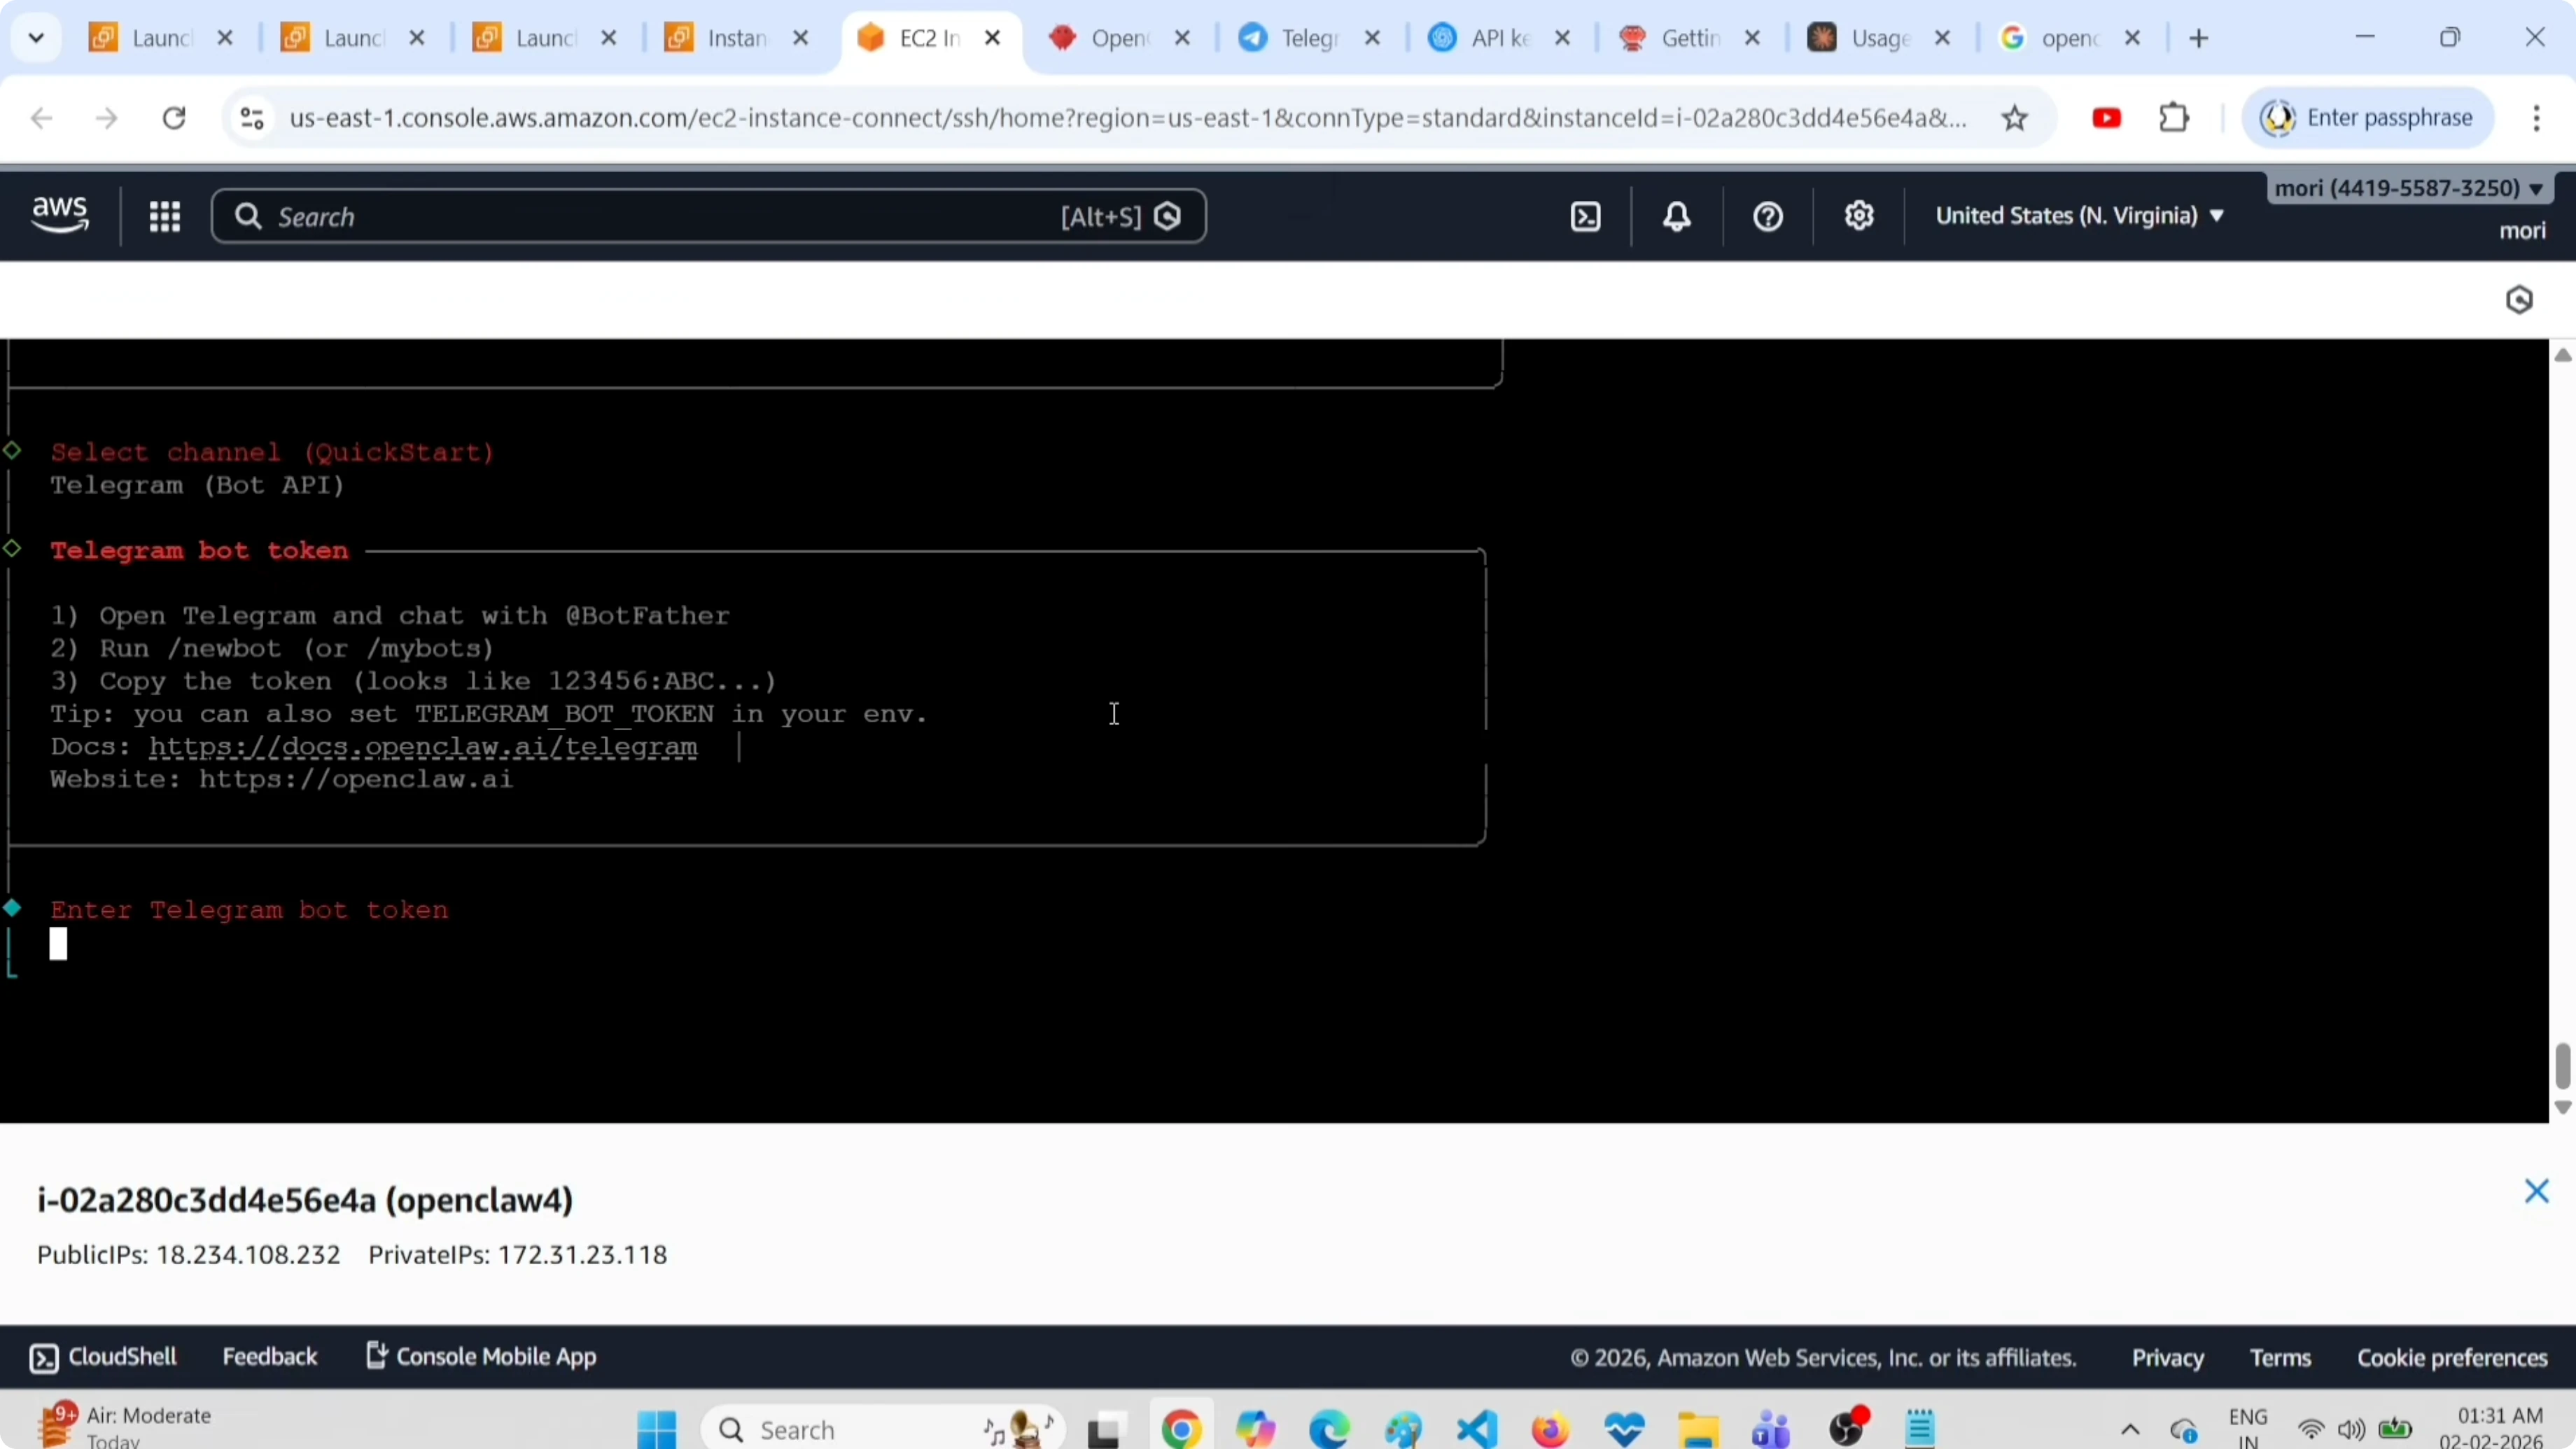
Open Telegram, search for BotFather, start a chat, and run the command:
/newbotGive your bot a name and a username when prompted. Copy the bot token and paste it back into the OpenClaw setup terminal.
Skills and gateway service
By default, six skills are selected. If you want to select more you can choose Yes, but I skipped it and selected No.
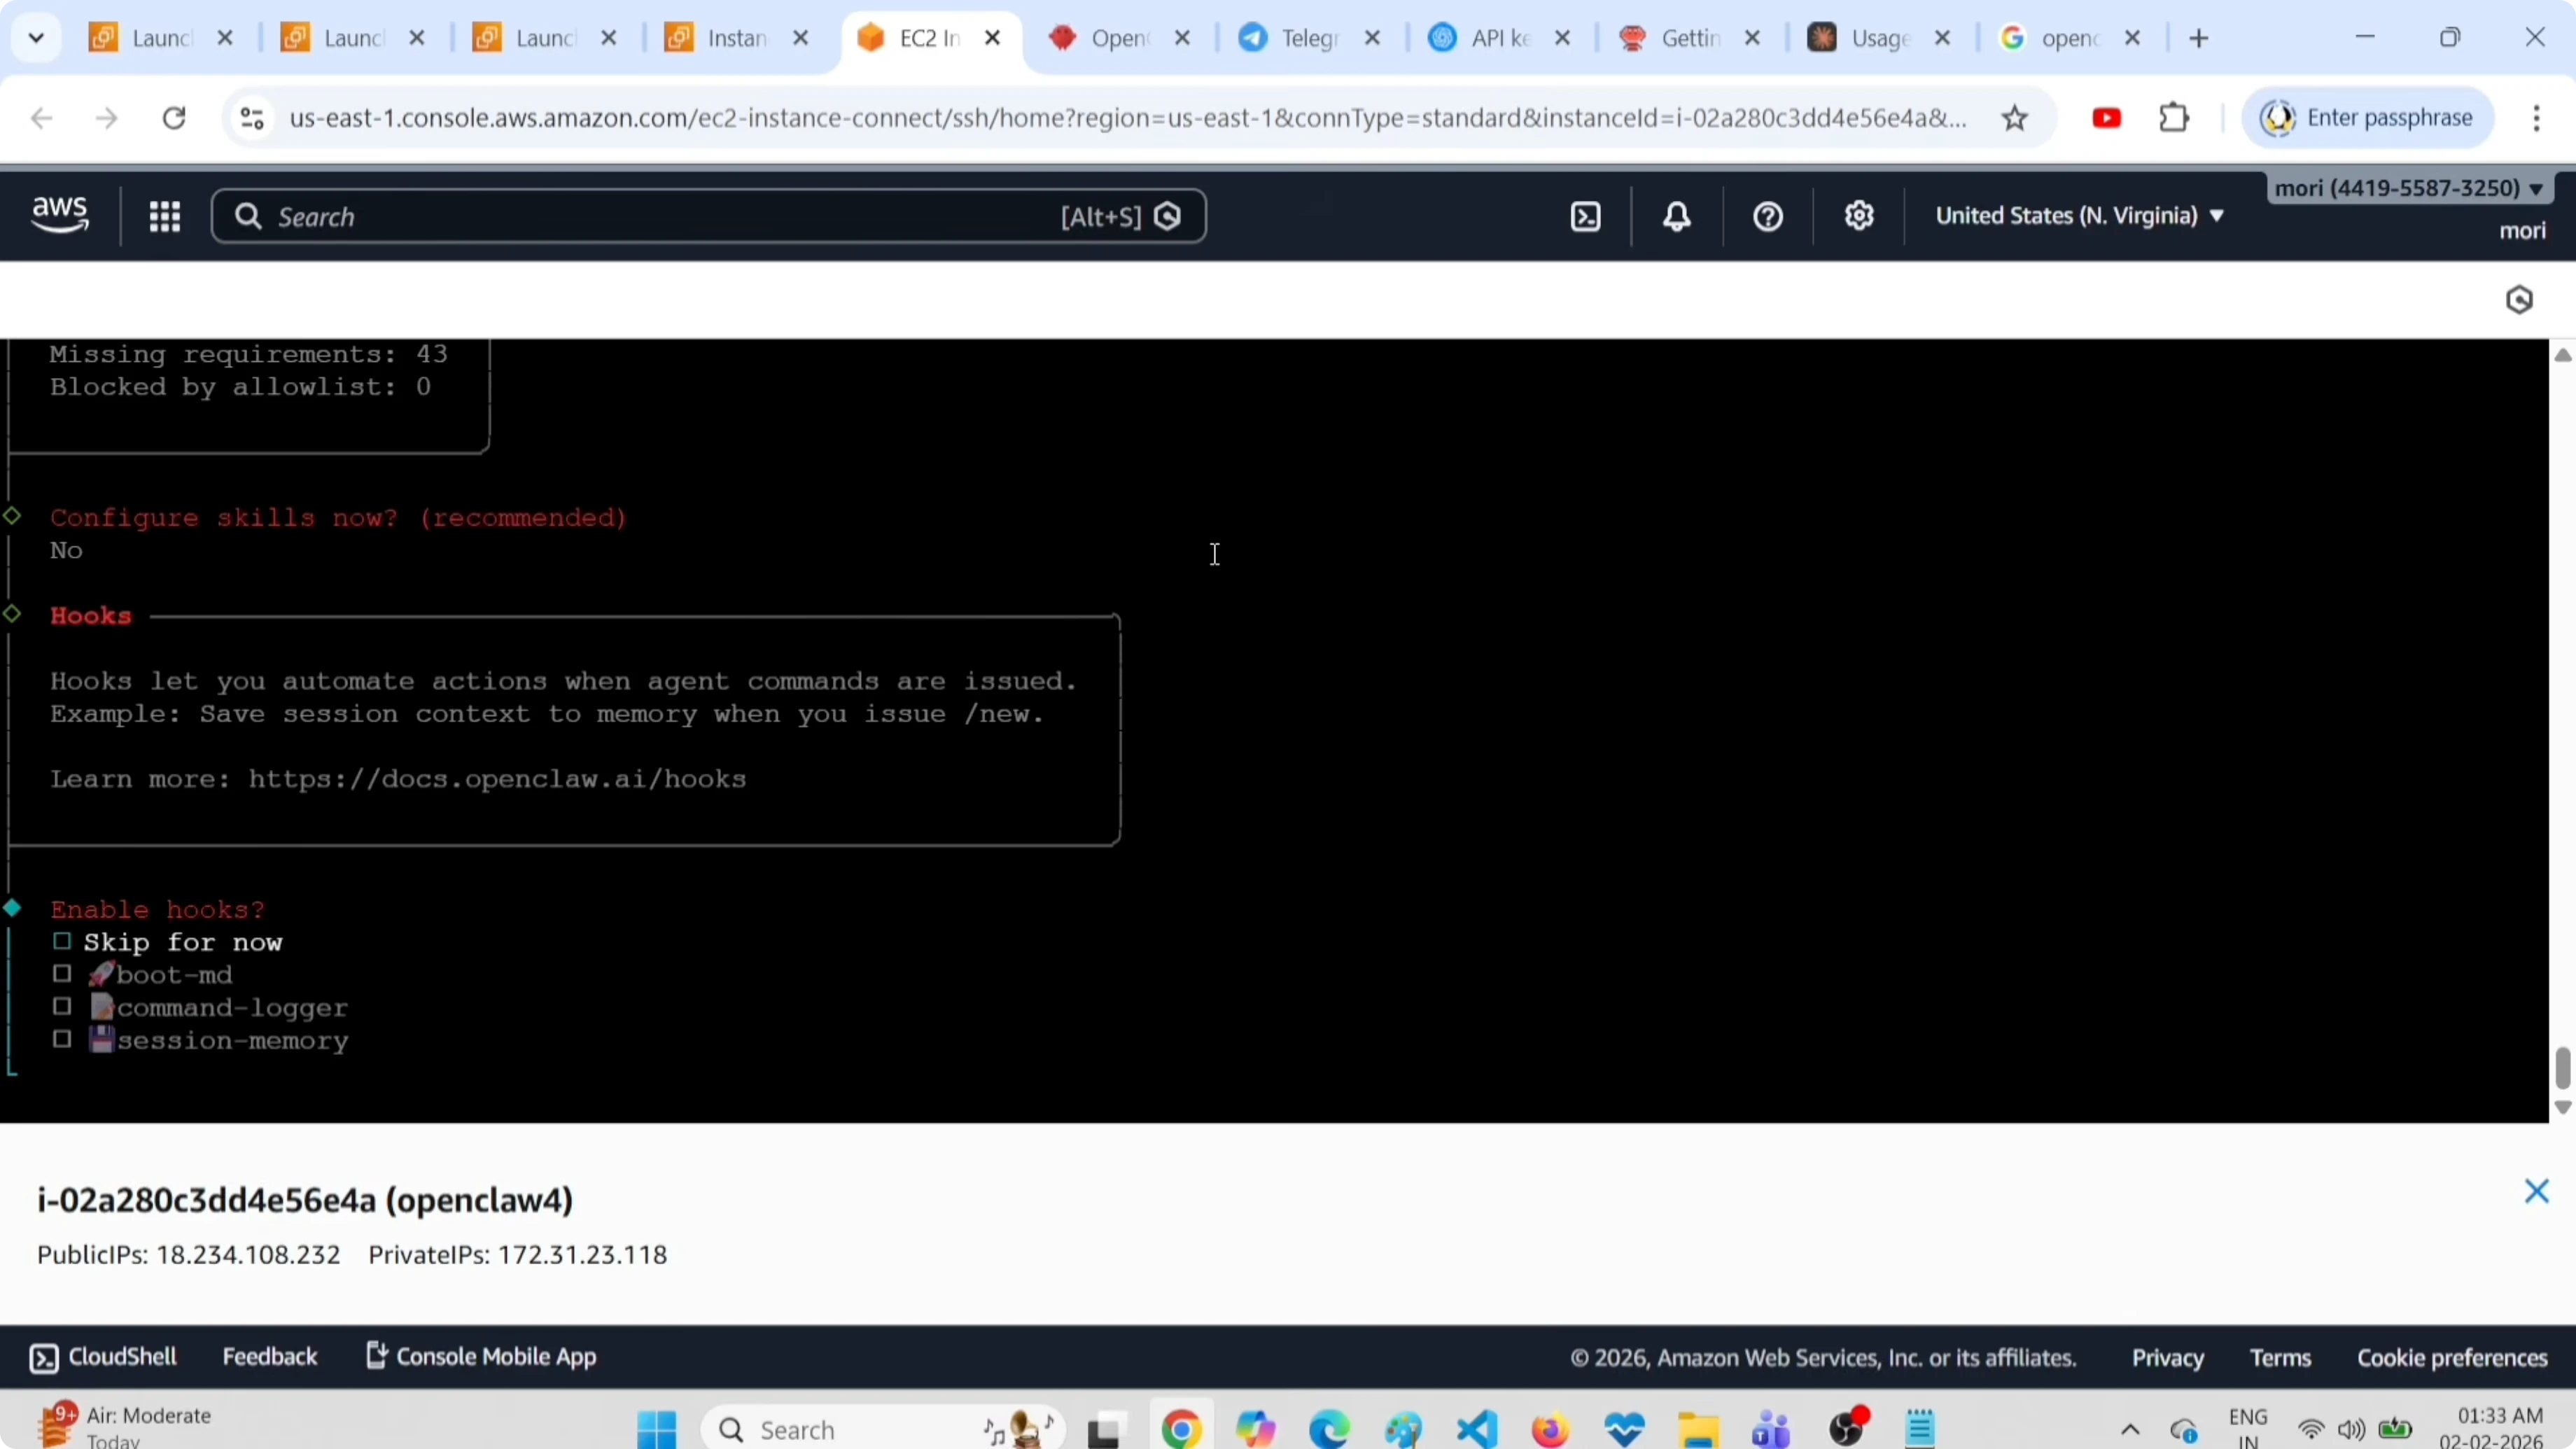
You will see the message that the OpenClaw gateway service is installed. Select Open in Web UI and confirm Yes, then open a new terminal to check status.
To access the terminal interface cleanly later, you can use these terminal UI instructions.
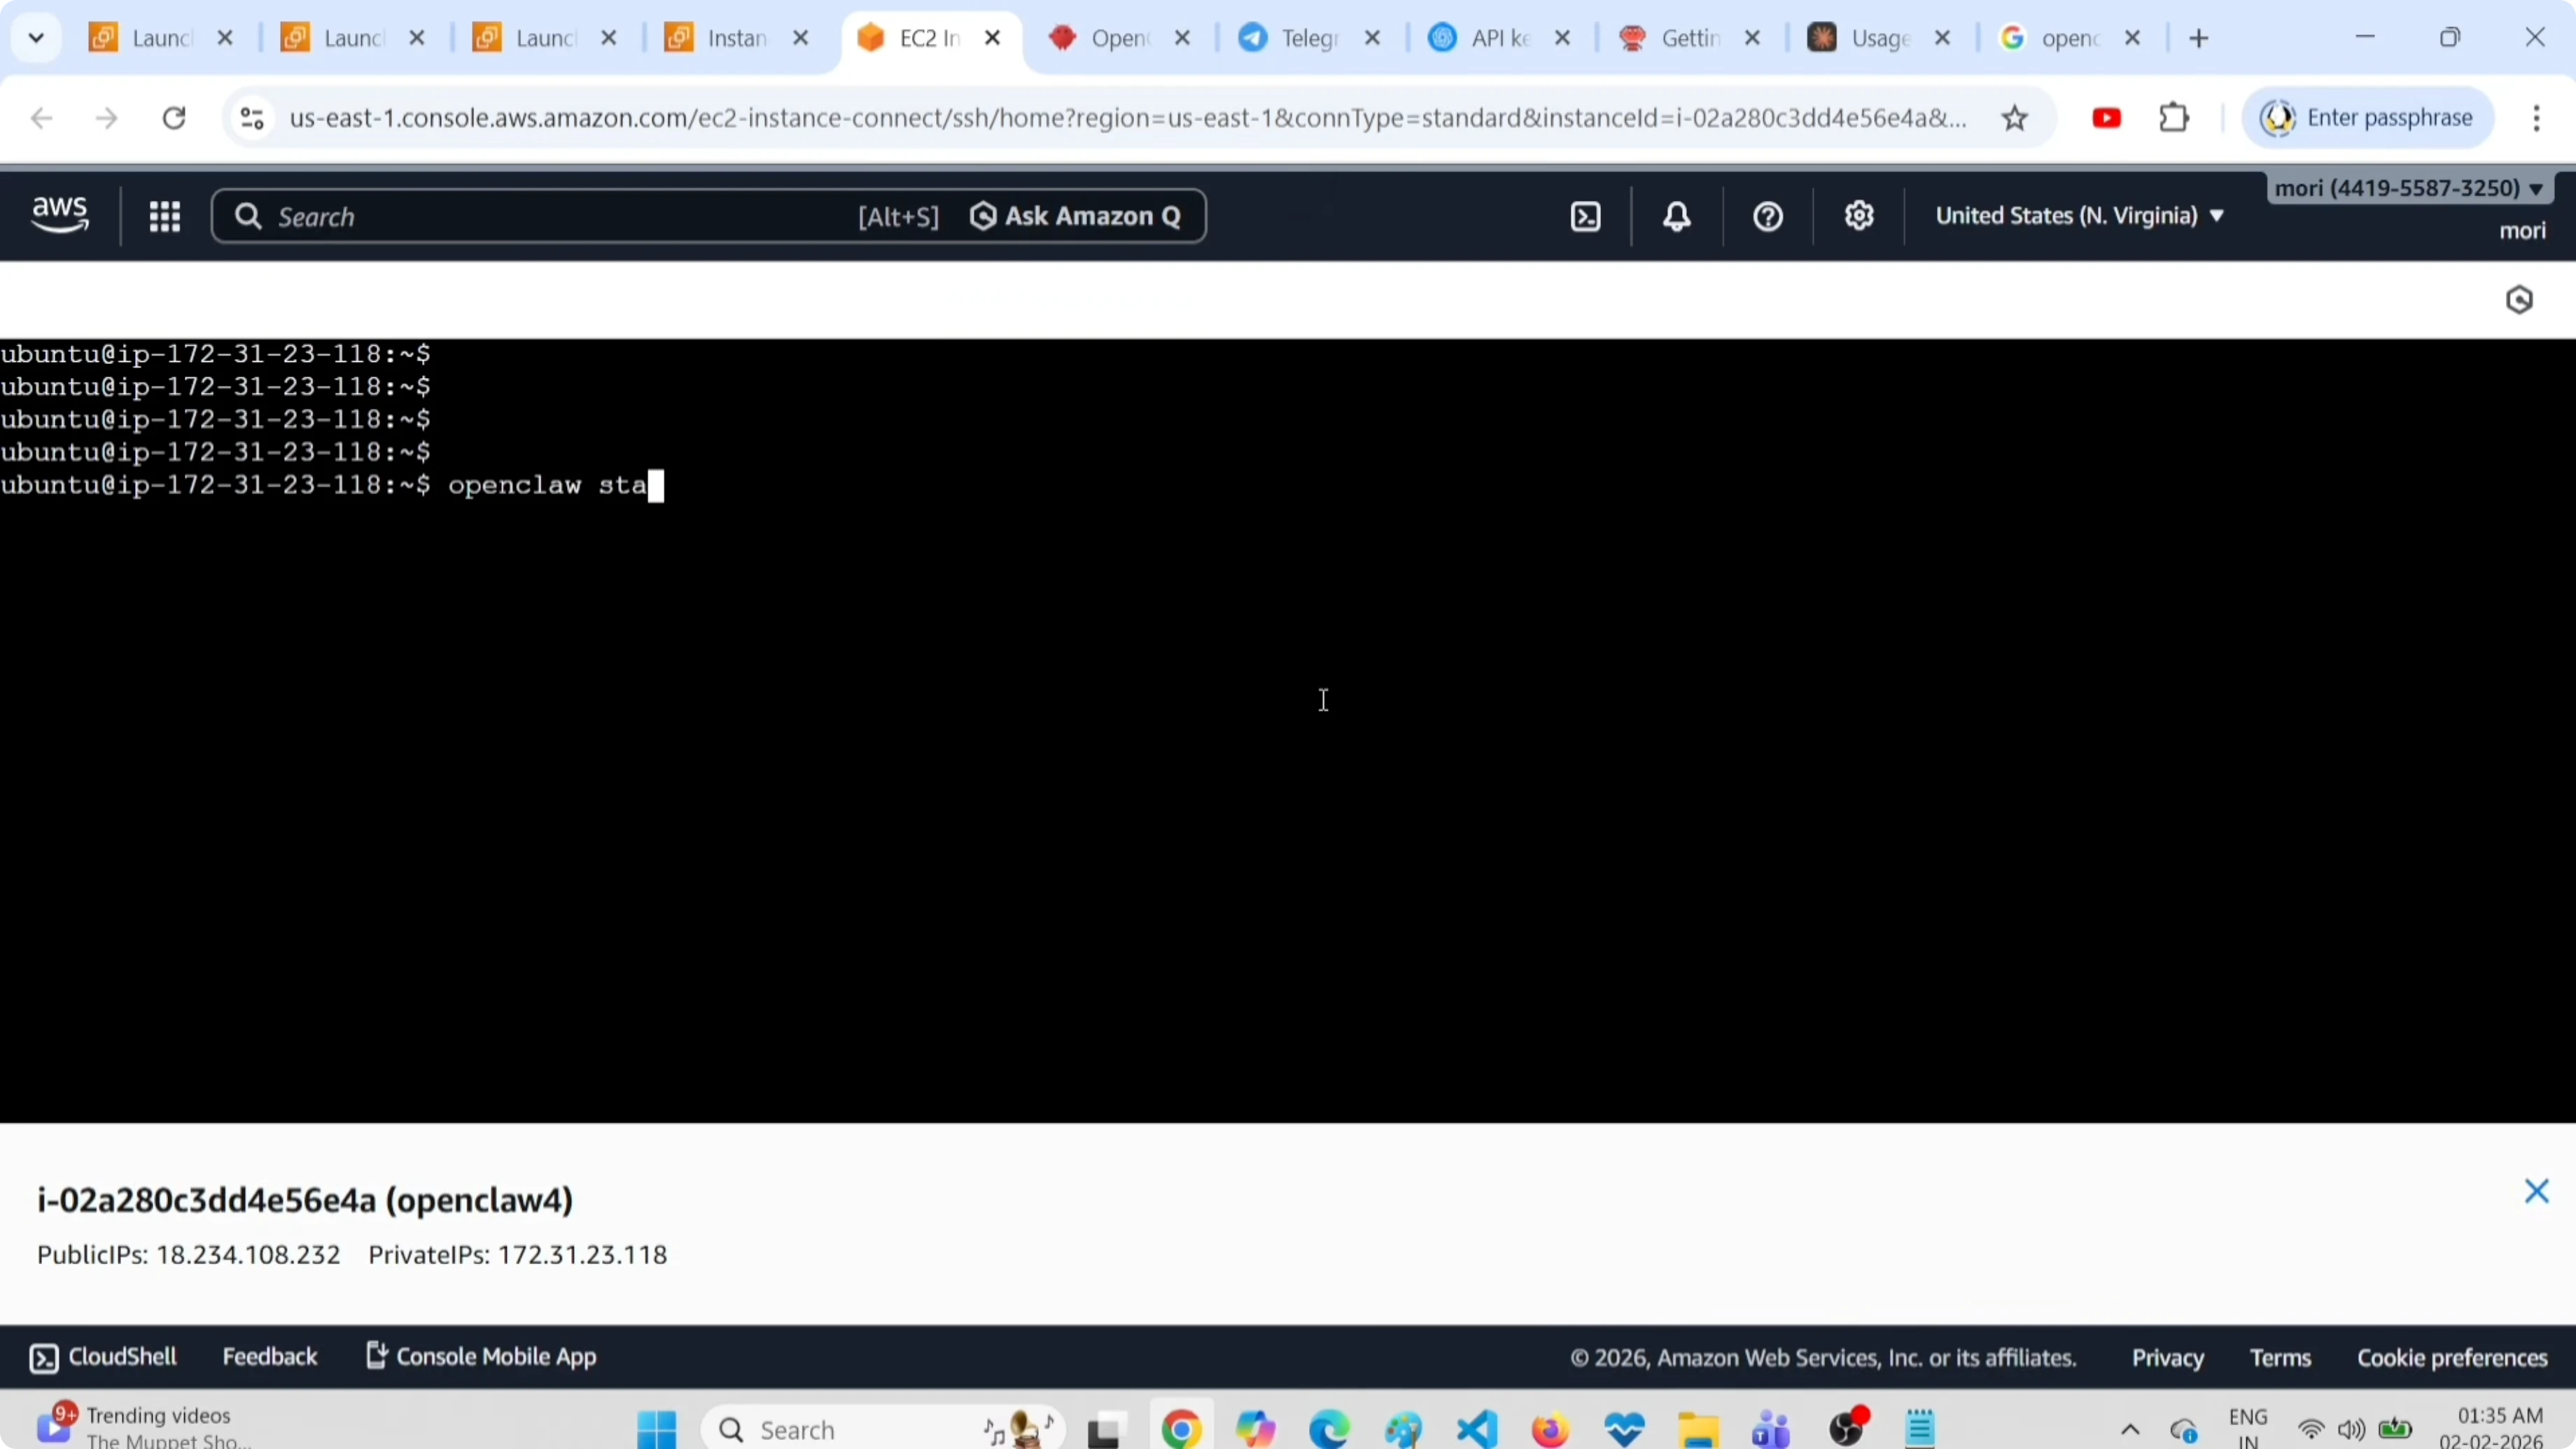
Verify the setup
Run this command to check status:
openclaw statusYou will see the channels configured, such as Telegram, and session information. Scroll up in the output to find the Web UI URL and confirm services are running.
To list configured models:
openclaw modelsPair OpenClaw with your Telegram bot
Open your Telegram bot and click Start. You will see your Telegram user ID and a pairing code.
Copy the pairing command shown in your terminal, paste it into the EC2 terminal, and append your bot token if required. Run the command and wait for the approved message.
Test and common error
Send a test message to the Telegram bot. If you get the error “You exceeded your current quota. Please check your plan and billing details,” add credits to your OpenAI account and try again.
If Docker components fail during setup on some systems, follow this guide to fix a broken Docker install in OpenClaw.
Prompts I tested
List all files in my home directory. I asked it to list files and it returned the expected output.
Create a new directory called test-project in my Documents folder. This created the folder correctly.
Create a file named config.txt with content hello in the directory test-project in my Documents folder. The file was created with the correct contents.
Check if I have Docker installed and tell me the version. If not installed, install Docker. These checks and installs worked for me.
Here are direct commands you can use for similar tasks:
ls -la ~
mkdir -p ~/Documents/test-project
echo "hello" > ~/Documents/test-project/config.txt
which docker || echo "Docker not found"
docker --version
On Ubuntu, installing Docker with apt:
sudo apt-get update
sudo apt-get install -y docker.io
sudo systemctl enable --now docker
List all currently running Docker containers. Then run an Nginx container named test-nginx-web-server on port 8080 and serve a custom index.html page showing Hello World. Make it available on localhost.
Create a local index file and run the container:
mkdir -p ~/webroot
echo "Hello World" > ~/webroot/index.html
docker run -d --name test-nginx-web-server -p 8080:80 -v ~/webroot:/usr/share/nginx/html:ro nginx:stable
curl http://localhost:8080
Change the message from Hello World to Hello World 111. This worked for me:
echo "Hello World 111" > ~/webroot/index.html
curl http://localhost:8080
Run a Python Flask app in a container. This created and ran the app for me:
mkdir -p ~/flaskapp
cat > ~/flaskapp/app.py << 'EOF'
from flask import Flask
app = Flask(__name__)
@app.route("/")
def home():
    return "Hello from Flask"
if __name__ == "__main__":
    app.run(host="0.0.0.0", port=5000)
EOF

cat > ~/flaskapp/Dockerfile << 'EOF'
FROM python:3.11-slim
WORKDIR /app
COPY app.py .
RUN pip install flask
EXPOSE 5000
CMD ["python", "app.py"]
EOF

cd ~/flaskapp
docker build -t flaskapp:latest .
docker run -d --name flaskapp -p 5000:5000 flaskapp:latest
curl http://localhost:5000
Find and list large files. Scan open ports on the server. These commands worked:
sudo du -ah / | sort -hr | head -n 20
sudo ss -tulpn
Install SQLite, create a database named test, create a table employees with columns name and age, insert a row, and print the data. This worked for me:
sudo apt-get update
sudo apt-get install -y sqlite3

sqlite3 ~/test.db << 'EOF'
CREATE TABLE IF NOT EXISTS employees (name TEXT, age INTEGER);
INSERT INTO employees (name, age) VALUES ('Alice', 30);
.headers on
.mode column
SELECT * FROM employees;
EOF
Add a new row and a new column designation, then query the data. These steps worked:
sqlite3 ~/test.db << 'EOF'
ALTER TABLE employees ADD COLUMN designation TEXT;
UPDATE employees SET designation = 'Engineer' WHERE name = 'Alice';
INSERT INTO employees (name, age, designation) VALUES ('Bob', 28, 'Analyst');
.headers on
.mode column
SELECT * FROM employees;
EOF
Delete all Docker containers. This removed all containers on my server:
docker rm -f $(docker ps -aq)If you need more help reaching the OpenClaw dashboards or terminals during testing, see this guide on accessing the AI dashboard and these terminal UI tips.
Final thoughts on Install OpenClaw with OpenAI GPT on AWS EC2 Free Tier?
This is how I set up OpenClaw with the OpenAI API and the GPT-4.1 mini model on an EC2 instance and connected it to Telegram. Keep an eye on model selection because bigger models can consume credits very fast. If you are focusing on cost, compare free and low-cost models using this OpenClaw setup reference and this free APIs and models list.
Subscribe to our newsletter
Get the latest updates and articles directly in your inbox.

Related Posts

8 Best Claude Code Plugins in 2026 (You Need to Know)
8 Best Claude Code Plugins in 2026 (You Need to Know)

7 Best Claude Code Skills (You Need to Know)
7 Best Claude Code Skills (You Need to Know)

Claude Code Desktop IDE Features (You Need to Know)
Claude Code Desktop IDE Features (You Need to Know)