Table Of Content
- Claude Code Desktop IDE Features (You Need to Know): setup
- Claude Code Desktop IDE Features (You Need to Know): building a page
- Plan and verification
- Claude Code Desktop IDE Features (You Need to Know): preview and QA
- Claude Code Desktop IDE Features (You Need to Know): use it from the web
- Claude Code Desktop IDE Features (You Need to Know): plugins and skills
- Claude Code Desktop IDE Features (You Need to Know): file views and comments
- Final thoughts

Claude Code Desktop IDE Features (You Need to Know)
Table Of Content
- Claude Code Desktop IDE Features (You Need to Know): setup
- Claude Code Desktop IDE Features (You Need to Know): building a page
- Plan and verification
- Claude Code Desktop IDE Features (You Need to Know): preview and QA
- Claude Code Desktop IDE Features (You Need to Know): use it from the web
- Claude Code Desktop IDE Features (You Need to Know): plugins and skills
- Claude Code Desktop IDE Features (You Need to Know): file views and comments
- Final thoughts
The Claude Code Desktop app has some massive upgrades that make it easier and faster to build apps. The app now includes a Claude Code tab where you can run code, preview your app, and manage terminal commands. It is basically an agent manager where you can work on projects without opening a local IDE or installing a separate CLI tool.
Everything happens directly inside the Claude Code Desktop app. A few weeks ago none of this was possible. Here is the exact workflow I use to build apps with Claude Code inside the desktop app.
| Plugin | What it adds | Typical use |
|---|---|---|
| Superpowers | Brainstorming, review, debugging, testing skills pack | Kick off plans and QA changes |
| Git | Repo status, diffs, branch operations | Commit and review changes |
| GitHub | Pull requests, issues, inline comments | Work with hosted repos |
| Docker | Build and run containers | Reproduce the app environment |
| REST Client | Call and test APIs | Verify endpoints during development |
| SQLite | Inspect local database files | Run queries while building features |
| Browser | Fetch and read web pages | Bring in reference docs as context |
| Terminal | Run shell commands in-session | Install dependencies and run scripts |
Claude Code Desktop IDE Features (You Need to Know): setup
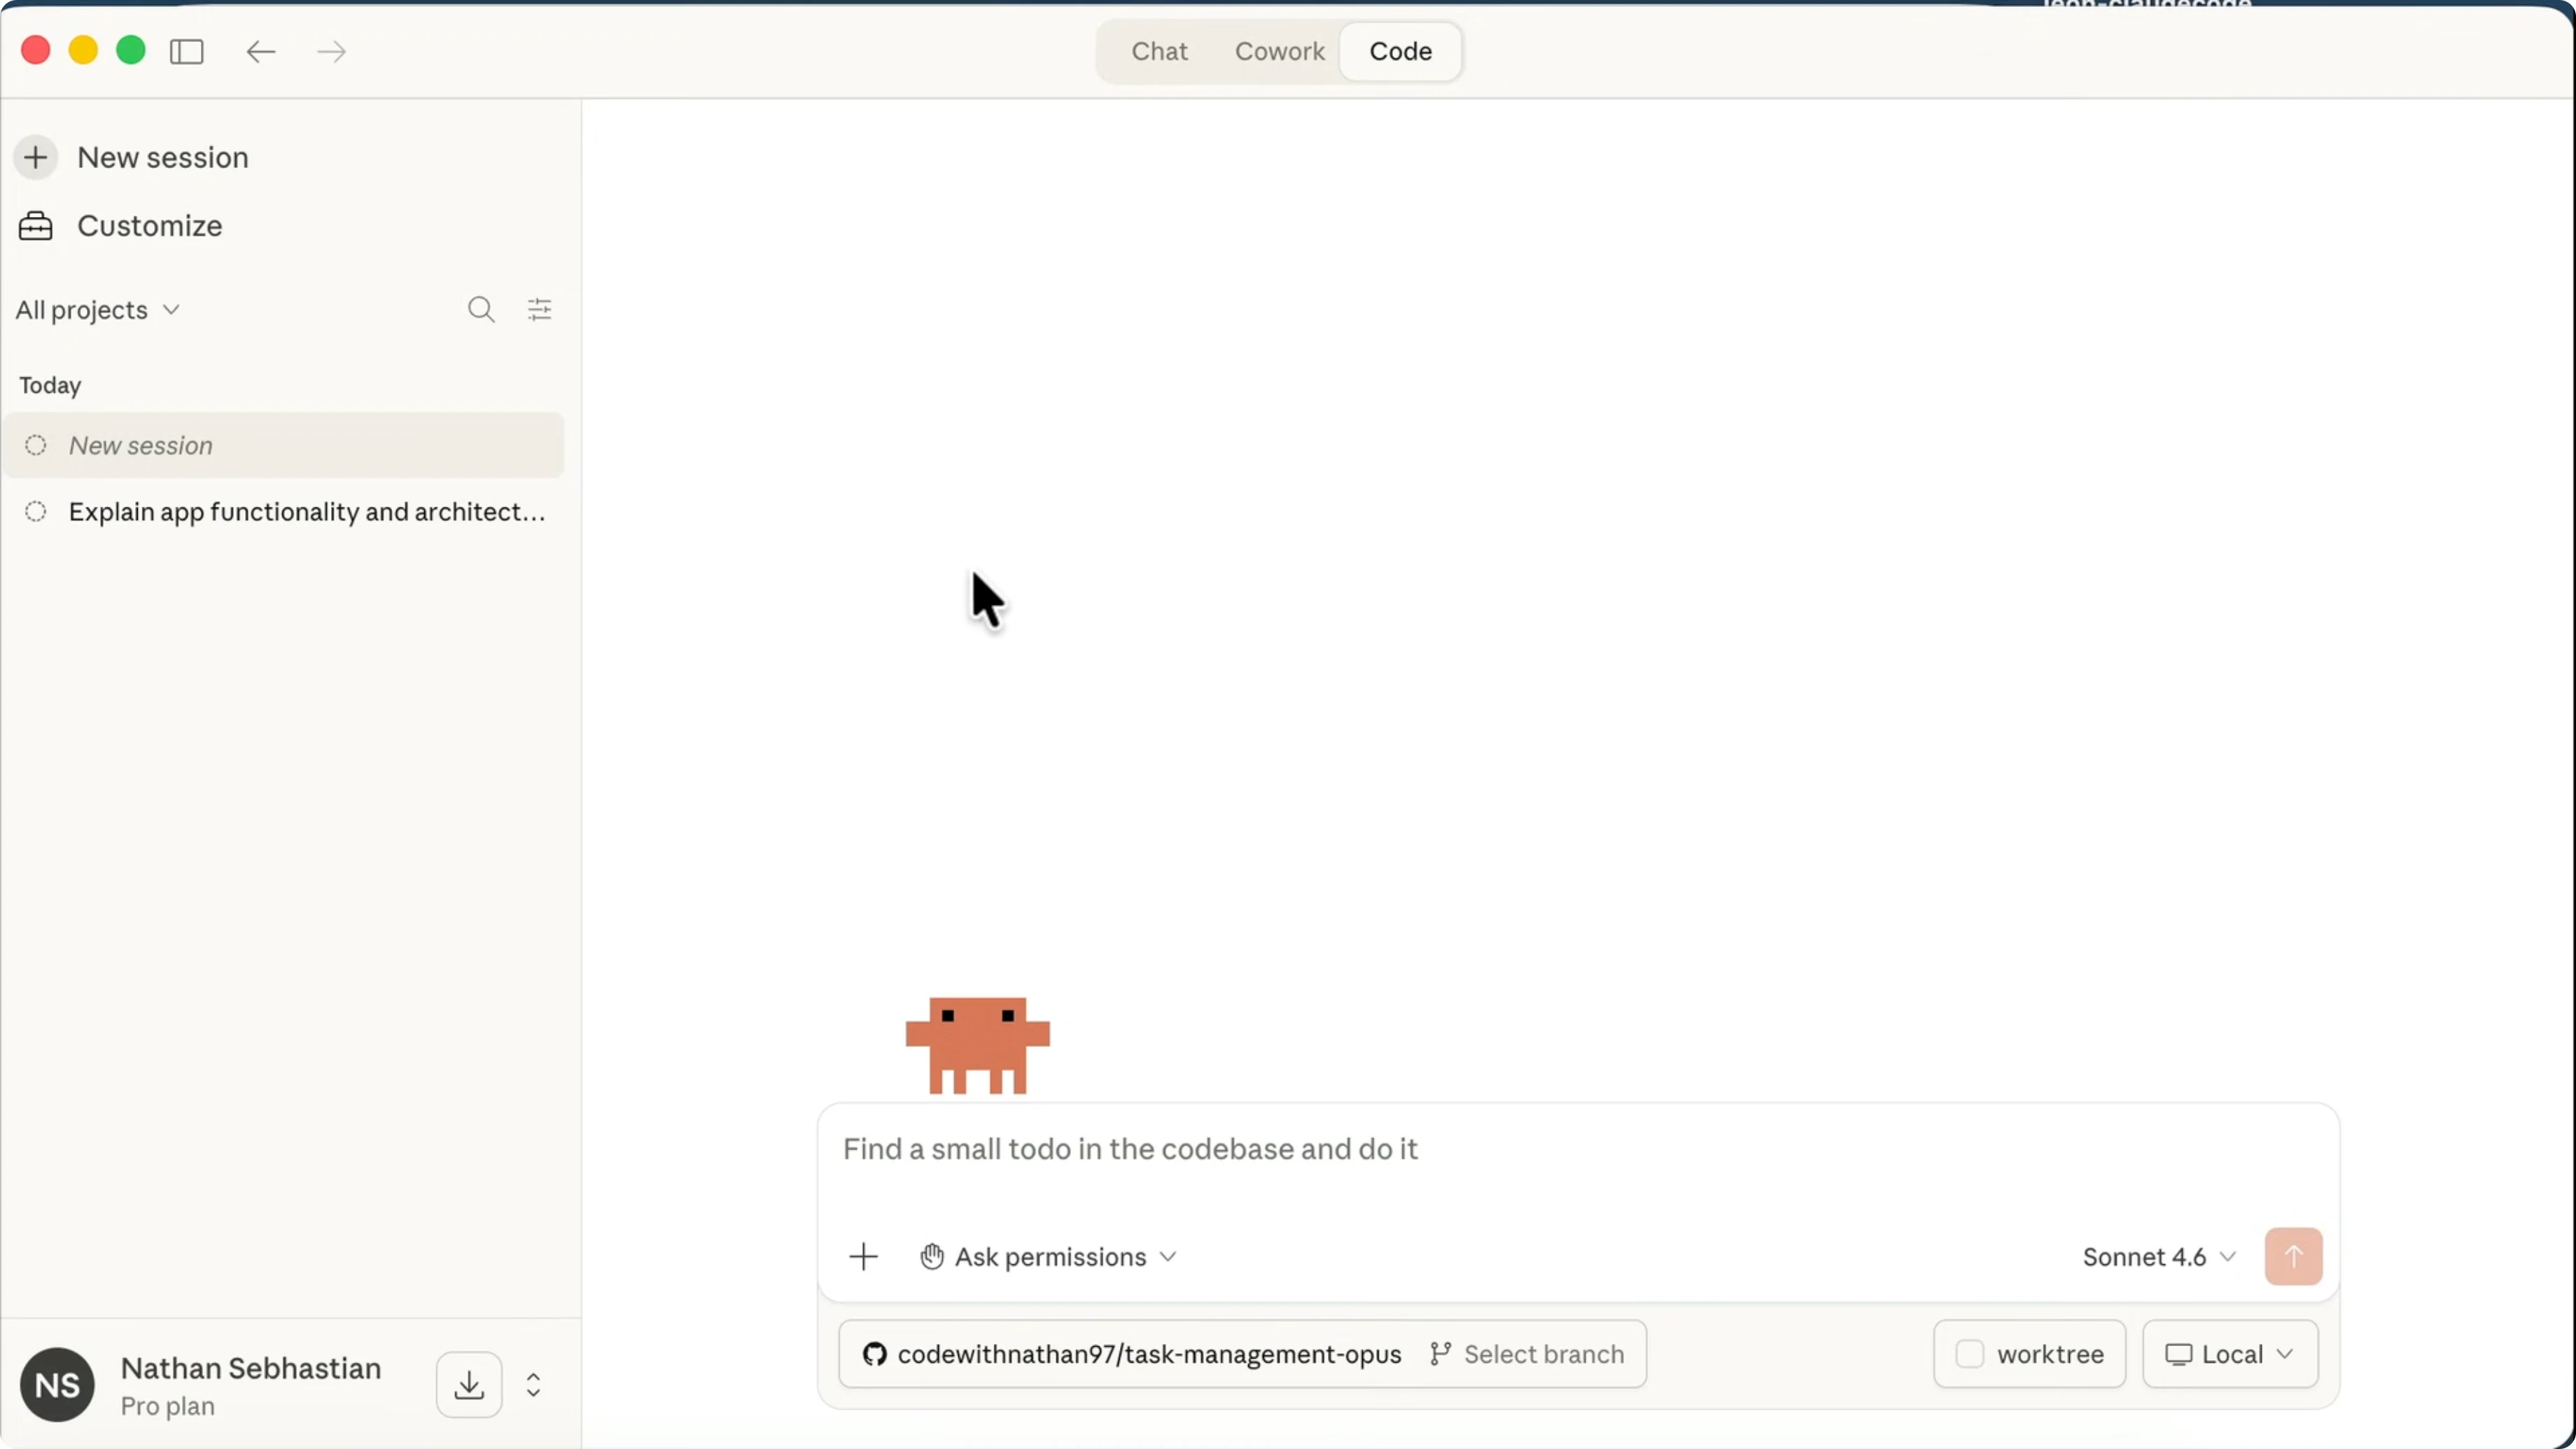
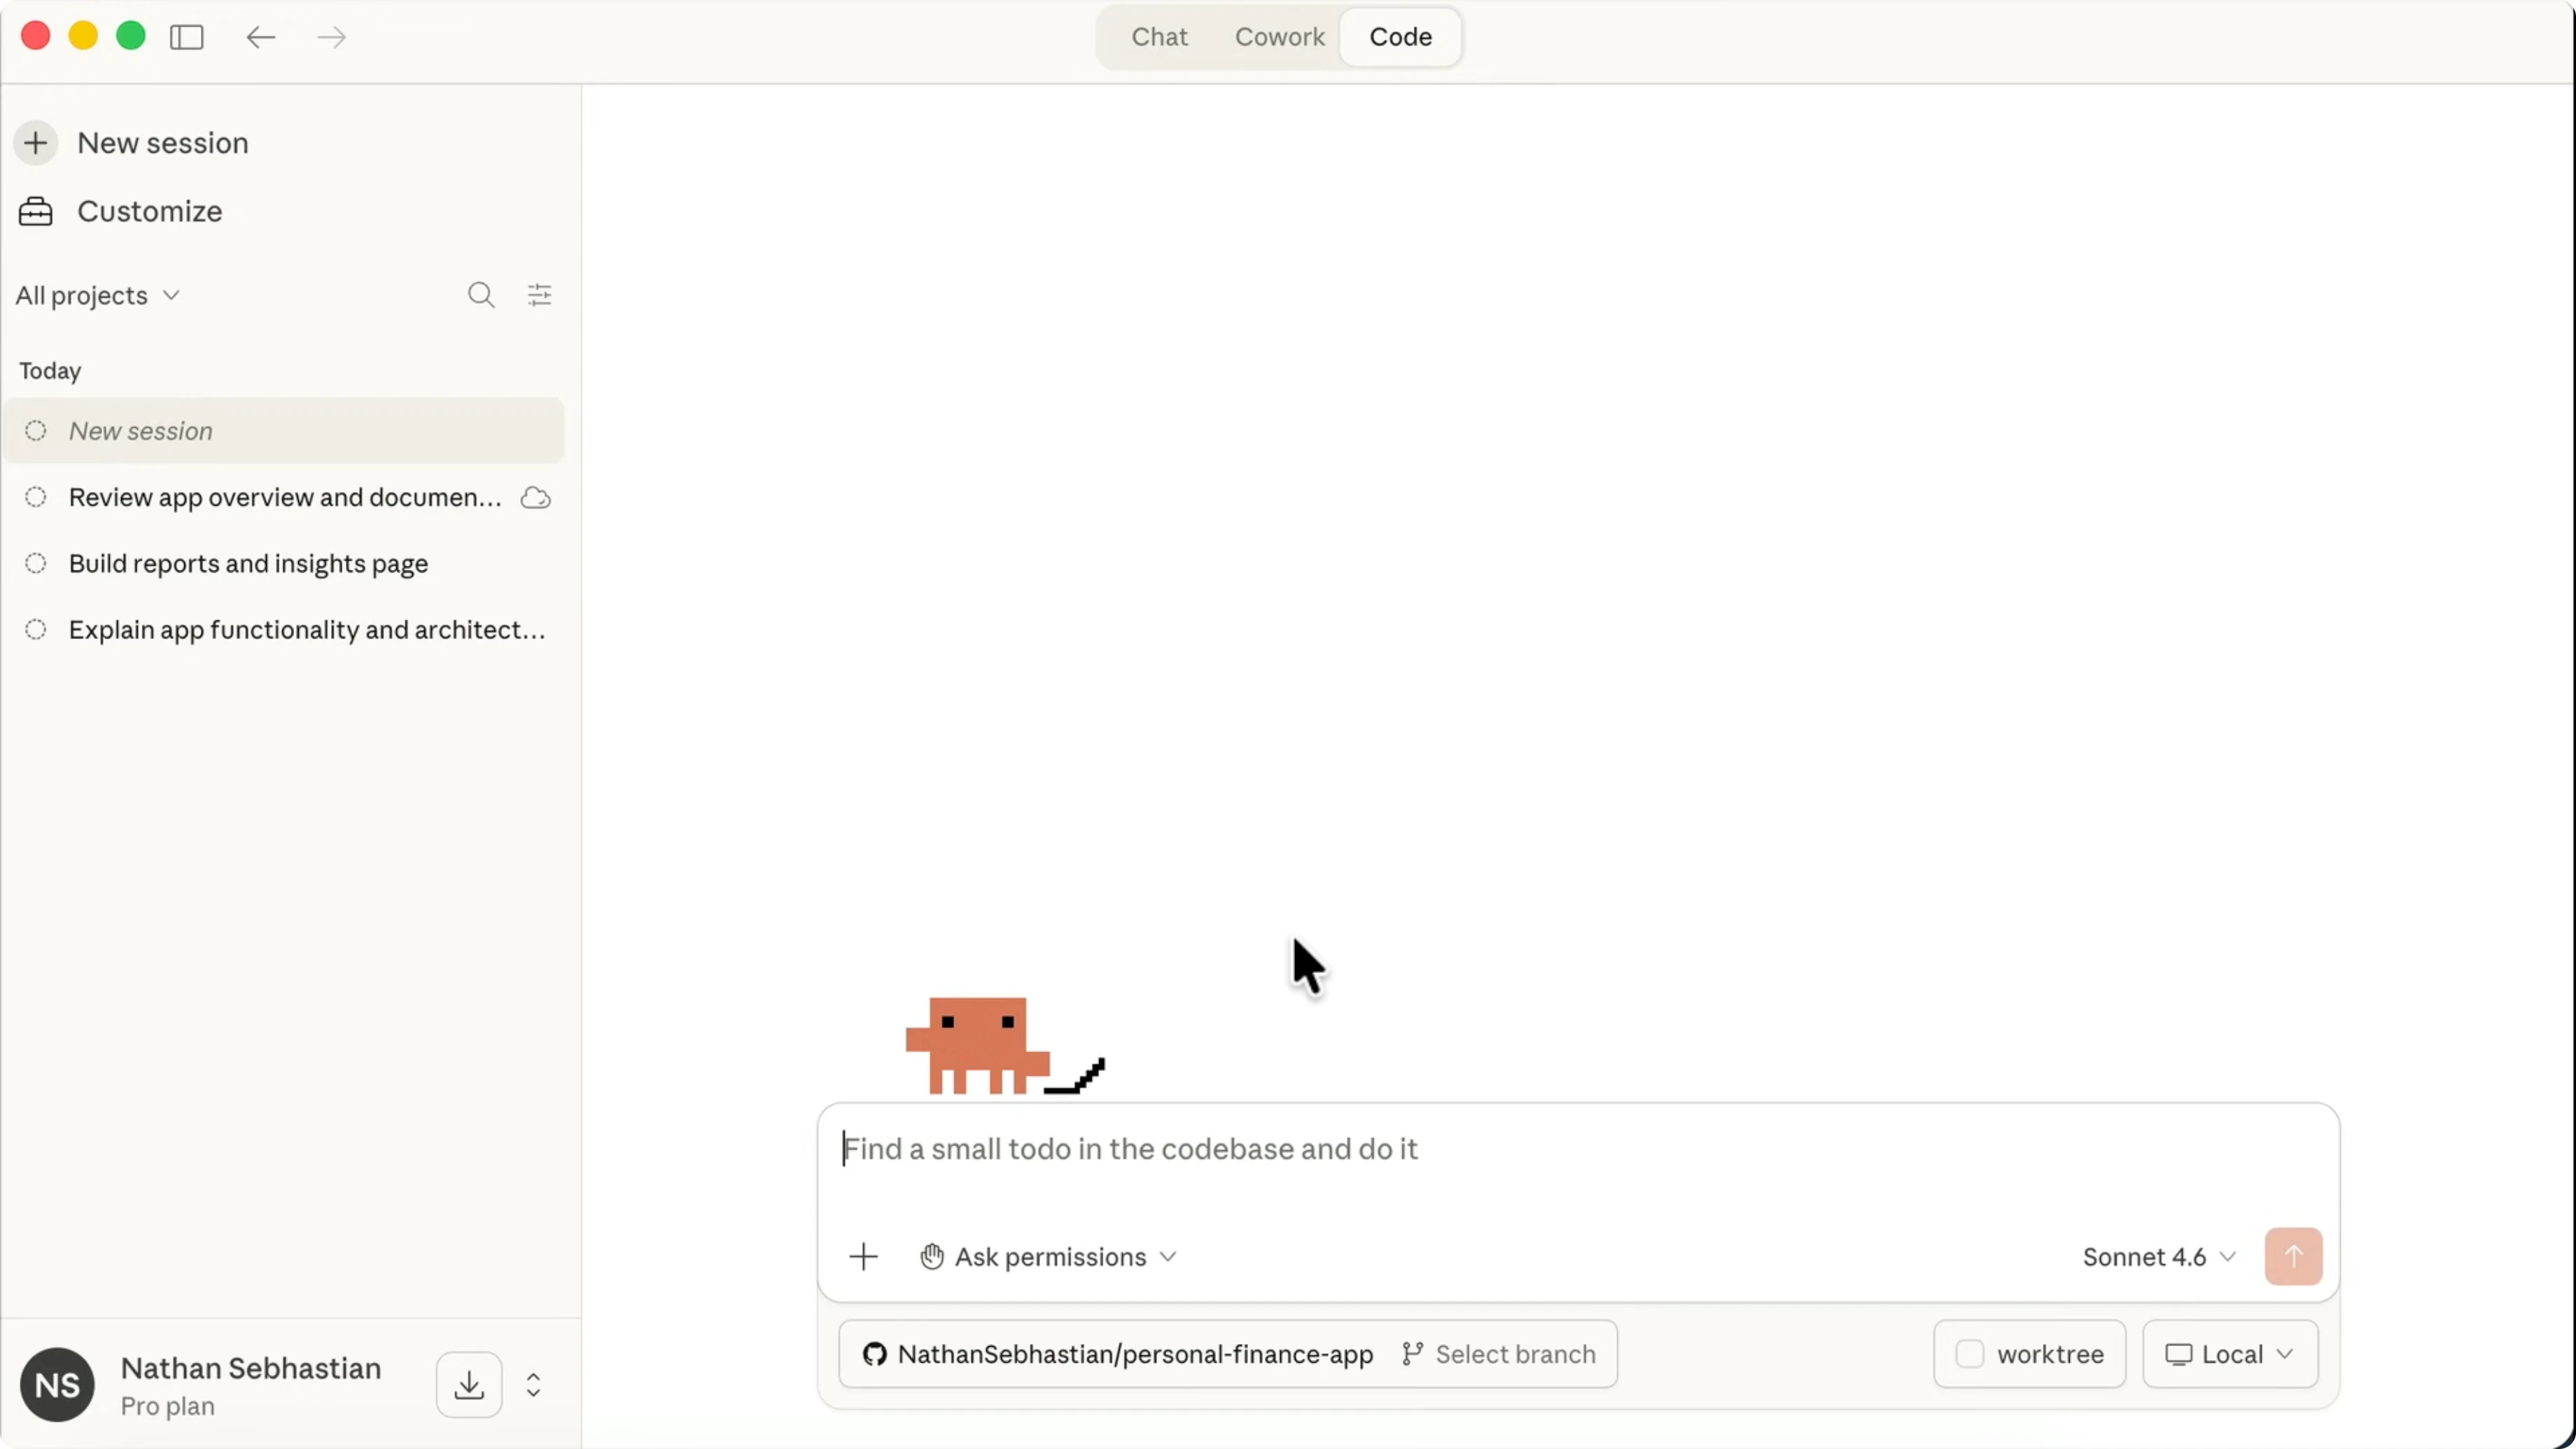
To get started, install the Claude Code Desktop app and log in to your account. In the desktop app, click the Code tab at the top. Keep in mind that you need to have an active subscription on your account to see this option.
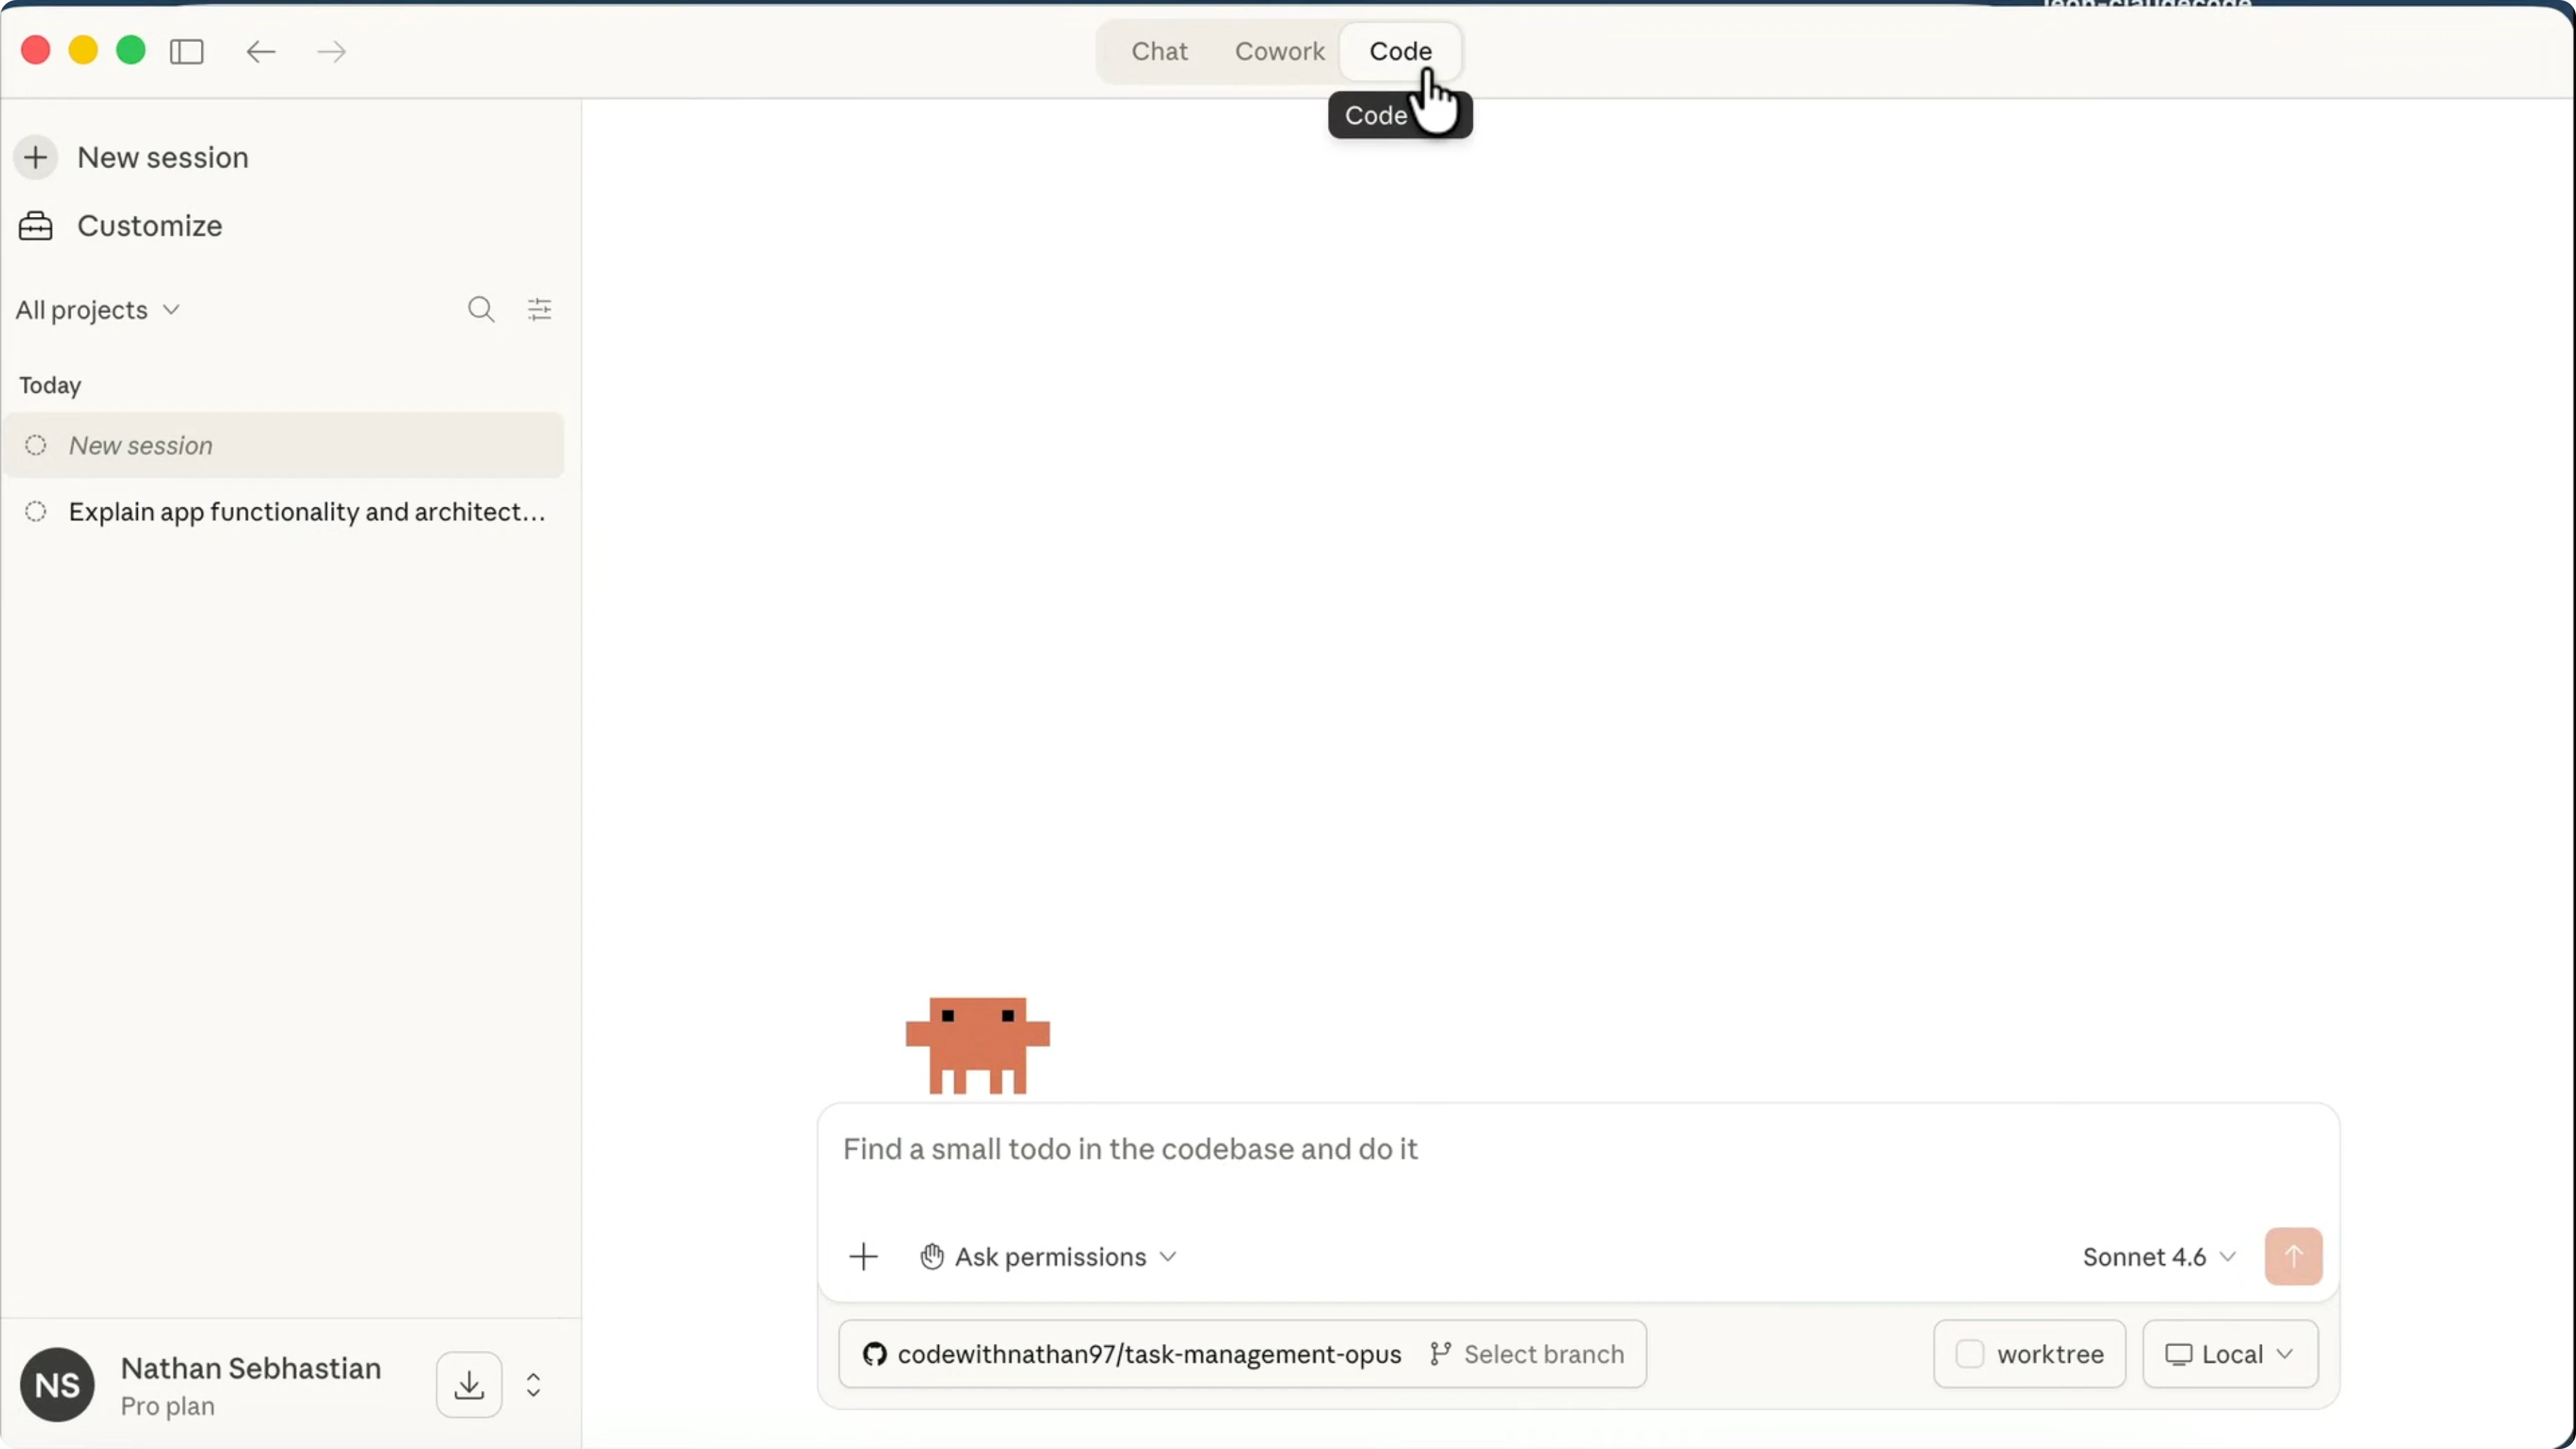
Here is the Claude Code Desktop interface. You can view your previous sessions on the left and then select a project folder to work on. If your project is stored in GitHub, you can also select the branch to work on.
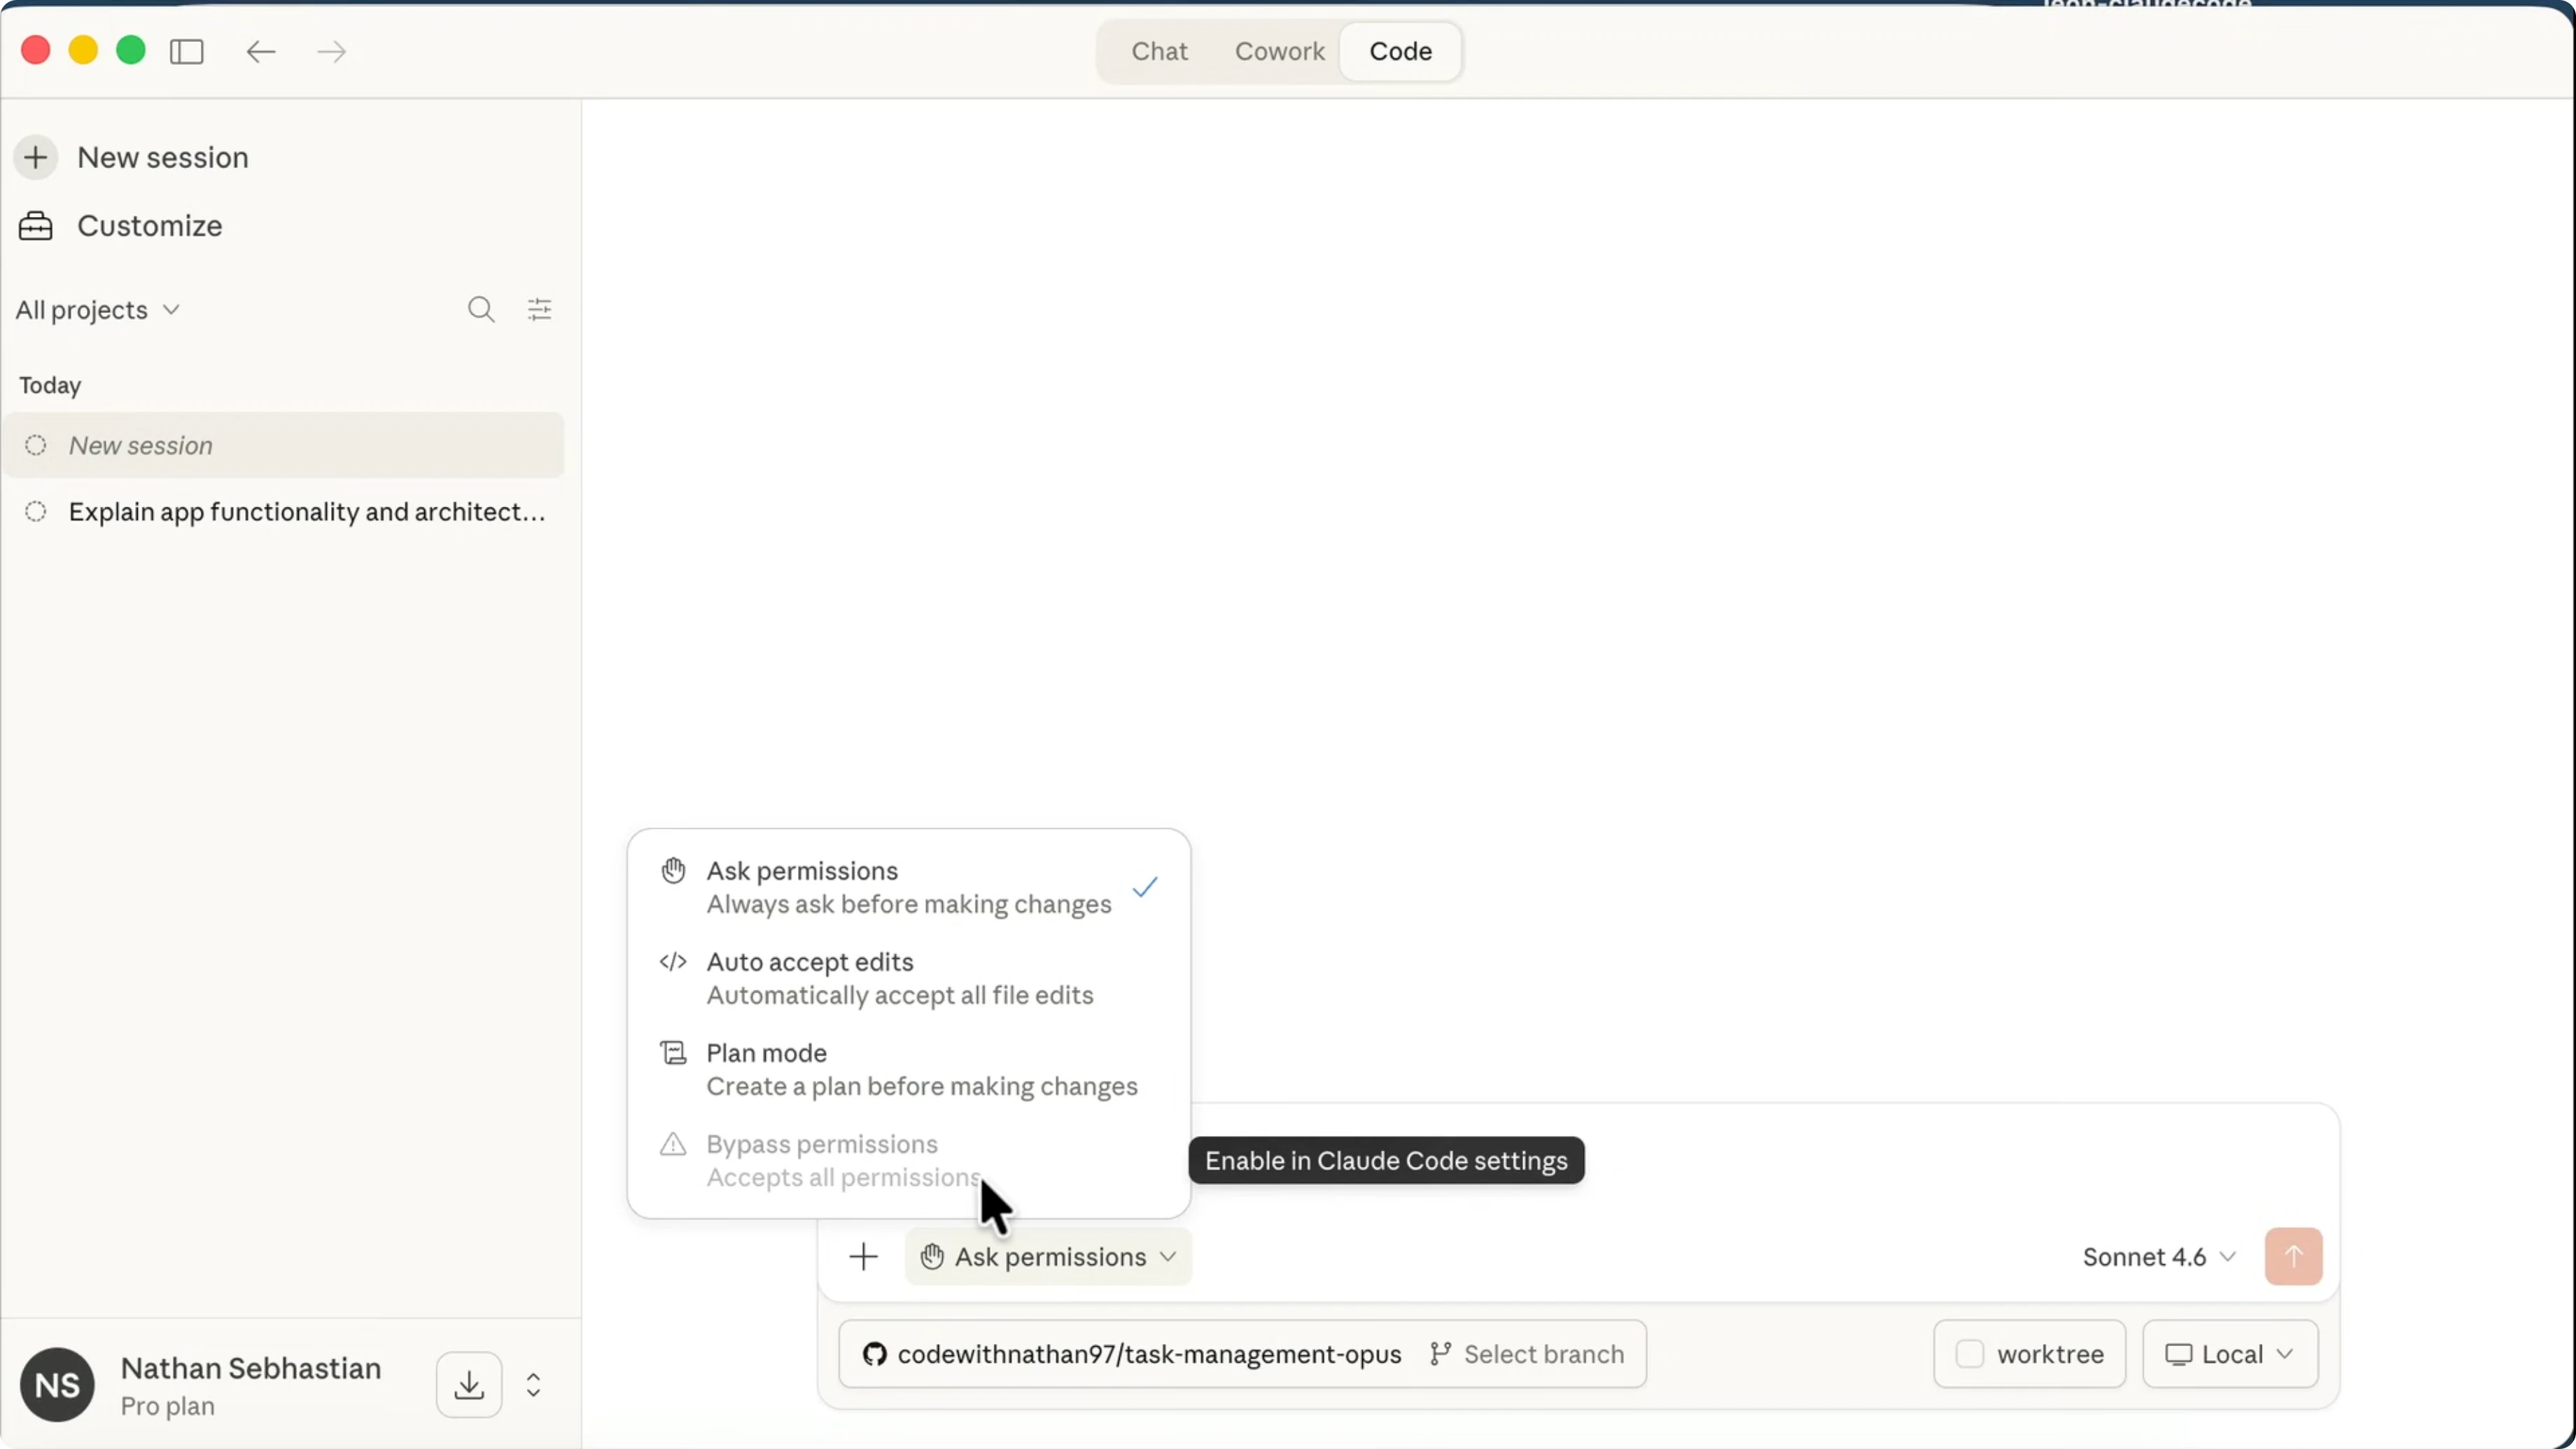
There is a permissions option where you can select Auto accept edits, Plan mode, or Bypass permissions. This option is disabled by default. To enable it, go to Settings, select Claude Code, and enable Bypass permissions mode.
There is also a Preview option which allows Claude to run the development server and open a live preview. Once done, close Settings and start working on your project. You can treat this like a full desktop workspace that keeps your coding loop tight.
If you want help organizing sessions and task flow, check out this guide on managing tasks in Claude Code Desktop. It pairs nicely with Plan mode and session history. You can keep your iterations focused.
Claude Code Desktop IDE Features (You Need to Know): building a page
Here is the app I am working with. It is a personal finance app built using Next.js and other tech. If we open the project docs, we can see the full tech stack.
It uses Next.js and TypeScript, Tailwind for styling, Drizzle ORM, and an SQLite database. You can run the app using the dev script and open it in the browser.
npm install
npm run dev
There is a dashboard and some charts. Several pages are active, and some are still in progress. I am going to use Claude to build the Reports page and see how it goes.
Back in Claude Code, I tell it I want to build the Reports and Insights page and ask it to suggest features to add to the page. I switch to Plan mode so that Claude can suggest a comprehensive action plan. For the model, I use Sonnet, because Opus is overkill for a simple app like this.
There is an option to run the session in a worktree if you want to work on multiple tasks at once. You can select whether to run the session locally or in the cloud using Claude Code Web. You can also add SSH connection and remote control.
Run the prompt and Claude will first scan the project. Once it has a good understanding of the project, it asks a few questions to get a better picture of what we want to build. For example, it asks which charts I want on the Reports page.
I select monthly income, spending by category, and budget versus actual spending. For insights, I choose spending categories and biggest transactions. A date range filter is a yes.
There is a brief message saying it failed to ask about feature preferences, but my answers go through and the agent moves on to design the implementation plan. That is fine here. Claude continues with a working plan.
Plan and verification
Claude generates an implementation plan in Markdown. It contains context, features to build, and files to create or replace. It also outlines the architecture and data queries.
It knows we are using a database and writes functions to query the data. Claude will then verify its own work by running the development server, confirming the features work, and running the build command. If there is anything you want to change, you can tell Claude from the chat.
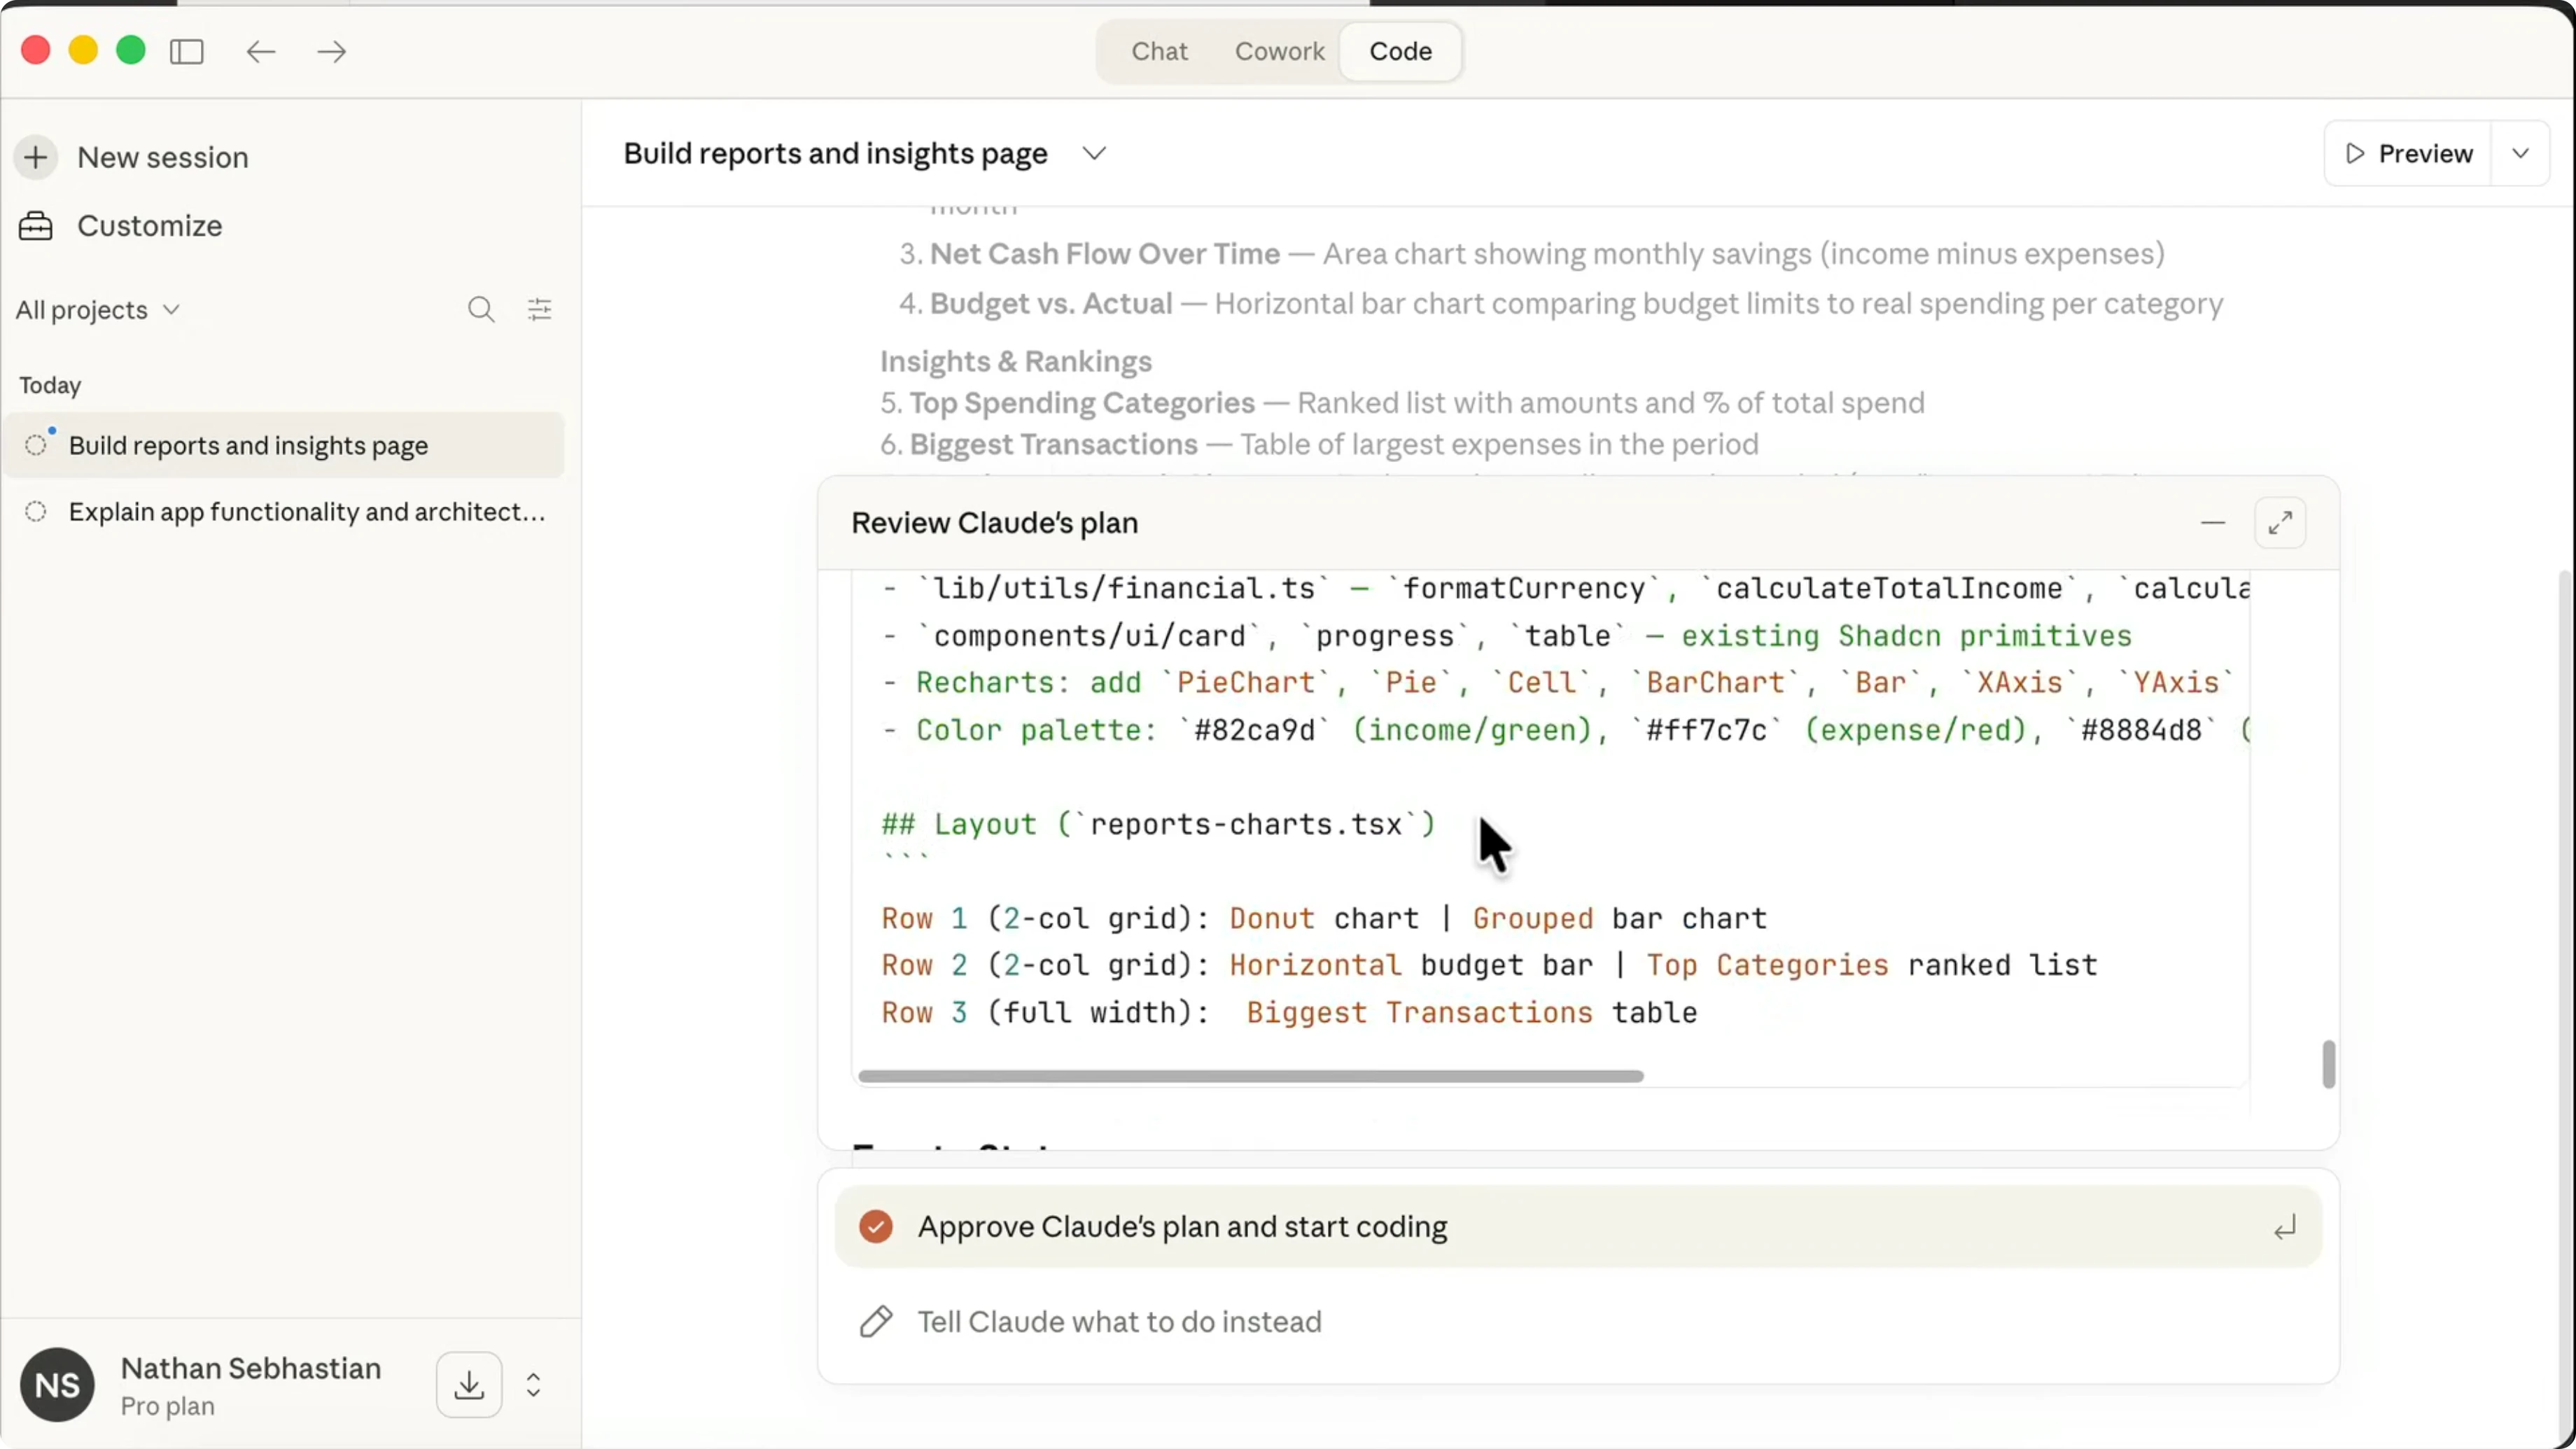
Approve the plan to begin execution. Claude exits Plan mode and starts making changes using the plan as the basis. It reads and edits files, and you can click entries to see more detail.
You can view the plan at any time by clicking the plan icon. That opens the Markdown plan file. You can also open the project files using an IDE from the bottom right.
I have VS Code and Cursor installed, so I can open the project there. Back in Claude Code, the app may ask for approval to edit a component. Allow for the session or switch permissions to Auto accept edits.
If you want it to run terminal commands or use skills without asking, you can enable Bypass permissions. This option is powerful but risky because it can edit and delete files without asking. The session window shows black borders to highlight that Claude is running autonomously.
Claude Code Desktop IDE Features (You Need to Know): preview and QA
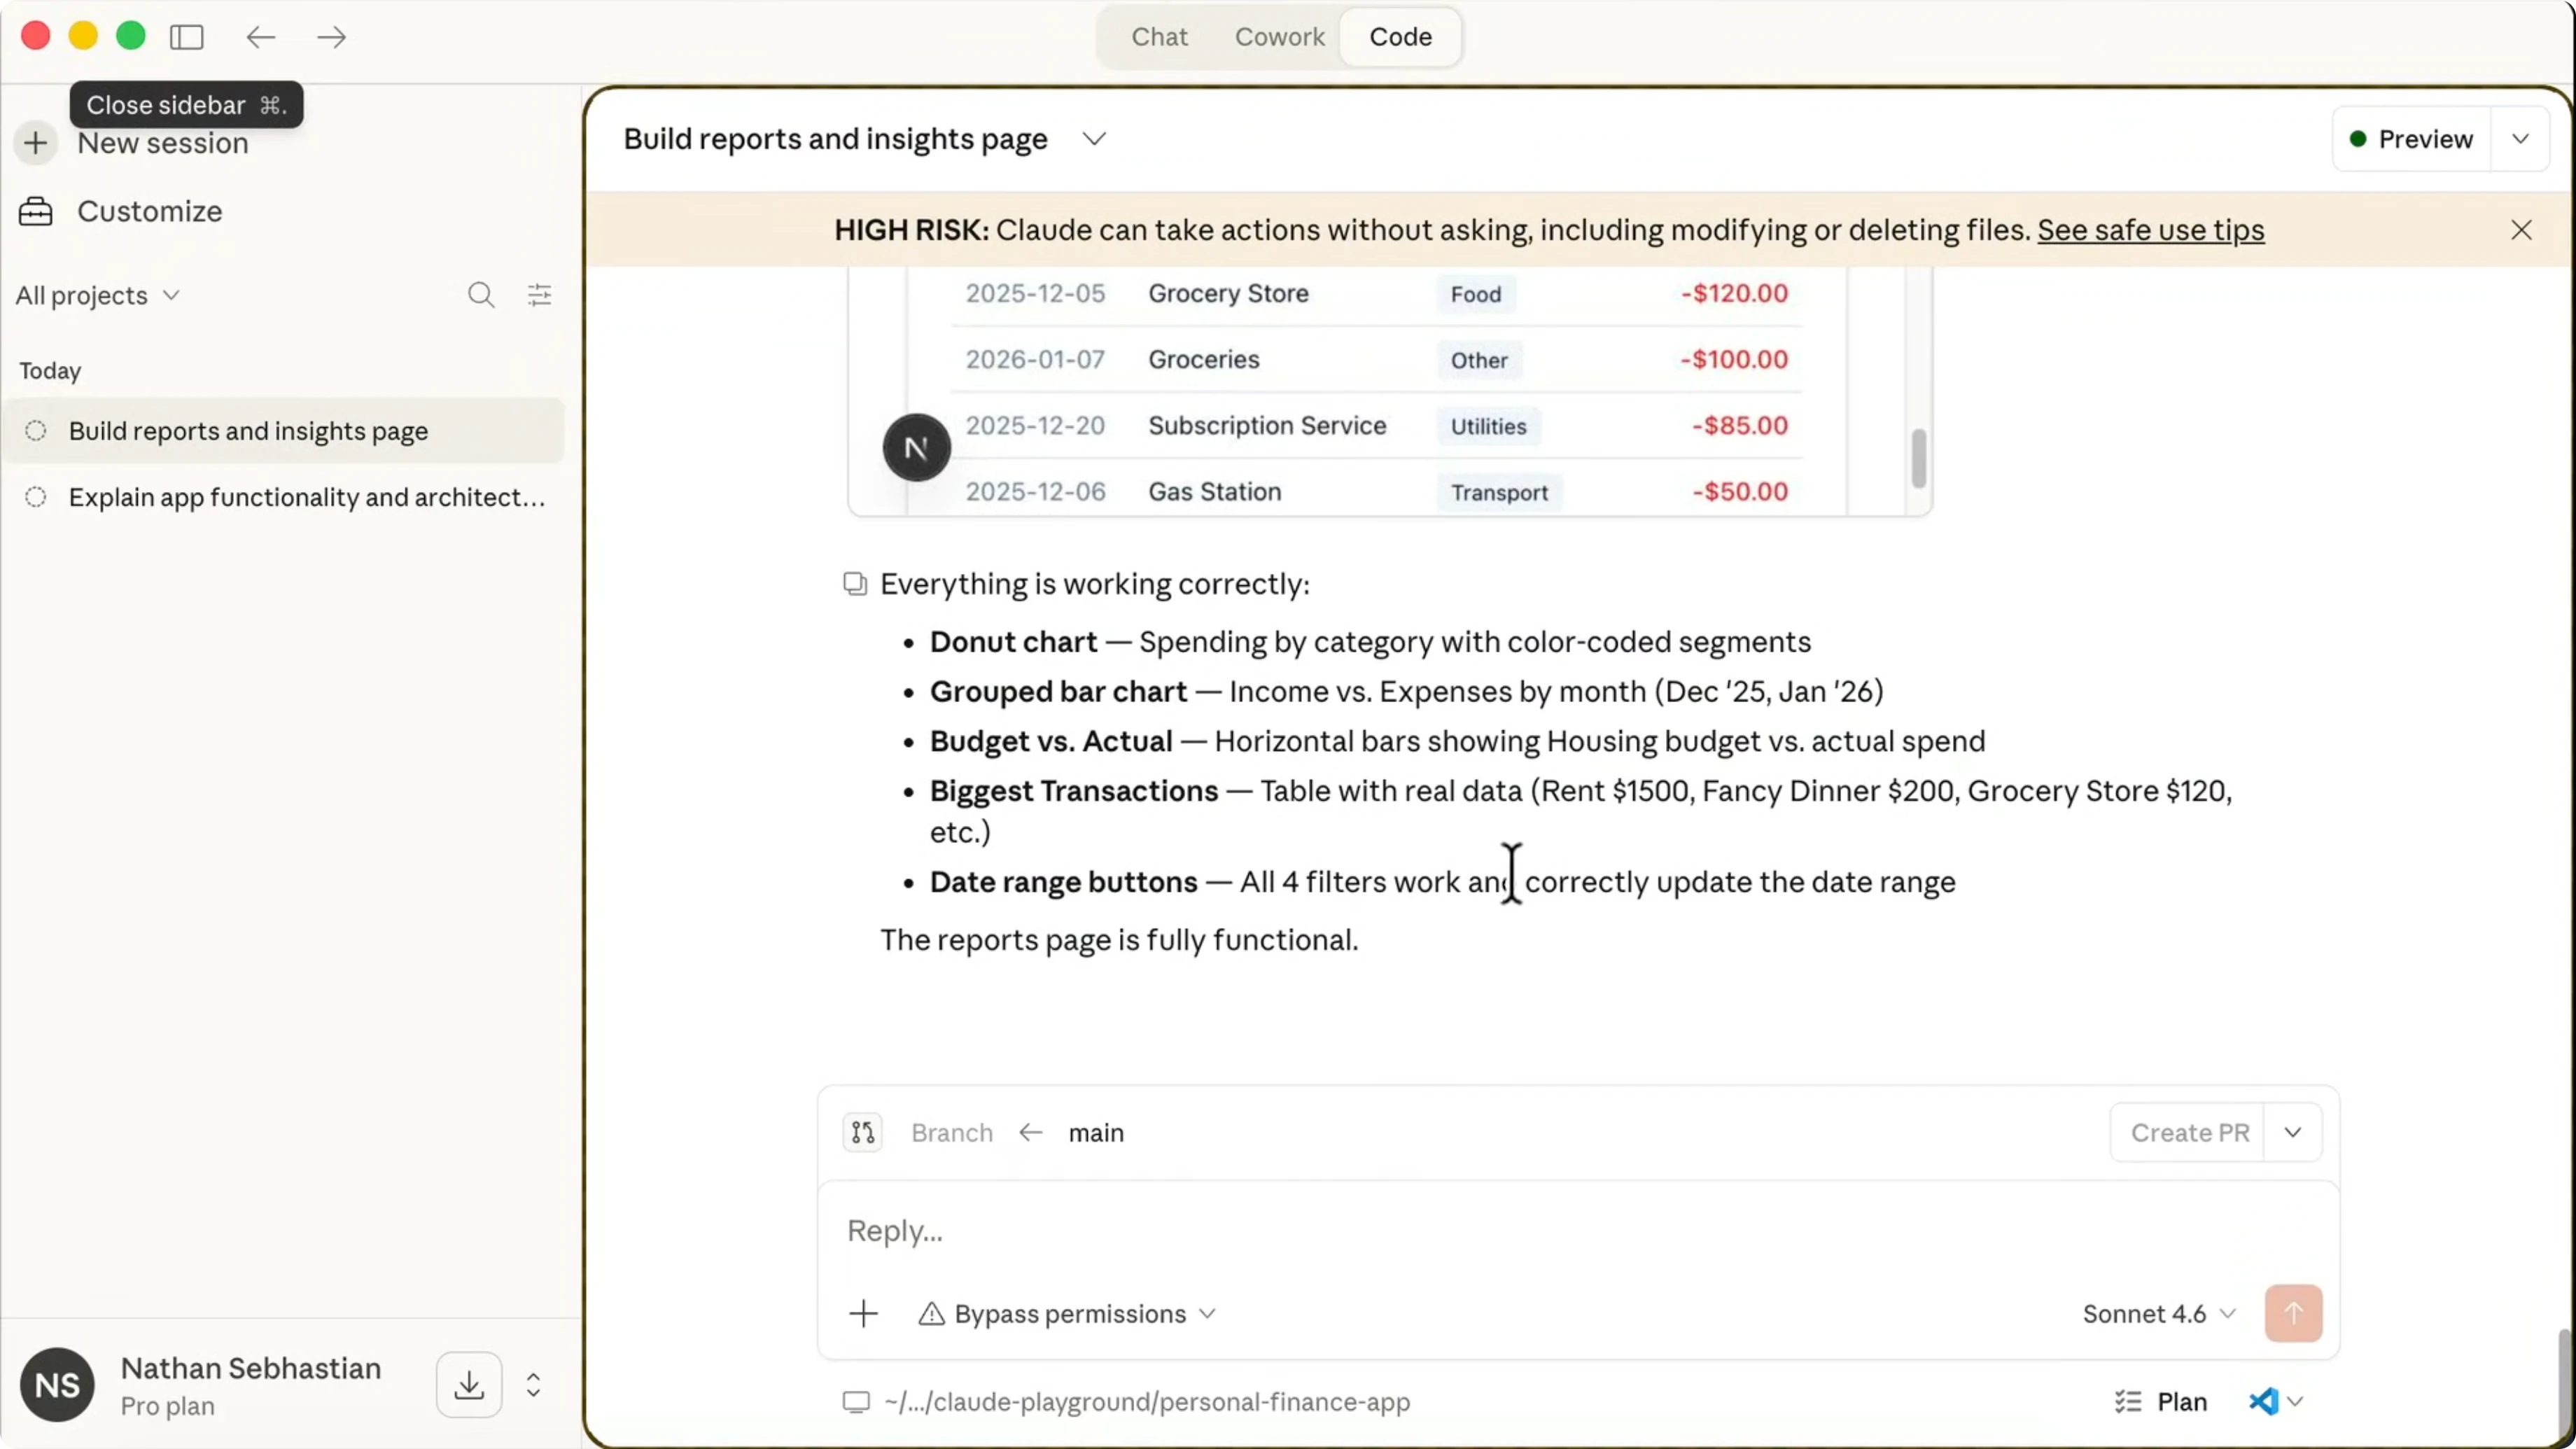
Claude completes the implementation and verifies that the page is working. It tests charts and the date range and even provides screenshots. That is a nice touch you do not see in a terminal.
Click the Preview button to open a live preview of the app, with console output below it. The preview window is limited to about half the screen and feels small for deep testing. I prefer opening it in the browser for a better view.
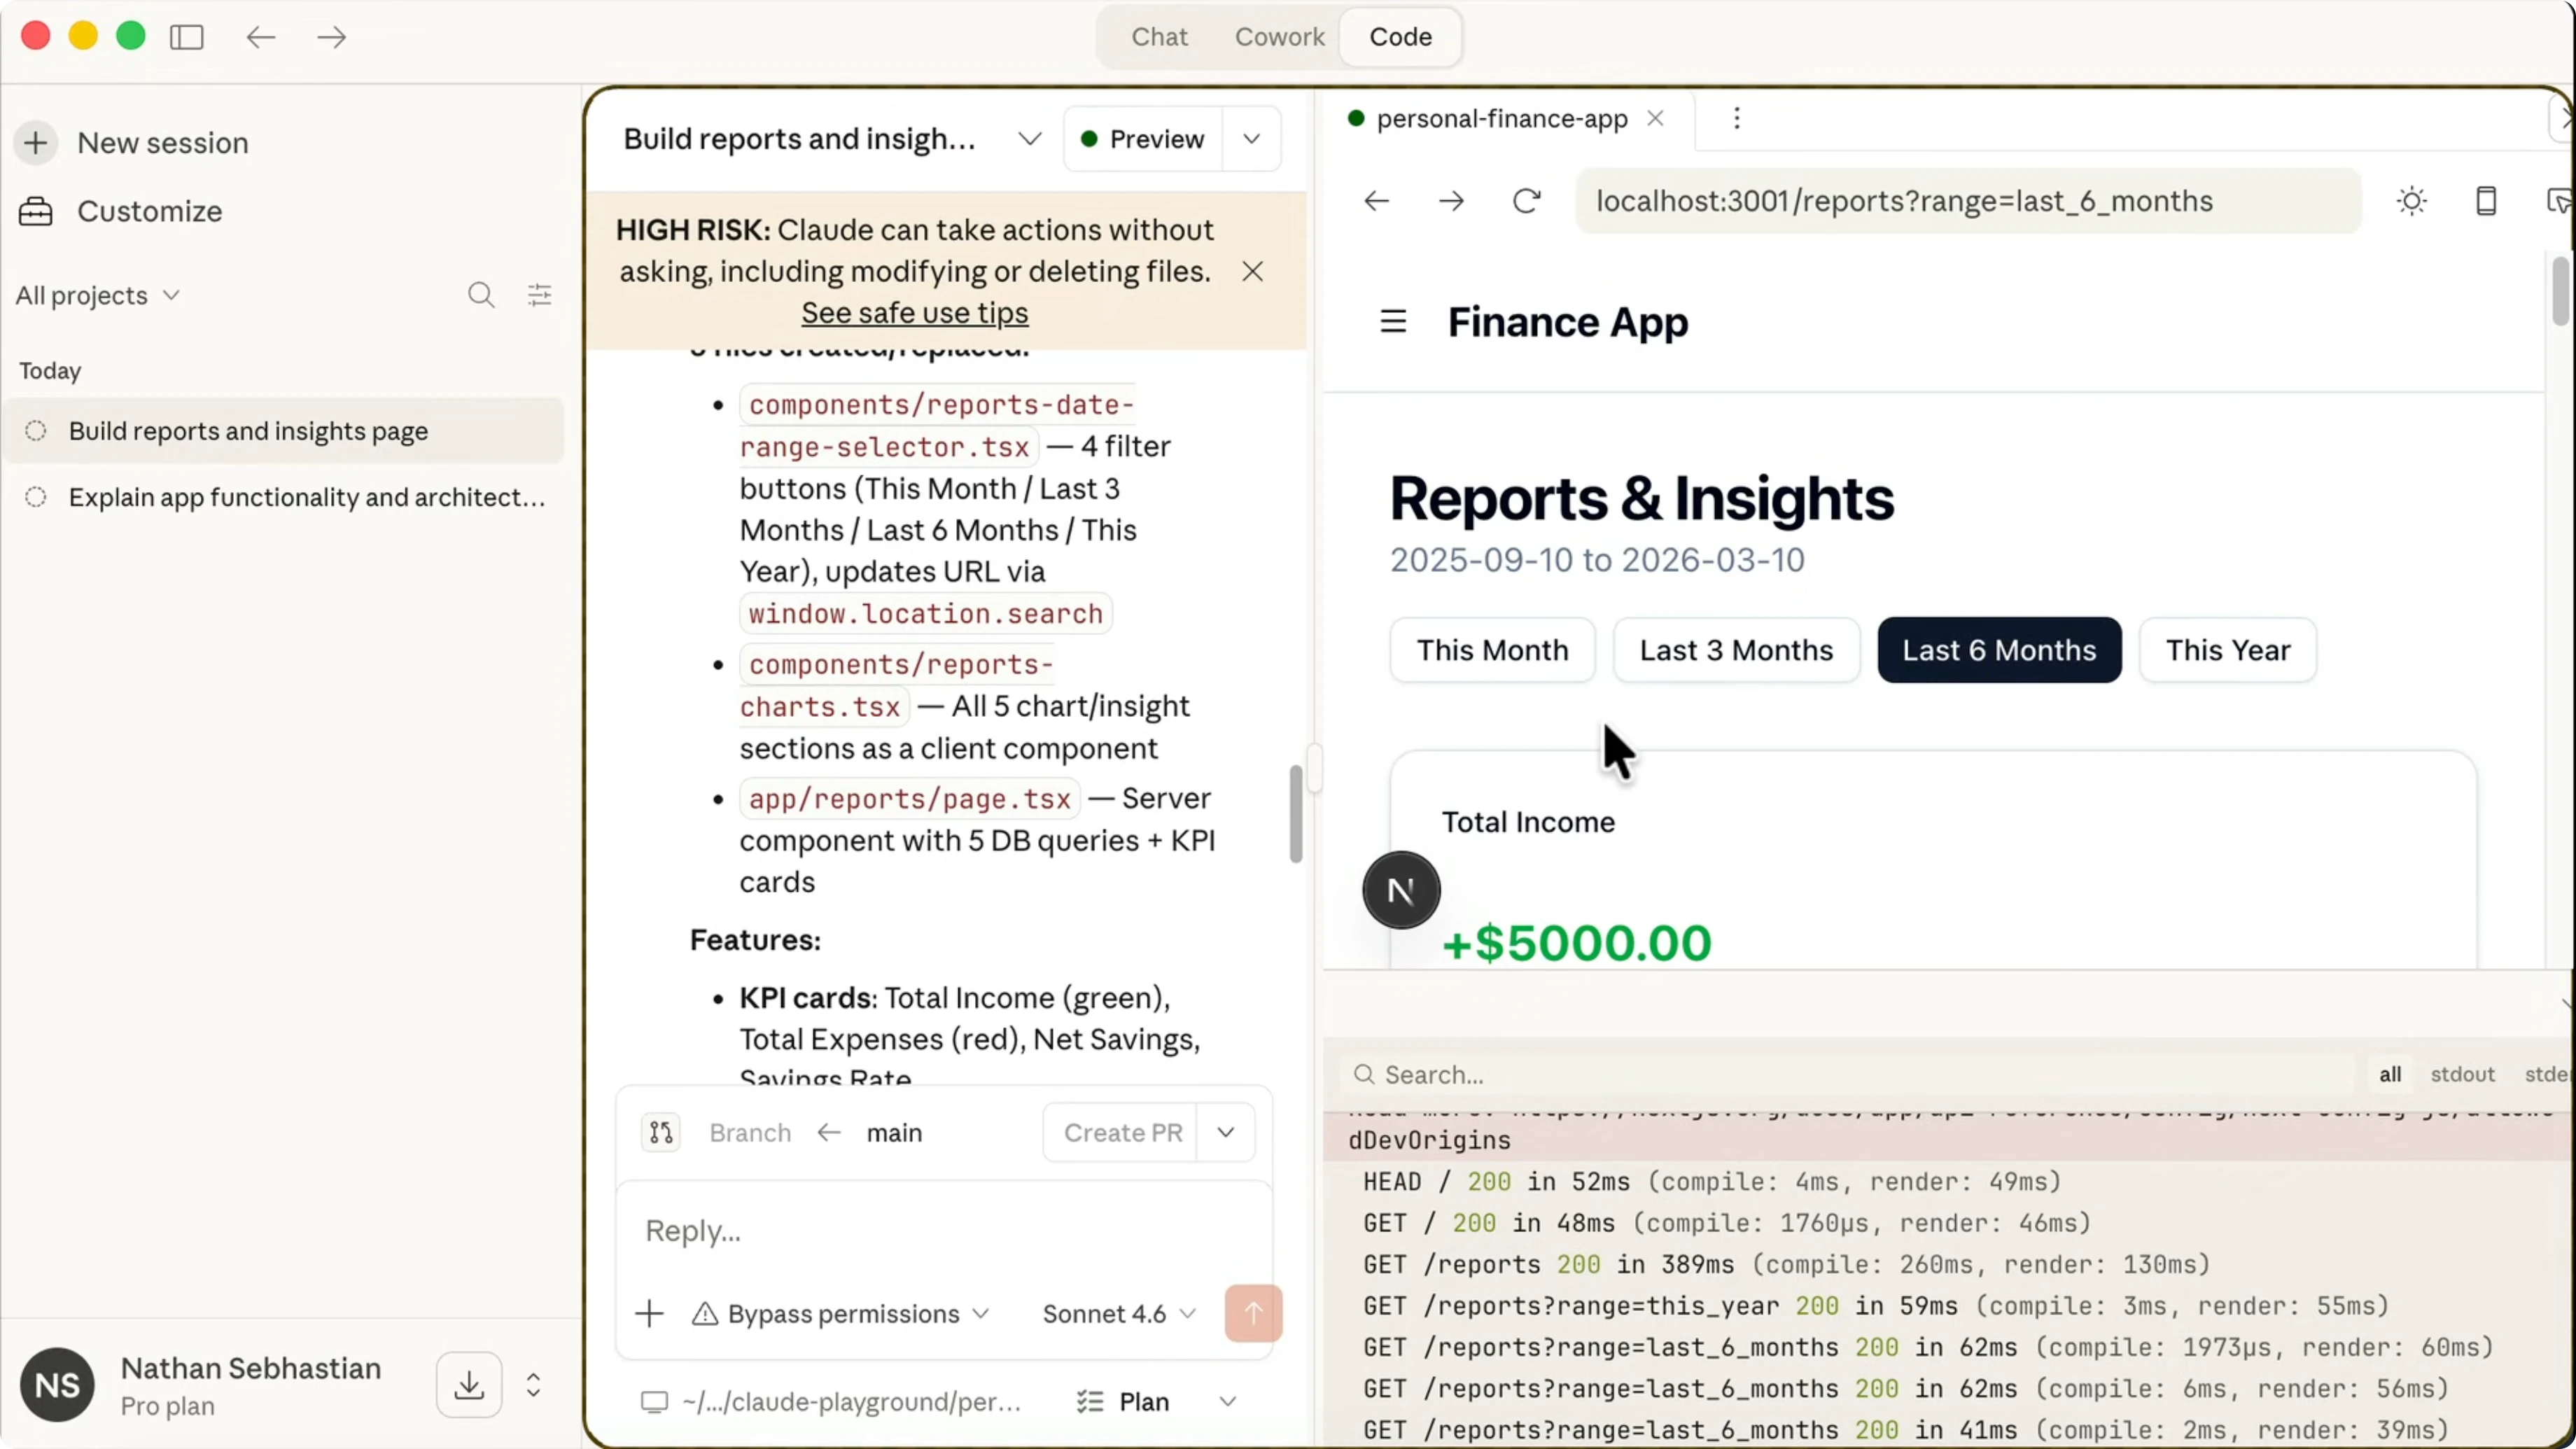
In the browser, switch the filter to the last three months to see data. You will see income versus expenses, spending by category, top spending categories, and budgets versus actual spending. The biggest expenses list below is helpful too.
Change the filter to the last 6 months and up to one year. The page stays responsive and informative across these ranges. This is a clean way to evaluate reporting features.
If you want a higher level workflow pattern for multi item builds, see how to set up Auto Claude Kanban boards. It helps when you split features like charts, filters, and insights into separate tracks. It works well with worktrees.
Claude Code Desktop IDE Features (You Need to Know): use it from the web
Create a new session and select the Claude Code from Web option. Your browser opens and asks you to connect your GitHub account. Authorize access, and I let it access just one repository for this app.
Create a Claude environment and leave the name at default. For network access, select the recommended option, then create and finish. You will drop into the Claude Code Web version.
Select the repository you want to work on. Ask for an overview of the app and submit the prompt, and Claude will work from the cloud environment. A benefit of the cloud is that if you close the browser and turn off your computer, the request will continue.
Claude sessions are synced to the desktop app. You can view and continue the session from desktop later. This cross device continuity keeps the development loop moving.
For broader tips on session setup, context windows, and model choice, read this guide on the best way to use Claude Code. It pairs nicely with cloud sessions. Your defaults matter.
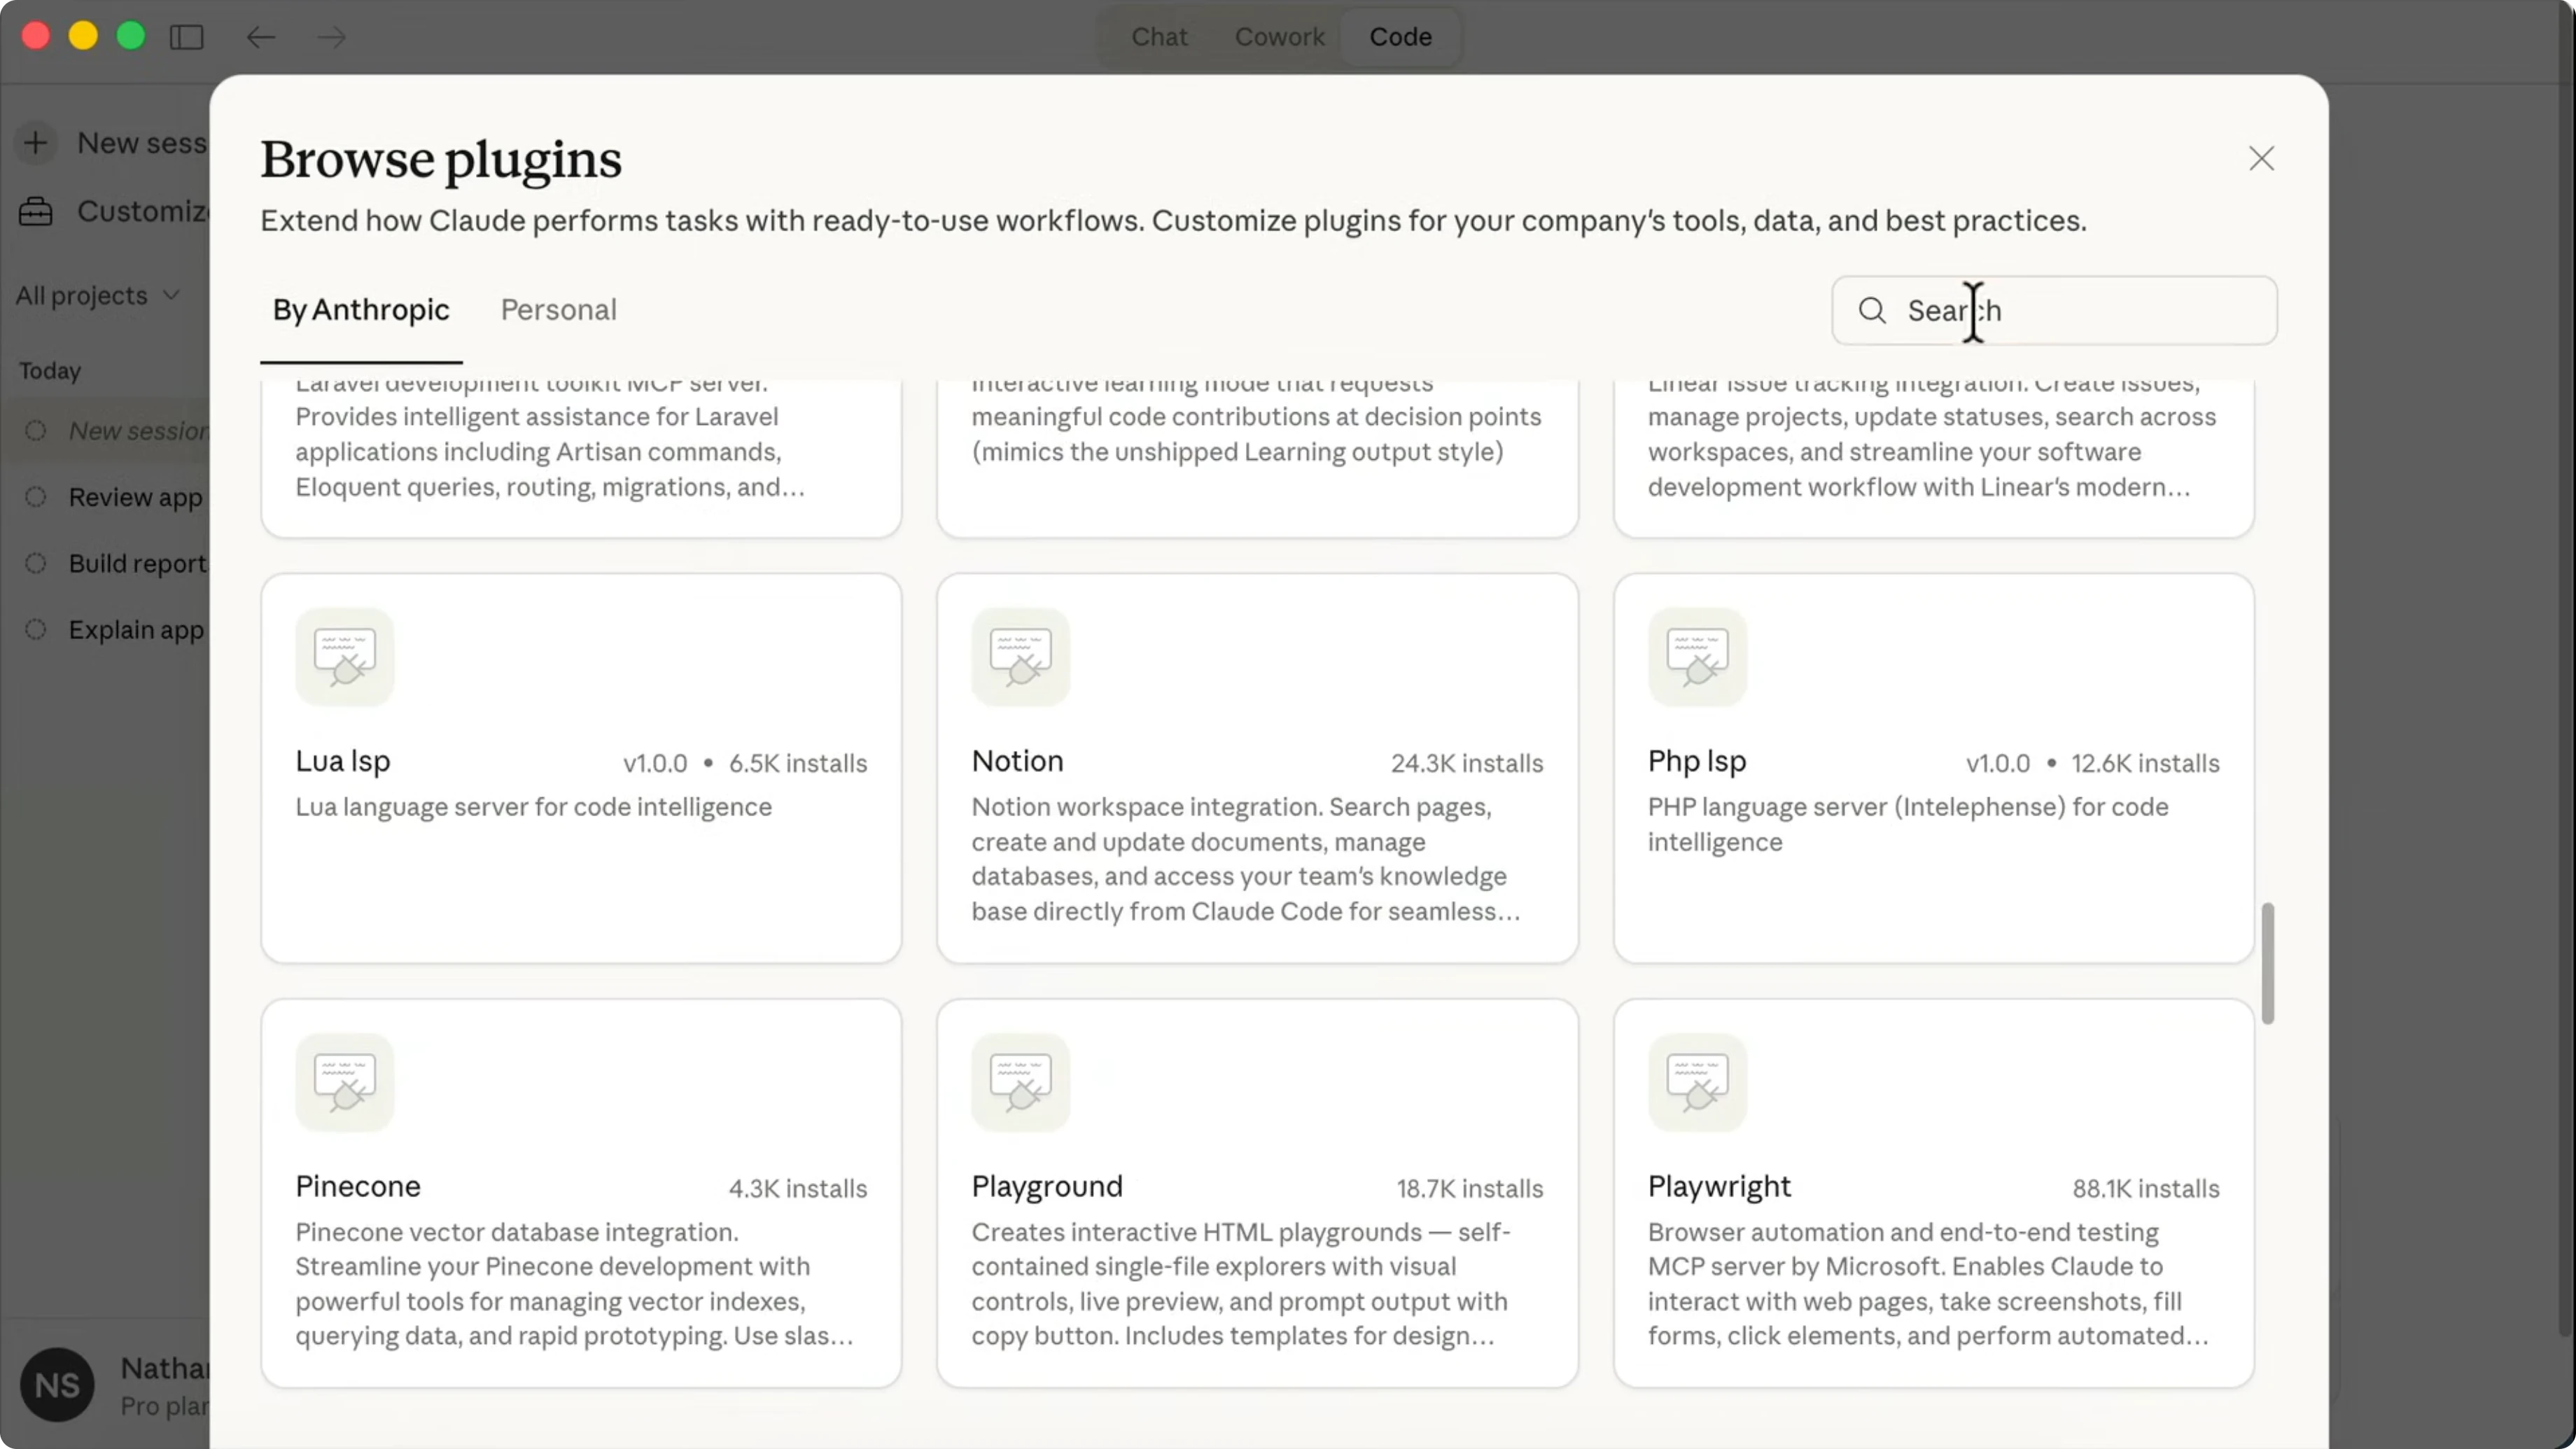
Claude Code Desktop IDE Features (You Need to Know): plugins and skills
You can install plugins just like in the terminal. Click the plus icon and select Add plugins to see all available plugins for Claude Code. Install the ones you want to use.
For example, search for the Superpowers plugin. This plugin teaches Claude Code how to brainstorm and use up agents for development, including reviewing, debugging, and testing code. Click Install and the plugin is added.
You can use it by running a slash command. The command here is:
/ashIf a command does not show up right away, open Plugins, select Superpowers, and you can see the skills there. Select the Brainstorming skill and ask it to give suggestions to improve the Report page. Submit the prompt to run that skill.
For a curated list of installable add ons, see our roundup of the best Claude Code plugins. And if you want to go deeper into Claude’s capabilities, here is a companion guide to the best Claude Code skills. These two resources help you extend your workspace with focus.
Claude Code Desktop IDE Features (You Need to Know): file views and comments
Claude Code Desktop is a solid agent manager, but you cannot get an overview of the project files unless you open the project from an IDE like VS Code or Cursor. You can still attach files using the add command. All files are available, but to see their contents you still need an IDE.
To view edited files inside Claude, you need to wade through the entries in chat. You can find the edited files and see a diff of the changes made. You can add a comment on a specific line.
For example, ask it to change an export name to something else. Submit the comment and Claude Code will treat it like a new prompt. This works, but it feels inconvenient.
I have explored Open Code Desktop and Codeex which implement this in a better way. You can view all changes in a unified sidebar, click a file to see the changes, and then add a comment there. Outside of that, Claude Code Desktop covers all features you find in the CLI.
You can attach files and images, run slash commands, connect with other apps, and install and manage plugins, skills, and MCP servers. The core loop is complete and it keeps shipping new capabilities. That is the part I like most.
For task planning across multiple sessions inside desktop, see this quick primer on Claude Code Desktop task management. It complements Plan mode with a predictable routine. Your backlog stays visible.
Final thoughts
Claude Code Desktop wraps planning, coding, preview, and verification into one place. I like Plan mode, permission controls, live preview, and the option to continue sessions in the cloud. The main friction today is file browsing and change review inside the app.
The plugin system and skills make it flexible for feature work and QA. If you already live in GitHub and Next.js, the web version is a good fit for long running prompts. Use desktop for tight feedback loops and switch to cloud when you need staying power.
Subscribe to our newsletter
Get the latest updates and articles directly in your inbox.