
Table Of Content
- Hardware Setup I Used
- System summary
- Prerequisites
- Install the PyTorch stack
- Log in to Hugging Face
- Download the Model
- Inference Code and Structure
- Run with Transformers
- Replace with your local model path
- Tokenizer and model
- Hardcoded prompt for quick test
- Warm up and caching
- Download Progress and Model Discussion
- Run Inference After Download
- Serve DeepSeek-V32 Speciale with vLLM
- Install vLLM
- or
- Start the vLLM server
- Query the API
- Practical Notes for Install and Operation
- Storage and bandwidth
- GPU memory planning
- Token economy and behavior
- Step-by-Step Summary
- Notes on Naming, License, and Expectations
- Troubleshooting Basics
- Conclusion

How to install DeepSeek V3.2 Speciale Setup: vLLM + Transformers
Table Of Content
- Hardware Setup I Used
- System summary
- Prerequisites
- Install the PyTorch stack
- Log in to Hugging Face
- Download the Model
- Inference Code and Structure
- Run with Transformers
- Replace with your local model path
- Tokenizer and model
- Hardcoded prompt for quick test
- Warm up and caching
- Download Progress and Model Discussion
- Run Inference After Download
- Serve DeepSeek-V32 Speciale with vLLM
- Install vLLM
- or
- Start the vLLM server
- Query the API
- Practical Notes for Install and Operation
- Storage and bandwidth
- GPU memory planning
- Token economy and behavior
- Step-by-Step Summary
- Notes on Naming, License, and Expectations
- Troubleshooting Basics
- Conclusion
DeepSeek has released two models: one focused on deep reasoning and another that is general purpose with tool capabilities. I have already tested the architectures and performance of both. This guide focuses on installing and running the deep reasoning model locally.
I am grateful to Hyperbolic for providing credits to test this model. The steps below show the exact environment and process I used, the commands to set everything up, and how to run inference with both Transformers and vLLM.
Hardware Setup I Used
I used a 16 GPU setup. Each GPU had around 80 GB of VRAM.
- OS: Ubuntu
- Nodes: 2
- GPUs per node: 8
- VRAM per GPU: 80 GB
- Total GPUs: 16
This setup is the minimum I recommend for installation and inference. With less, it will not work reliably.
System summary
| Component | Details |
|---|---|
| OS | Ubuntu |
| Nodes | 2 |
| GPUs | 16 total |
| VRAM | 80 GB per GPU |
| Per-node | 8 GPUs per node |
Prerequisites
Before downloading and loading the model, install the core Python packages. You will need torch, torchvision, and torchaudio. These can take time to install. I had them installed already, so it was faster for me.
Install the PyTorch stack
Use your preferred environment manager. The following is a baseline:
python -m pip install --upgrade pip
pip install torch torchvision torchaudio
If you depend on a specific CUDA build, install from the official PyTorch instructions for your CUDA version.
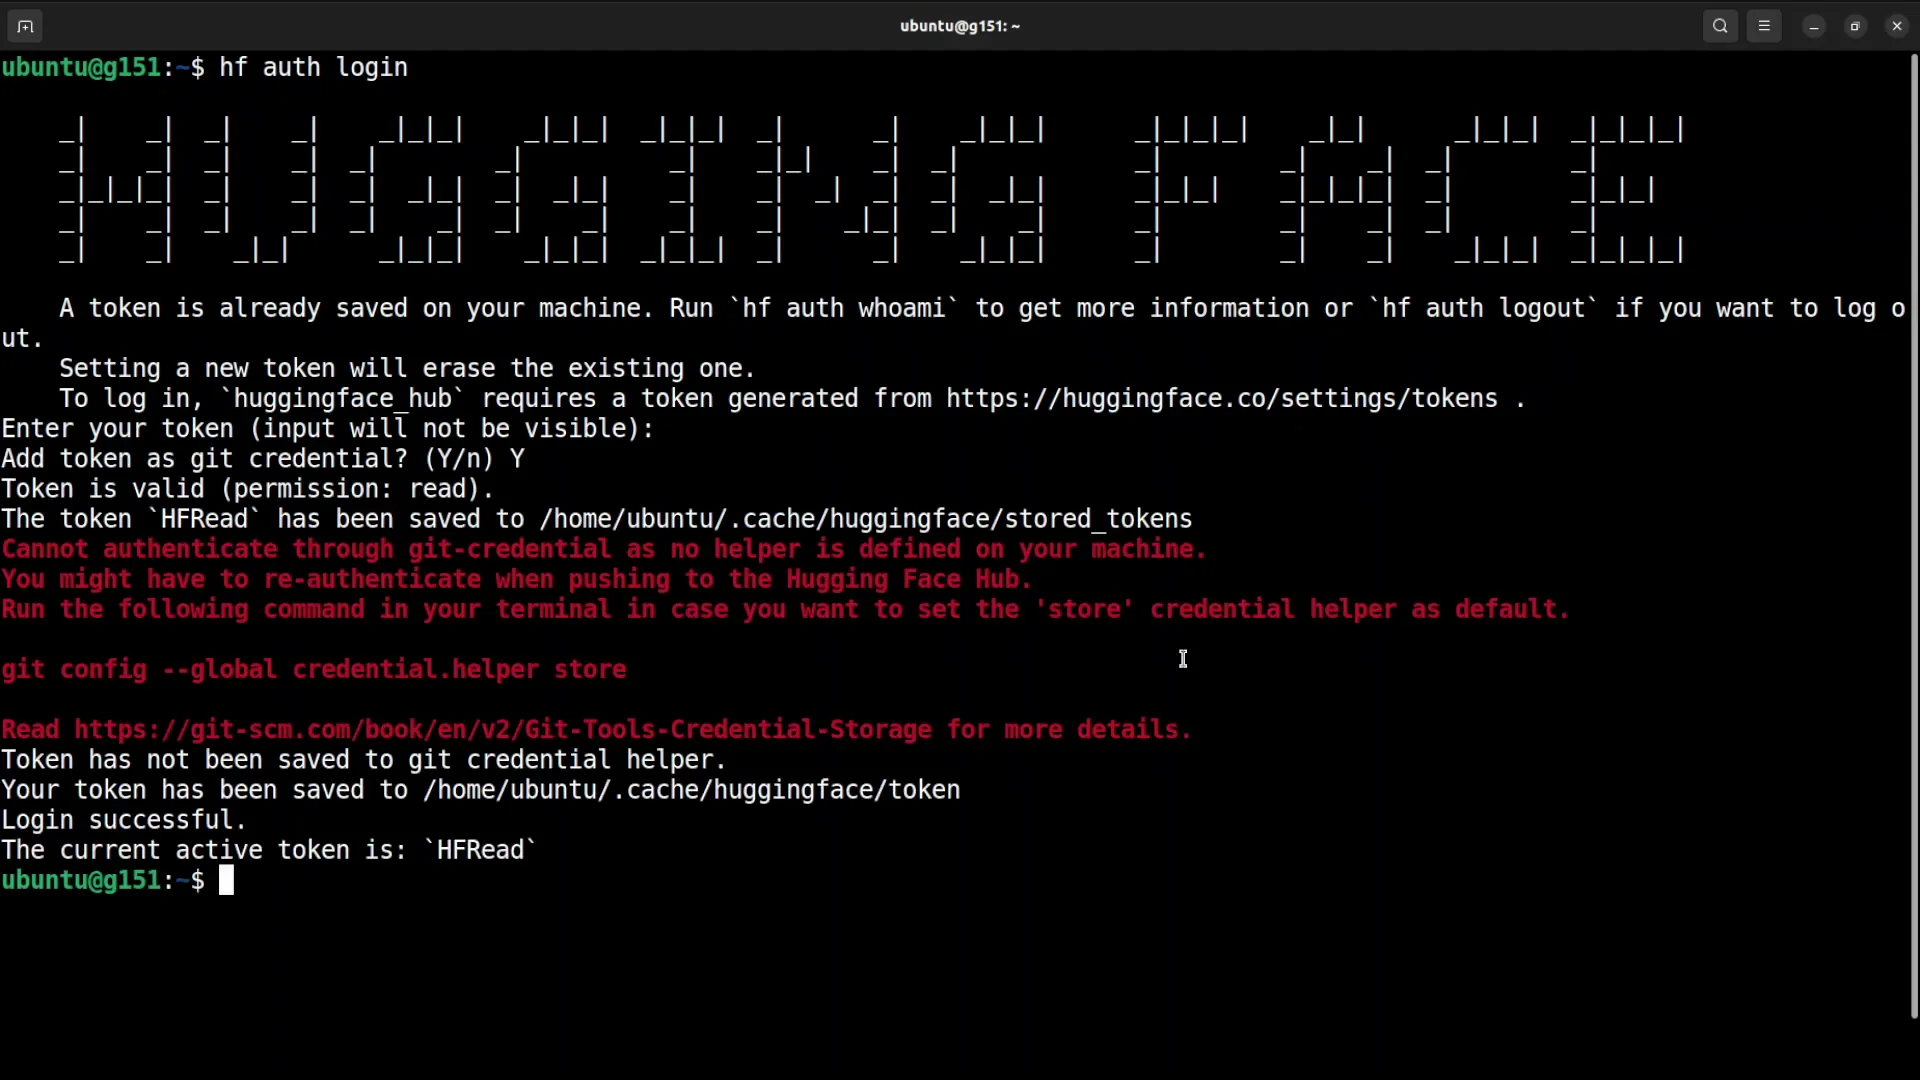
Log in to Hugging Face
You will need a Hugging Face read token to download the model. Log in using the CLI:
pip install -U "huggingface_hub[cli]"
huggingface-cli login- Generate a read token from your Hugging Face profile.
- Paste the token when prompted.
- Confirm that the login succeeded.
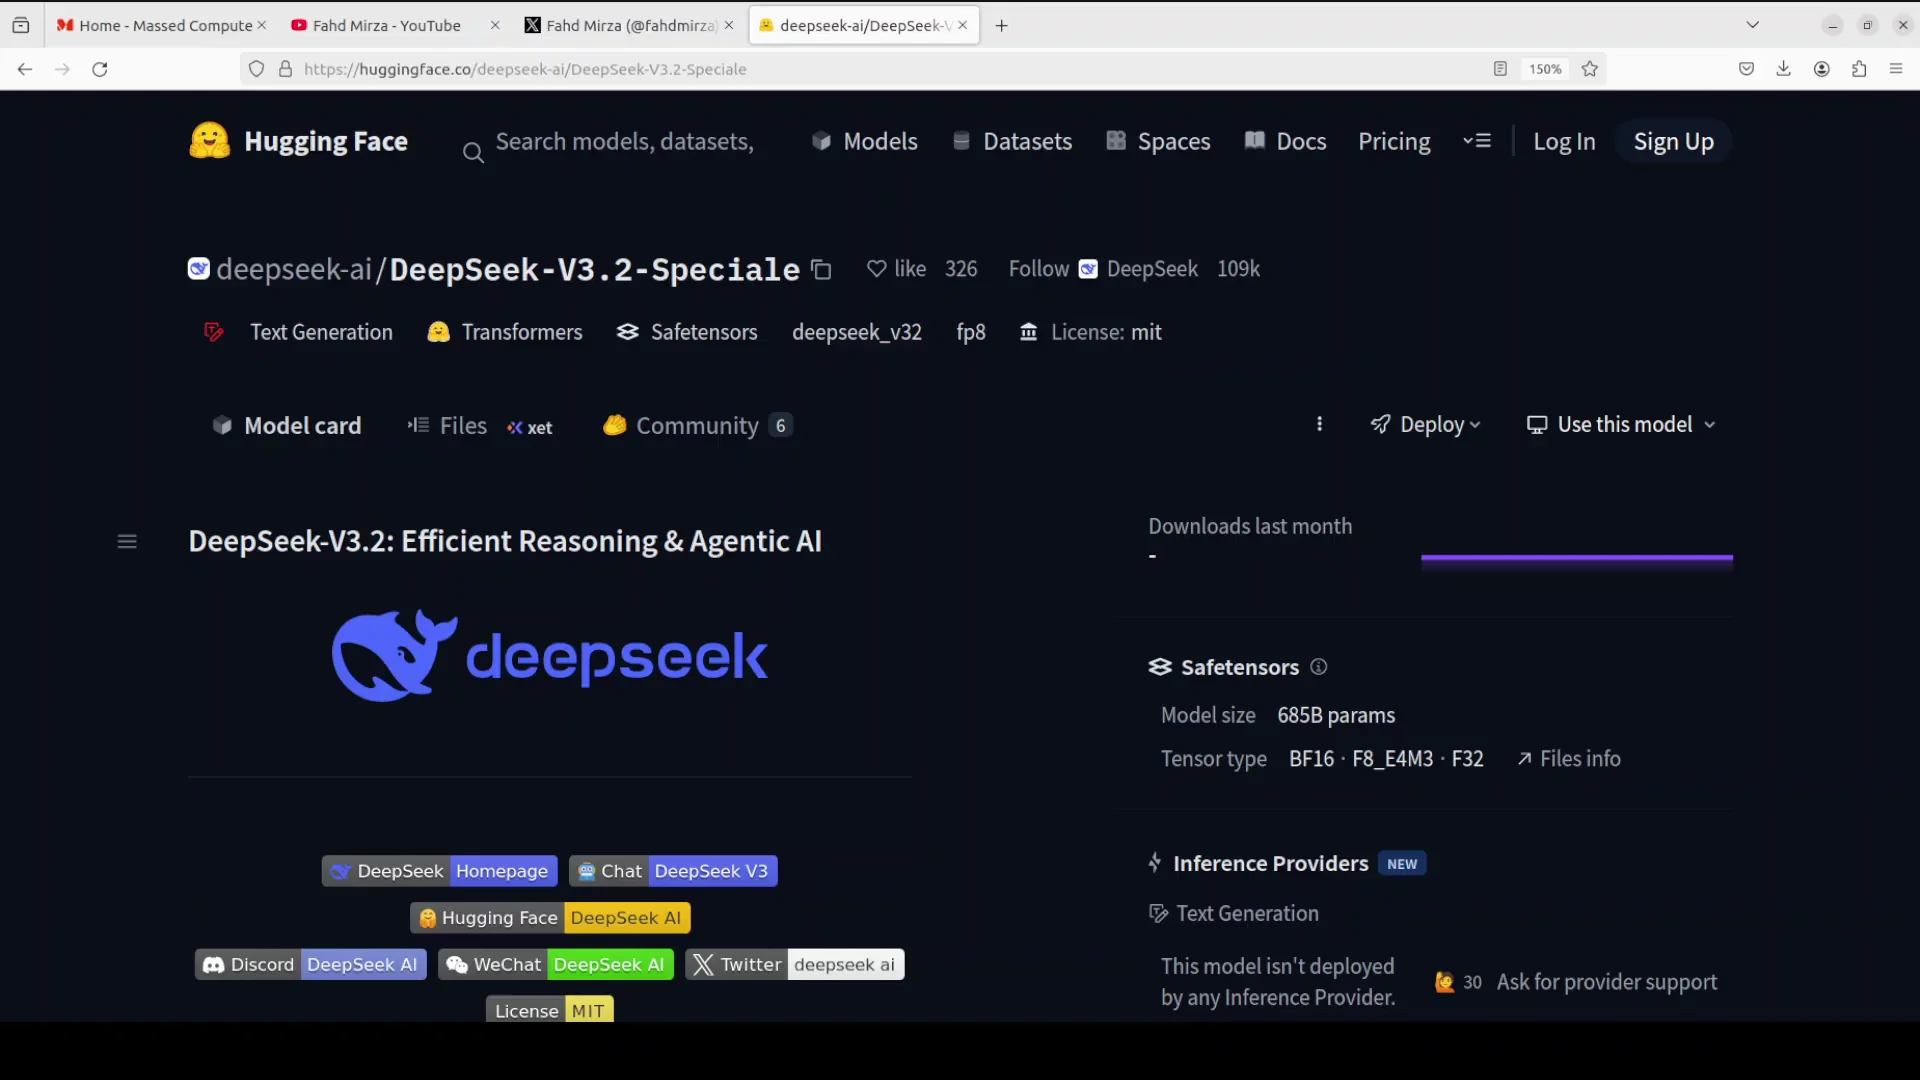
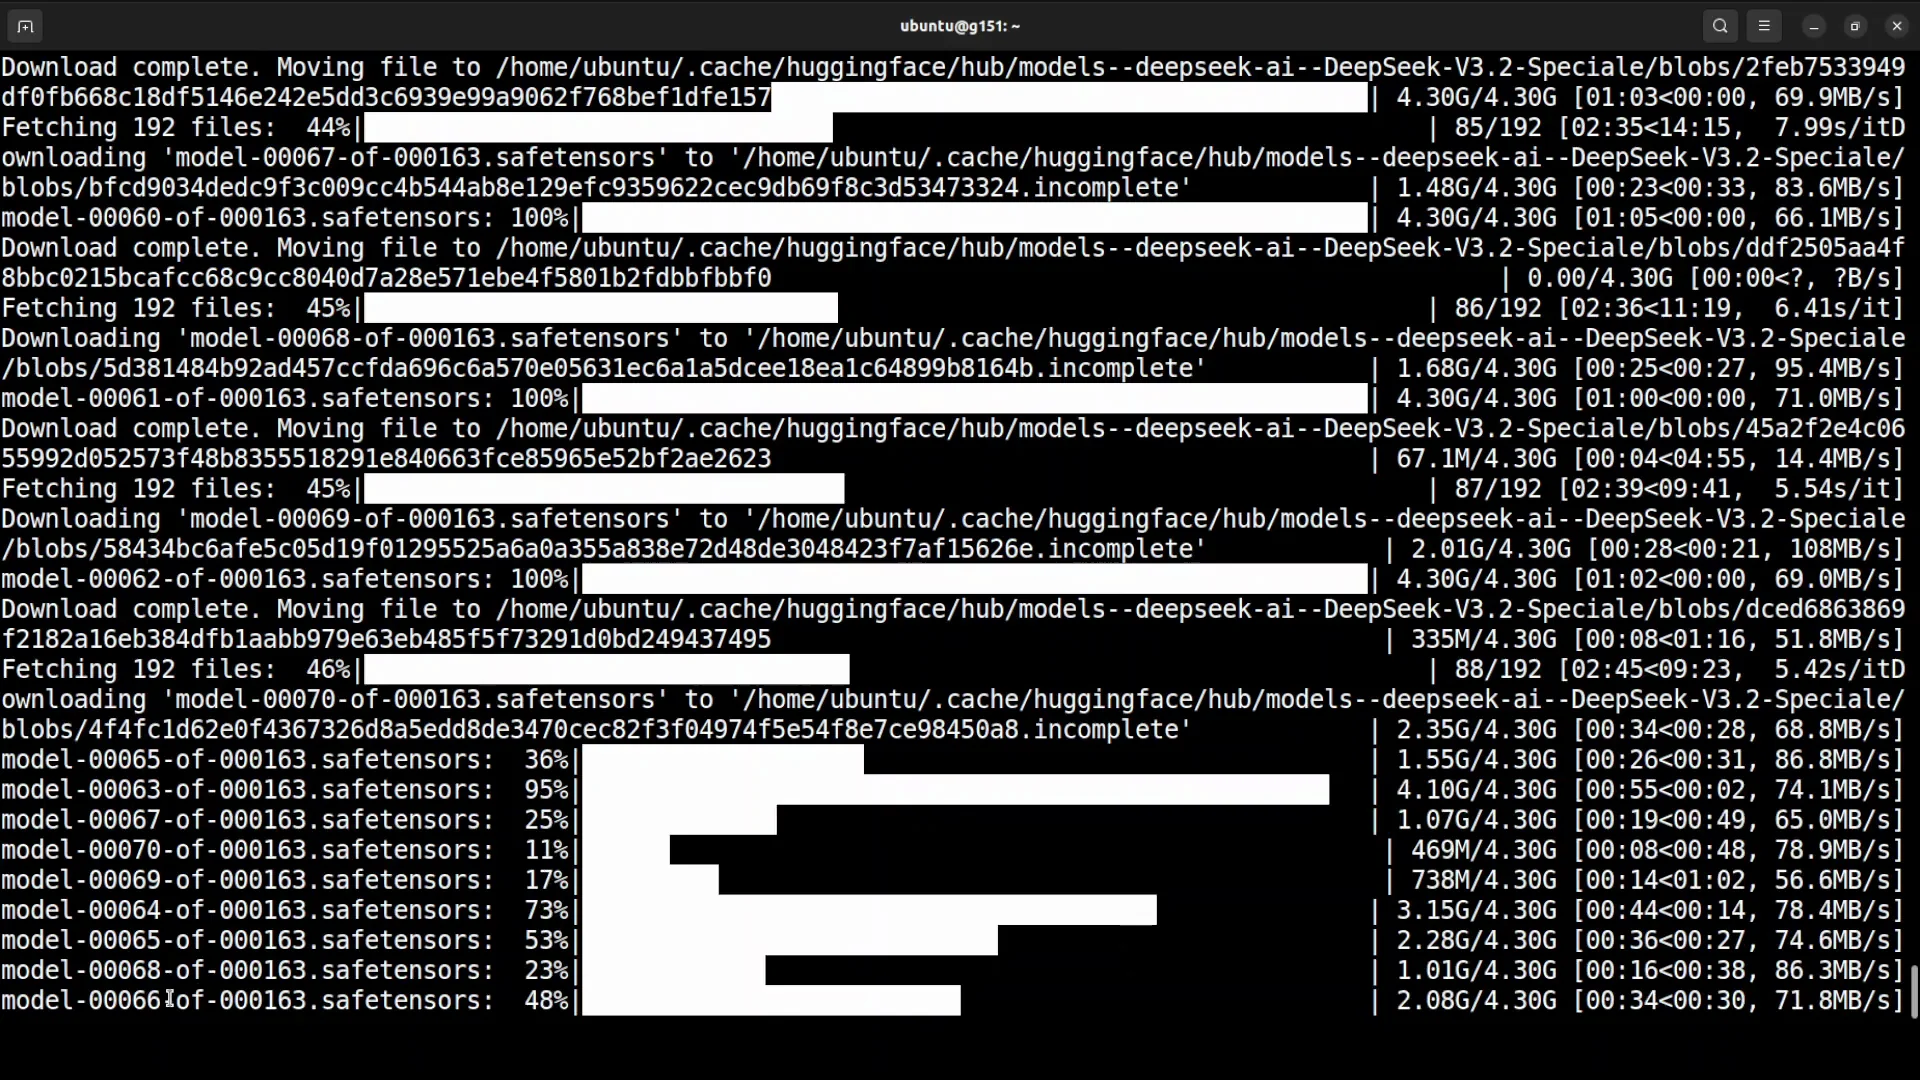
Download the Model
The model is large. It consists of 163 shards. Ensure you have enough disk space and network bandwidth to download it fully.
You can download via the Hugging Face CLI or programmatically:
pip install -U huggingface_hub
python -c "from huggingface_hub import snapshot_download; snapshot_download(repo_id='deepseek-ai/DeepSeek-V3.2-Speciale', local_dir='/models/deepseek-v3.2-speciale')"- Replace the repo_id if your model variant uses a different name on the Hub.
- Set local_dir to your desired model path.
If you prefer git-lfs:
apt-get update && apt-get install -y git git-lfs
git lfs install
git clone https://huggingface.co/deepseek-ai/DeepSeek-V3.2-Speciale
Monitor your storage usage as the shards expand on disk.
Inference Code and Structure
I used a script based on the model card’s generate.py, with small changes so I did not need to pass runtime parameters on every call. The flow is straightforward:
- Load the downloaded model onto the GPUs.
- Provide a prompt.
- The model converts the prompt to logits, the raw token probabilities.
- Internal scoring and ranking happen.
- Return the generated tokens.
I used a hardcoded prompt in the script for quick testing. For full testing I used a separate setup. This guide focuses on installation and minimal local usage.
Run with Transformers
Below is a clean reference to load and run the model locally with Transformers. Adjust paths and settings to your environment.
from transformers import AutoTokenizer, AutoModelForCausalLM
import torch

# Replace with your local model path
model_path = "/models/deepseek-v3.2-speciale"

# Tokenizer and model
tokenizer = AutoTokenizer.from_pretrained(model_path, use_fast=True)
model = AutoModelForCausalLM.from_pretrained(
    model_path,
    torch_dtype=torch.bfloat16,
    device_map="auto"  # spreads across available GPUs
)

# Hardcoded prompt for quick test
prompt = "What is the sum of all prime numbers?"

inputs = tokenizer(prompt, return_tensors="pt")
inputs = {k: v.to(model.device) for k, v in inputs.items()}

with torch.inference_mode():
    output_ids = model.generate(
        **inputs,
        max_new_tokens=512,
        temperature=0.2,
        top_p=0.95
    )

print(tokenizer.decode(output_ids[0], skip_special_tokens=True))
Notes:
- device_map=auto distributes weights across your available GPUs.
- Use torch.bfloat16 if your GPUs support it. If not, consider torch.float16.
- For multi-GPU nodes with large VRAM, auto-sharding will help fit the model.
Warm up and caching
The first prompt call will warm up kernels and caches. Subsequent calls will be faster. I had already warmed up the model before running inference in my session.
Download Progress and Model Discussion
While the model downloads, here are observations on performance and positioning based on my testing and the published details:
- Benchmarks look strong for coding and general tasks.
- It is comparable to major closed-source models like Claude 4.5, ChatGPT, and Gemini.
- Claude Opus 4.5 may be slightly better, though I have not seen a direct benchmark to confirm.
- Overall, it performs at a level similar to leading closed-source labs.
The license is a major highlight. It uses the MIT license, which is extremely permissive.
- You can use it in commercial applications.
- You can integrate it in business settings.
- The deep reasoning focus is useful for enterprise tasks that need reliable chains of thought.
The naming reflects a steady iteration. They released 3.2 experimental a few weeks prior, and this release is 3.2 special. Instead of branding it as a new major version, they kept it within 3.2. On the model card, they mention three innovations that make this approach strong. From what I have seen, other labs could replicate these ideas if they choose.
Run Inference After Download
After the download completed, I cleared my terminal and ran the inference script. The model loaded on the GPUs and responded.
The quick test prompt I used was:
- What is the sum of all prime numbers?
What I like about this model is token economy. If a question requires extended reasoning, it will expand the chain of thought. If not, it keeps the answer concise. That behavior was consistent in earlier testing too.
Serve DeepSeek-V32 Speciale with vLLM
You can also serve the model with vLLM. This is simple to set up on a multi-GPU machine once the model is available locally.
Install vLLM
Install either the nightly build or the stable package:
pip install -U vllm
# or
pip install -U vllm-nightly
Make sure to install the deep gem library if your environment requires it. Follow your environment’s package references for that dependency.
Start the vLLM server
Use the OpenAI-compatible API server to host the model:
python -m vllm.entrypoints.openai.api_server \
  --model /models/deepseek-v3.2-speciale \
  --tensor-parallel-size 8 \
  --gpu-memory-utilization 0.9 \
  --port 8000
Guidelines:
- Adjust tensor-parallel-size to match the number of GPUs you allocate.
- Set gpu-memory-utilization based on available VRAM and other loads.
- Use your local path for the model.
You can increase the number of GPUs assigned to improve throughput and context handling. vLLM will handle the serving and batching efficiently on supported hardware.
Query the API
Once the server is running, send prompts using an OpenAI-compatible client. For example:
curl http://localhost:8000/v1/chat/completions \
  -H "Content-Type: application/json" \
  -d '{
        "model": "local-deepseek-v3.2-speciale",
        "messages": [{"role": "user", "content": "What is the sum of all prime numbers?"}],
        "max_tokens": 512,
        "temperature": 0.2
      }'
Replace the model field if your client requires a different identifier.
Practical Notes for Install and Operation
Storage and bandwidth
- 163 shards require substantial disk space. Plan for the full footprint plus headroom.
- Stable and fast network connections help prevent partial or corrupted downloads.
GPU memory planning
- 80 GB per GPU made the process straightforward for me, across 16 GPUs in two nodes.
- If you have fewer or smaller GPUs, be prepared for memory errors. The model is large.
Token economy and behavior
- The model tends to keep outputs concise when the prompt does not require extended reasoning.
- For tasks that demand deeper reasoning, it expands the chain naturally.
Step-by-Step Summary
Follow these steps in order:

- Prepare hardware
- Ubuntu environment.
- 2 nodes with 8 GPUs each.
- 80 GB VRAM per GPU minimum.
- Sufficient disk for 163 shards.

- Create and activate your Python environment
- Use conda, venv, or your preferred manager.
- Upgrade pip.
- Install prerequisites
- pip install torch torchvision torchaudio.
- Verify CUDA compatibility if needed.

- Log in to Hugging Face
- pip install -U huggingface_hub.
- huggingface-cli login with your read token.
- Download the model
- Use snapshot_download or git-lfs clone.
- Confirm all shards are present.
- Run a quick test with Transformers
- Load the model with device_map=auto.
- Use a simple prompt to confirm output.
- Warm up the model with one run.

- Optional: Serve with vLLM
- pip install -U vllm or vllm-nightly.
- Start the OpenAI-compatible server.
- Adjust tensor parallelism and GPU memory settings.

- Iterate on prompts and evaluation
- Test coding and reasoning prompts.
- Observe token economy and response style.
Notes on Naming, License, and Expectations
The model name reflects continued iteration within the 3.2 line instead of a major version bump. That choice keeps the focus on results instead of naming. A recent 3.2 experimental build preceded this release.
The MIT license opens broad use in production:
- Commercial and enterprise usage is allowed.
- Deployment flexibility is high.
- The deep reasoning focus aligns with many business tasks.
From my testing and published data, performance is strong and in the same range as prominent closed-source options. There may be settings in which Claude Opus 4.5 is ahead, but head-to-head benchmarks are limited. The three innovations described on the model card contribute to strong results. Other labs could replicate these ideas.
Troubleshooting Basics
-
Install errors when setting up torch, torchvision, torchaudio
- Check CUDA version compatibility.
- Reinstall with the correct platform-specific wheels.
-
Hugging Face authentication problems
- Ensure the token has read permission.
- Run huggingface-cli whoami to verify status.
-
Out of memory during load or generation
- Confirm device_map=auto is active.
- Reduce max_new_tokens.
- Increase tensor-parallel-size in vLLM.
- Shut down other GPU processes.
-
Slow download or incomplete shards
- Use snapshot_download to resume.
- Verify disk space and filesystem limits.
Conclusion
This guide showed the exact setup I used to install and run the deep reasoning model locally. I outlined the hardware configuration, prerequisites, Hugging Face login, model download, a minimal Transformers script for inference, and vLLM commands to serve it. The model is large, but with the right hardware and setup, installation is straightforward. The license is permissive, and performance in coding and reasoning tasks is strong based on my testing and the published information.
For enterprise and production scenarios that require deep reasoning and flexible licensing, this release is a notable option to run locally at scale.
Subscribe to our newsletter
Get the latest updates and articles directly in your inbox.

Related Posts

8 Best Claude Code Plugins in 2026 (You Need to Know)
8 Best Claude Code Plugins in 2026 (You Need to Know)

7 Best Claude Code Skills (You Need to Know)
7 Best Claude Code Skills (You Need to Know)

Claude Code Desktop IDE Features (You Need to Know)
Claude Code Desktop IDE Features (You Need to Know)