
Table Of Content
- What is AniGen: Exploring Unified S3 Fields in 3D Asset Animation
- AniGen: Exploring Unified S3 Fields in 3D Asset Animation Overview
- AniGen: Exploring Unified S3 Fields in 3D Asset Animation Key Features
- AniGen: Exploring Unified S3 Fields in 3D Asset Animation Use Cases
- How AniGen Works
- The Technology Behind It
- Installation and Setup
- Pretrained Models
- Minimal Example
- Web Demo
- Training
- Stage 1: Skin AutoEncoder
- Stage 2: Sparse Structure DAE
- Stage 3: Structured Latent DAE
- Stage 4: SS Flow Matching (image-conditioned generation)
- Stage 5: SLAT Flow Matching (image-conditioned generation)
- Performance and Showcases
- Tips and Best Practices
- FAQ
- What files do I get after a run
- What systems are supported
- Do I need to install CUDA by hand
- How do I launch the web demo
- Where can I learn more about shape encoders
- Is there a guide to other 3D model builders

AniGen: Exploring Unified S3 Fields in 3D Asset Animation
Table Of Content
- What is AniGen: Exploring Unified S3 Fields in 3D Asset Animation
- AniGen: Exploring Unified S3 Fields in 3D Asset Animation Overview
- AniGen: Exploring Unified S3 Fields in 3D Asset Animation Key Features
- AniGen: Exploring Unified S3 Fields in 3D Asset Animation Use Cases
- How AniGen Works
- The Technology Behind It
- Installation and Setup
- Pretrained Models
- Minimal Example
- Web Demo
- Training
- Stage 1: Skin AutoEncoder
- Stage 2: Sparse Structure DAE
- Stage 3: Structured Latent DAE
- Stage 4: SS Flow Matching (image-conditioned generation)
- Stage 5: SLAT Flow Matching (image-conditioned generation)
- Performance and Showcases
- Tips and Best Practices
- FAQ
- What files do I get after a run
- What systems are supported
- Do I need to install CUDA by hand
- How do I launch the web demo
- Where can I learn more about shape encoders
- Is there a guide to other 3D model builders
What is AniGen: Exploring Unified S3 Fields in 3D Asset Animation
AniGen is a tool that turns a single picture into a 3D character or object that you can move. It gives you a clean 3D mesh, a bone setup called a skeleton, and skin weights so the mesh bends the right way.
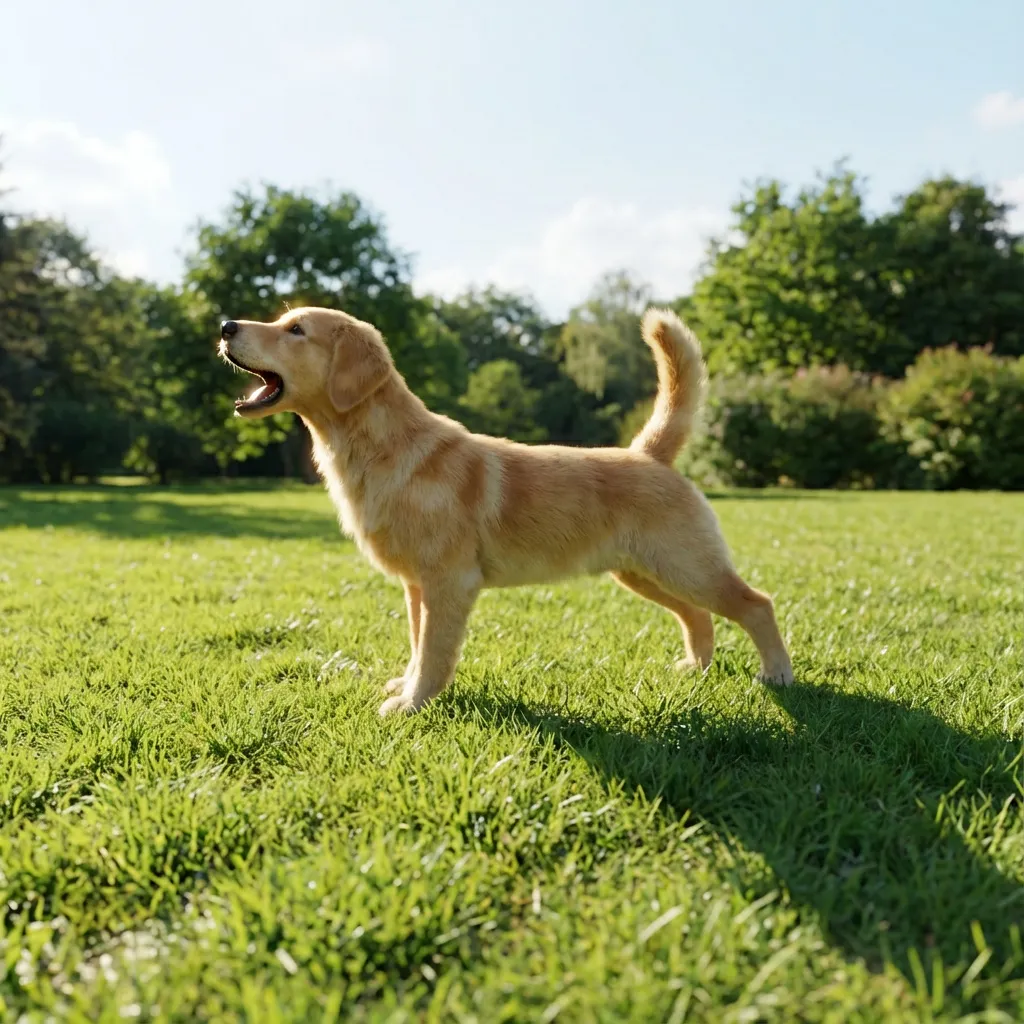
It works with animals, people, and machines. You do not need a long setup. You get a rig you can use right away in common 3D apps.
AniGen: Exploring Unified S3 Fields in 3D Asset Animation Overview
Here is a quick look at the project.
| Item | Detail |
|---|---|
| Type | Research code and tool for 3D asset generation |
| Purpose | Turn one input image into a fully rigged 3D asset ready for animation |
| Input | One image file |
| Output | mesh.glb rigged mesh, skeleton.glb skeleton view, processed_image.png masked input |
| Main Features | Single image to 3D, co generation of shape skeleton skin, flow based pipeline, strong generalization to many categories |
| Key Idea | Unified S3 Fields store shape skeleton skin in one shared 3D space |
| Who It Is For | 3D artists, animators, robotics and simulation teams, researchers |
| Platform | Linux |
| GPU Need | NVIDIA GPU with at least 18GB memory |
| CUDA | Tested with CUDA 11.8 and 12.2 |
| Python | Python 3.8 or higher |
| Demo | Simple web app with Gradio, also on Hugging Face Spaces |
| Models | Pretrained weights on Hugging Face including dinov2 dsine vgg |
For more practical guides on building worlds and scenes, see our category page here: 3D World Creation.
AniGen: Exploring Unified S3 Fields in 3D Asset Animation Key Features
- One picture in, full rig out. You get a mesh, skeleton, and skin weights in one run.
- Unified S3 Fields. Shape, bones, and skin live in one shared 3D space for better match.
- Strong rig quality. Bones fit the body and work well with motion data.
- Two stage flow pipeline. First make a simple structure, then refine into full detail.
- Works across many types. Supports animals, humanoids, and machines.
If you want another way to make 3D from images, check our short post: Diffsplat guide.
AniGen: Exploring Unified S3 Fields in 3D Asset Animation Use Cases
- Character setup from a single poster or photo for quick prototyping.
- Robots and tools for simulation and control tests.
- Game and film pre viz to block scenes fast.
- Education and research on rigging and deformation.
How AniGen Works
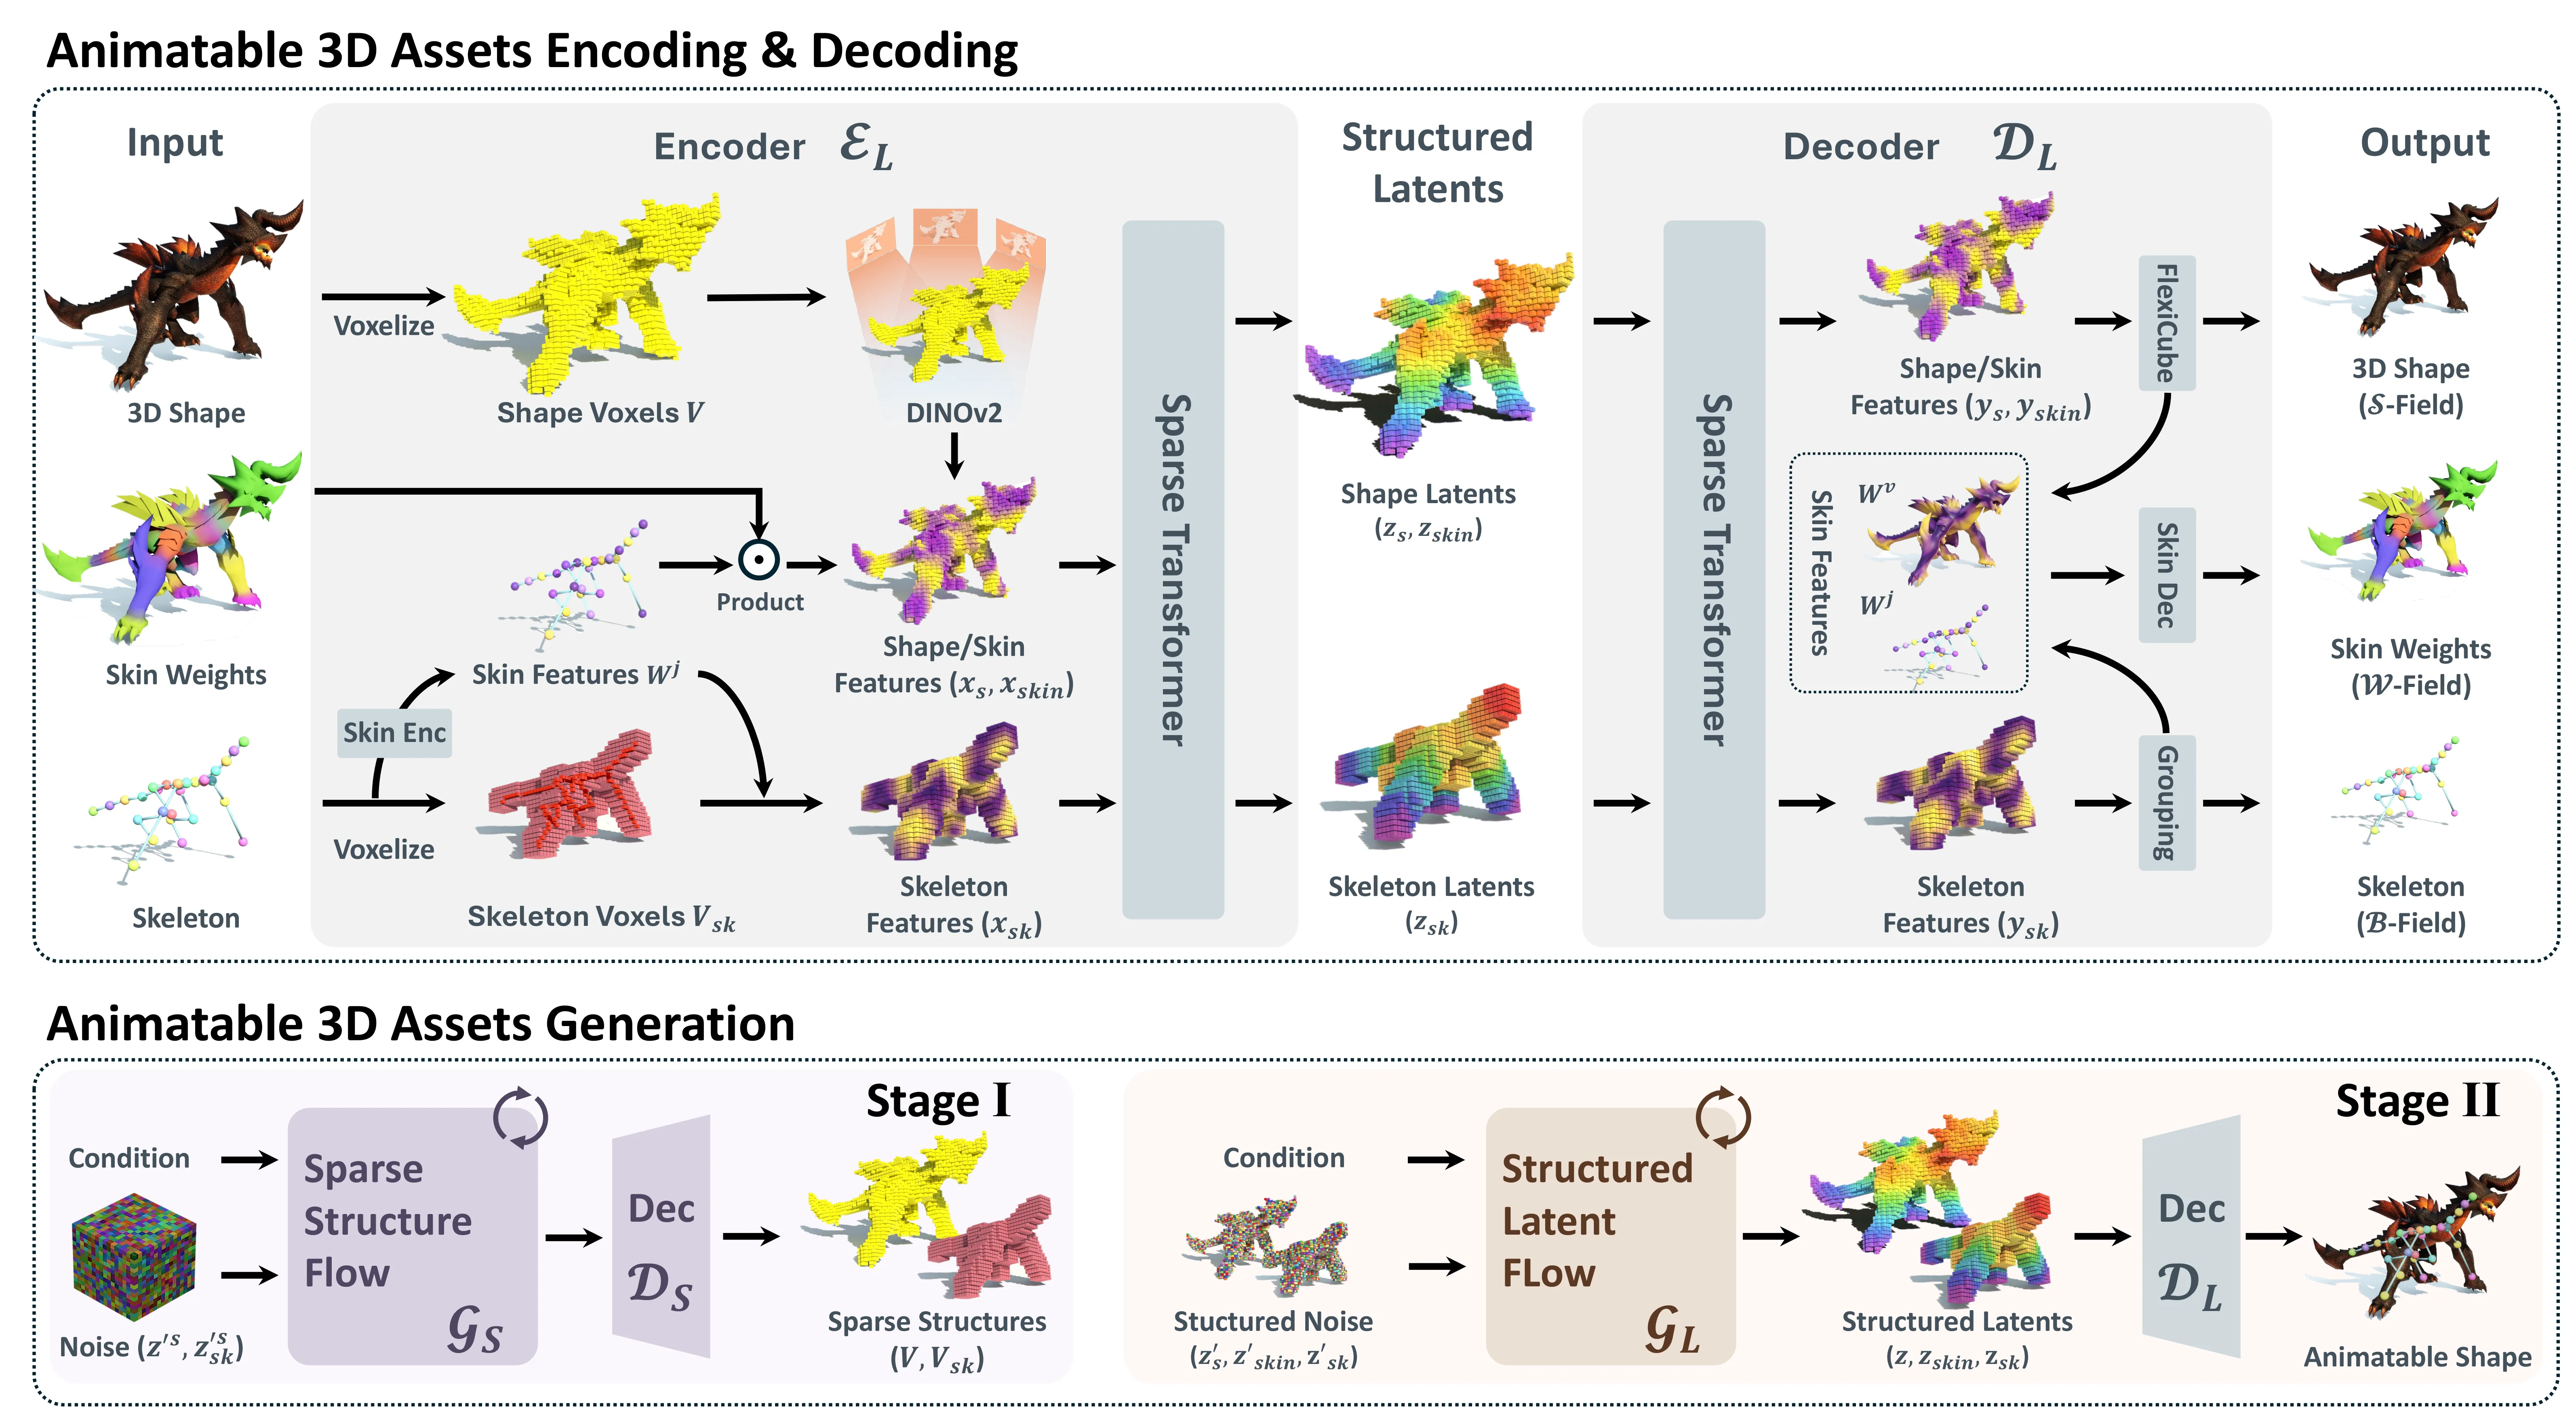
AniGen treats shape, skeleton, and skin as three fields in the same 3D space. This is called S3 Fields: Shape, Skeleton, Skin. Because they share one space, the mesh and bones line up better.
It uses a smart skeleton field with fading confidence near tricky borders. This helps avoid wrong bone picks at boundary zones. It also has a dual skin feature so the system can handle any number of joints.
The Technology Behind It
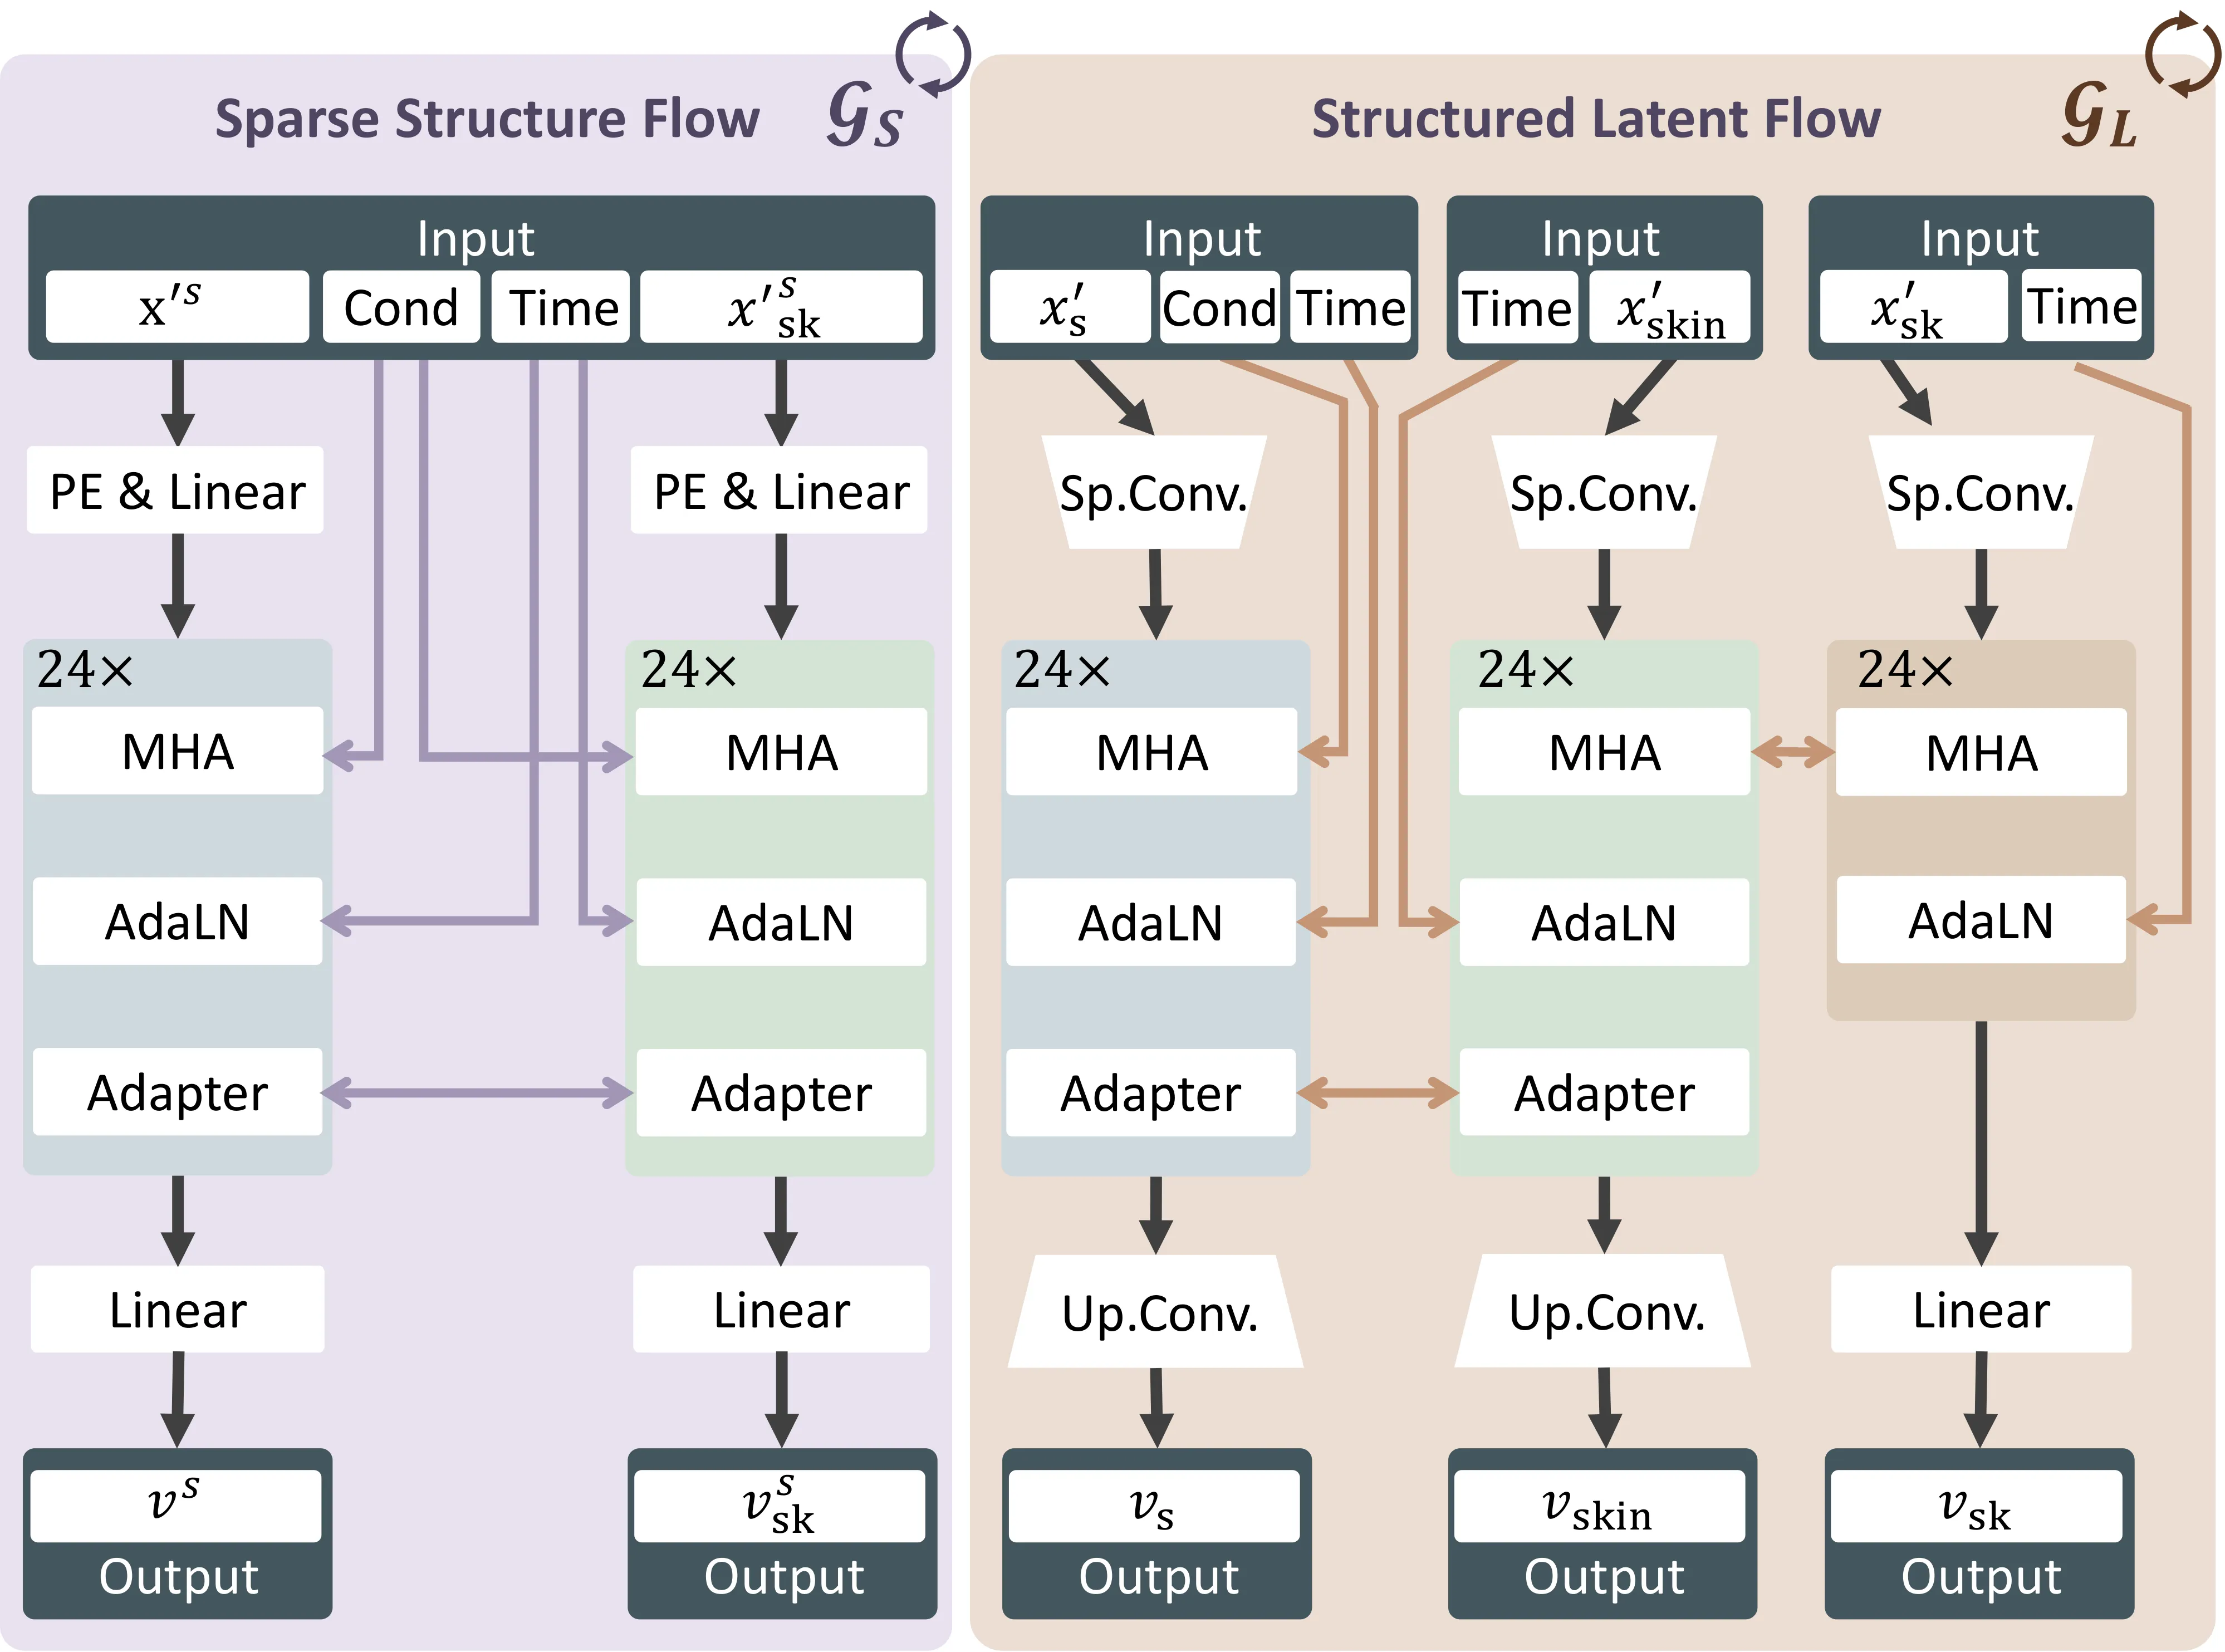
AniGen runs in two stages. First it makes a sparse scaffold that captures the big structure. Then it fills in dense geometry and full articulation.
It uses flow matching to move from noise to a good latent code. From this code it creates the final mesh, bones, and skin weights. The result is a rig that bends smoothly.
To learn how auto encoders help with 3D shapes, read our quick explainer: Dora auto encoder overview.
Installation and Setup
AniGen is tested on Linux. You need an NVIDIA GPU with at least 18GB memory. CUDA 11.8 or 12.2 is tested. Conda is recommended. Python 3.8 or higher is required.

Clone the repo: git clone --recurse-submodules https://github.com/VAST-AI-Research/AniGen.git cd AniGen
Clone the repo:
git clone --recurse-submodules https://github.com/VAST-AI-Research/AniGen.git
cd AniGen
Install the dependencies:
We recommend using uv for fast, reliable installs. The setup script will also work with plain pip if uv is not available.
Create a new virtual environment and install everything: source ./setup.sh --new-env --all
If your network connection to PyPI is unstable or slow, you can use the Tsinghua mirror: source ./setup.sh --new-env --all --tsinghua
If you already have an environment with PyTorch installed, install into it directly: source ./setup.sh --basic
[!NOTE] The setup script auto-detects your CUDA version and installs matching wheels for PyTorch, spconv, pytorch3d, and nvdiffrast. DSINE (used for surface normal estimation) is loaded at runtime via torch.hub and does not require separate installation.
Install the dependencies:
We recommend using uv for fast, reliable installs. The setup script will also work with plain pip if uv is not available.
Create a new virtual environment and install everything:
source ./setup.sh --new-env --allIf your network connection to PyPI is unstable or slow, you can use the Tsinghua mirror:
source ./setup.sh --new-env --all --tsinghuaIf you already have an environment with PyTorch installed, install into it directly:
source ./setup.sh --basic[!NOTE] The setup script auto-detects your CUDA version and installs matching wheels for PyTorch, spconv, pytorch3d, and nvdiffrast. DSINE (used for surface normal estimation) is loaded at runtime via torch.hub and does not require separate installation.
Pretrained Models
Models are on Hugging Face. Download all needed weights including dinov2, dsine, and vgg. A good default is SS Flow Duet plus SLAT Flow Auto.
- For more detailed skeletons including fingers use SS Flow Duet.
- For better geometry generalization use SS Flow Solo.
- SLAT Flow Control supports density levels 0 to 4. If the level does not match the object, skin weights can be poor.
Minimal Example
Here is an example of how to use the pretrained models for 3D asset generation.
After running the code, you will get the following files:
- mesh.glb: a rigged mesh file
- skeleton.glb: a skeleton ization file
- processed_image.png: the masked image as the condition
AniGen Pipeline Rigged Mesh plus Skeleton:
For AniGen checkpoints in this repo for example ckpts/anigen/ss_flow_solo plus ckpts/anigen/slat_flow_control, you can run:
python example.py --image_path assets/cond_images/trex.pngWeb Demo
The demo is a simple Gradio app.
Install the demo extras:
source ./setup.sh --demoIf needed, install via the Tsinghua mirror:
source ./setup.sh --demo --tsinghuaRun the app:
python app.pyOpen the address shown in your terminal.
Training
Training needs the CUBVH extension. setup.sh builds it for you. It is not needed for inference.
Sample data is at AniGen Sample Dataset. For custom data, see TRELLIS and the sample format.
Train in this order:
# Stage 1: Skin AutoEncoder
python train.py --config configs/anigen_skin_ae.json --output_dir outputs/anigen_skin_ae

# Stage 2: Sparse Structure DAE
python train.py --config configs/ss_dae.json --output_dir outputs/ss_dae

# Stage 3: Structured Latent DAE
python train.py --config configs/slat_dae.json --output_dir outputs/slat_dae

# Stage 4: SS Flow Matching (image-conditioned generation)
python train.py --config configs/ss_flow_duet.json --output_dir outputs/ss_flow_duet

# Stage 5: SLAT Flow Matching (image-conditioned generation)
python train.py --config configs/slat_flow_auto
Performance and Showcases
Showcase 1 — Given a single conditional image, AniGen generates a 3D shape along with its skeleton and skinning weights, supporting animals, humanoids, and machinery. Given a single conditional image, AniGen generates a 3D shape along with its skeleton and skinning weights, supporting animals, humanoids, and machinery. This clip shows how one input picture turns into a full rig. You can use the result across many categories.
Showcase 2 — Video Video. This clip gives a quick look at the tool in action. It helps you see the output flow from input to rigged 3D.
For more end to end scene tips and tools, you can also browse our 3D world creation collection.
Tips and Best Practices
- Use a GPU with at least 18GB memory for smooth runs.
- If your network is slow, use the Tsinghua flags in setup commands.
- Pick SS Flow Duet for detailed hands and fingers. Pick SS Flow Solo for stronger shape coverage.
- If skinning looks off with SLAT Flow Control, try a different density level.
FAQ
What files do I get after a run
You get mesh.glb the rigged mesh, skeleton.glb a skeleton view, and processed_image.png the masked input image.
What systems are supported
The code is tested on Linux. It needs an NVIDIA GPU with at least 18GB memory.
Do I need to install CUDA by hand
Yes, you need the CUDA Toolkit on your system. The setup script will match the right wheels for your CUDA version.
How do I launch the web demo
Install demo extras with the setup command. Then run python app.py and open the address shown in your terminal.
Where can I learn more about shape encoders
For a short read on 3D shape auto encoders, see this post: Dora auto encoder overview.
Is there a guide to other 3D model builders
For a fast intro to a different image to 3D path, check our note on Diffsplat.
Image source: AniGen: Exploring Unified S3 Fields in 3D Asset Animation
Subscribe to our newsletter
Get the latest updates and articles directly in your inbox.

Related Posts
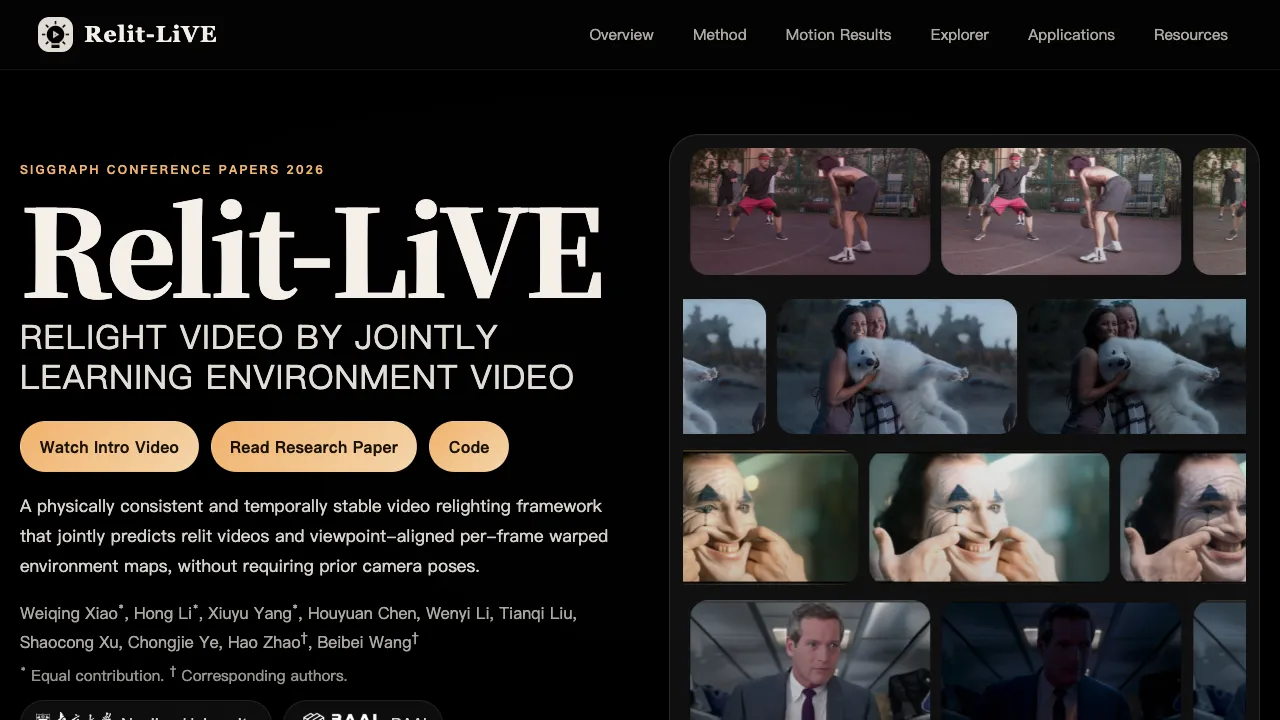
Relit-LiVE: Enhancing Videos by Learning Environment Together
Relit-LiVE: Enhancing Videos by Learning Environment Together
CausalCine: Real-Time Video Narratives with Autoregression
CausalCine: Real-Time Video Narratives with Autoregression

DreamX-World: The Future of Interactive World Models
DreamX-World: The Future of Interactive World Models